Are you looking for an easy way to increase your website conversions dramatically? Whether you’re running a contest, promoting a new product, or simply want to grow your email list, exit popups are an excellent way to make it happen.
In this article, we’ll explain what these popups are and how to create an exit popup on your WordPress site to grow your subscribers and business revenue.
But first, let’s look at what an exit popup is and the best time to use one.
What is an Exit Popup and When to Use One?
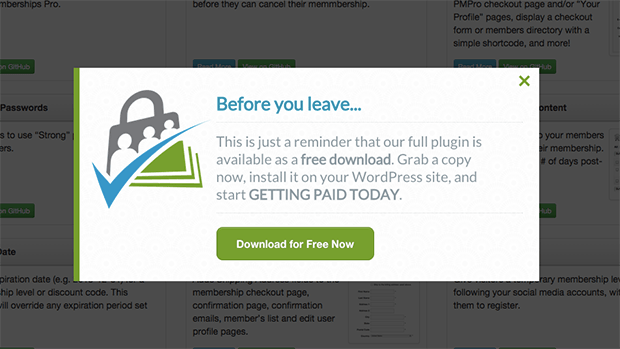
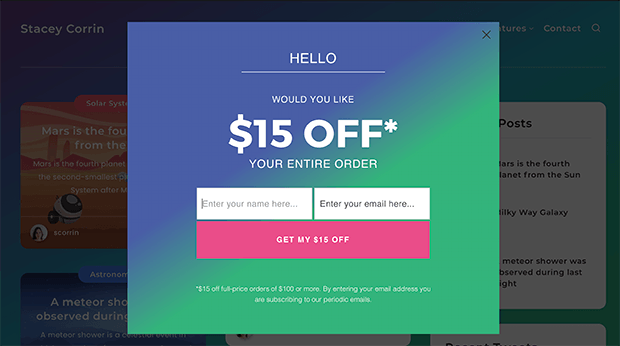
An exit popup is a lightbox popup overlay that appears when someone is about to leave your website. They use exit-intent technology to track visitors’ activity so that when they intend to leave, they see a popup message.
The message in an exit popup is designed to distract users from leaving your site, right at the pivotal moment, and convince them to convert. Usually, it includes an incentive for opting-in such as a discount code, special offer, or access to free content exclusive to subscribers.
Exit popups are also used to increase the time users spend on your site and reduce shopping cart abandonment.
For example, you can use an exit popup to suggest relevant articles, keeping readers engaged with your content, and reducing your bounce rate.
Alternatively, you can create an exit popup that reminds people they haven’t finished checking out. In this scenario, you can give them the option of saving their cart, so they can come back at a later time to continue shopping.
If you’re not convinced, check out how Medstar Media saw their conversion rates increased by 500% using exit-intent lightbox popups.
Now that you know why exit popups are a valuable lead generation tool for your business let’s look at how to create an exit popup in WordPress.
How to Create an Exit Popup in WordPress
In this tutorial, we’ll use OptinMonster to create an exit popup for your WordPress site.
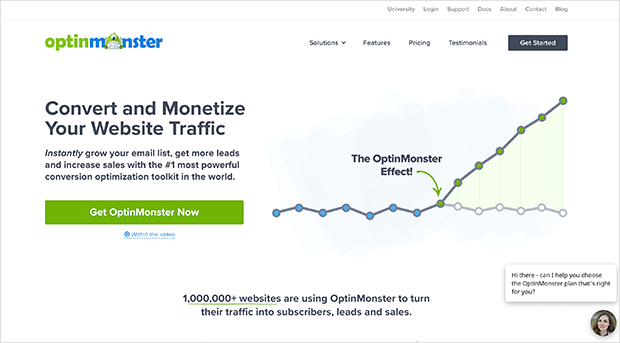
OptinMonster is the most powerful lead generation software on the market. It makes it super-easy to create any marketing campaign to grow your email list, get more leads, and increase sales.
It comes with a wide range of campaign types from exit-intent popups and slide-in campaigns to floating hello bars, full-screen welcome mats, etc.
Each campaign has a variety of customizable templates that you can edit using the drag and drop builder. Plus, you can personalize your marketing messages to specific audiences with the powerful targeting and segmentation engine.
Even better, you can test and optimize your lead generation strategy in real-time with campaign-specific analytics.
With that in mind, let’s dive in with the first step.
1. Sign Up for OptinMonster
To begin, click here to get started with OptinMonster. You’ll need at least a Pro plan to experience the full range of benefits.
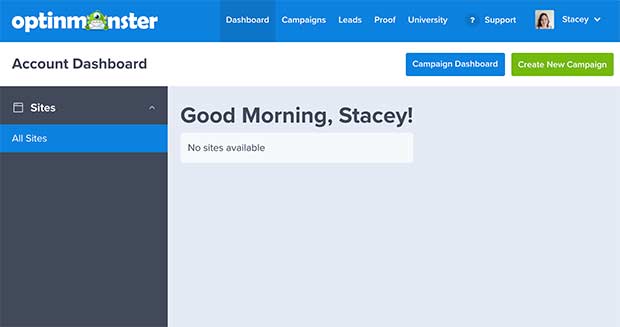
Then log in to your OptinMonster account area, which will look similar to the example below.
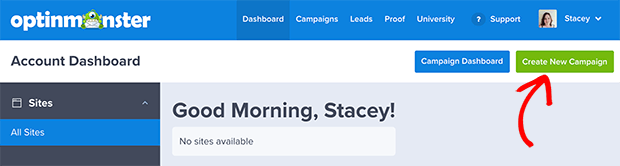
2. Create a New Campaign
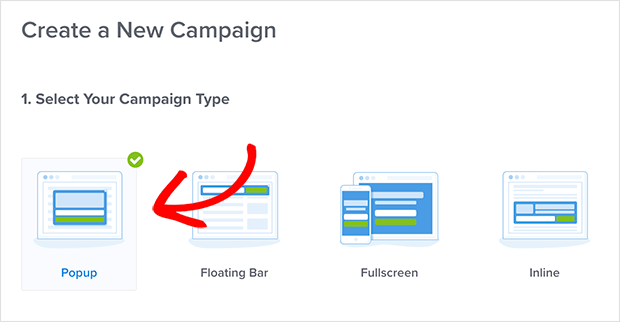
The next step is to click the green Create New Campaign button.
Doing so takes you to a screen to select a new campaign type. Since you want to create an exit popup, choose the Popup campaign type.
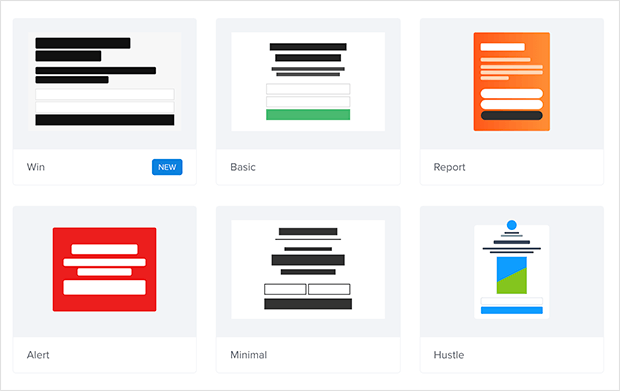
Then go ahead and select a popup template to start with.
OptinMonster’s campaign templates are grouped in a variety of ways. You can filter the templates by Goal, Device, Category, and even by newest.
In our example, we’ve filtered the templates to show those most suited to targeting abandoning visitors, which is one of the main goals of an exit popup.
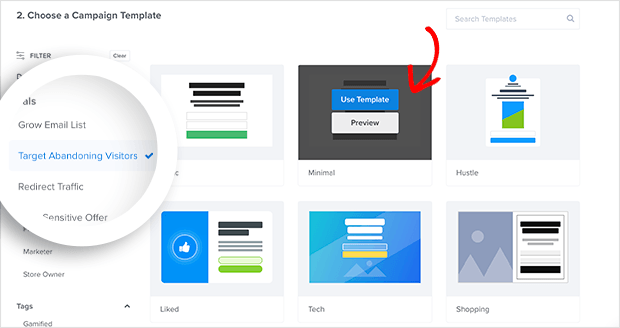
To preview a template, just hover your mouse over one you like and click Preview.
If you’re happy with how it looks, click Use Template. This opens a popup window where you can give your campaign a name and add a website for displaying it.
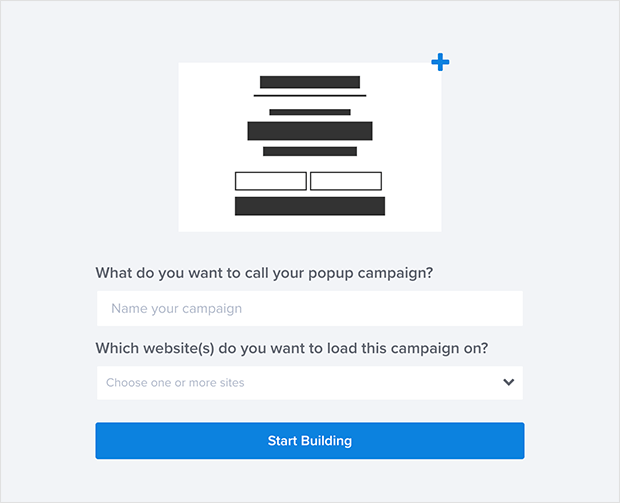
Click Start Building to create your campaign and go to the OptinMonster campaign builder. You’ll see your chosen template in the builder and have access to a near-unlimited suite of tools to customize your exit popup.
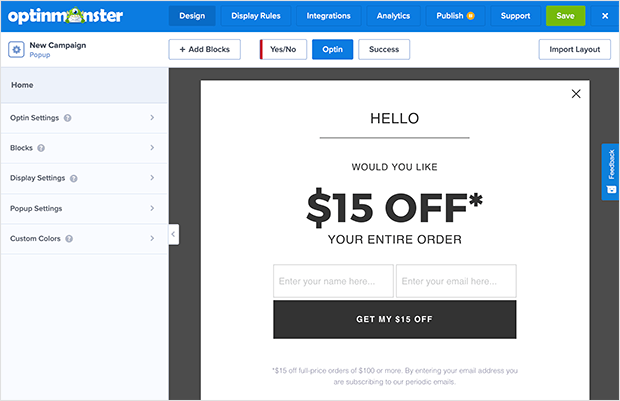
3. Customize Your Exit Popup
Customizing your popup is easy.
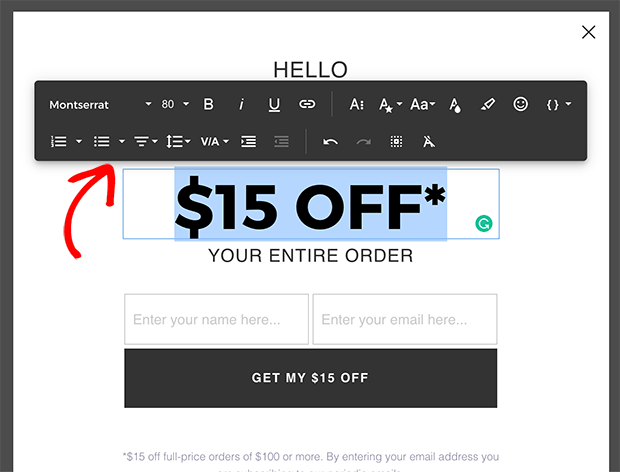
With the in-line text editor, you can change your font style, color, alignment, and more, by selecting any text and choosing your customization options.
Changing your call to action button is just as simple. Click the button on your template and select your changes in the left-hand panel.
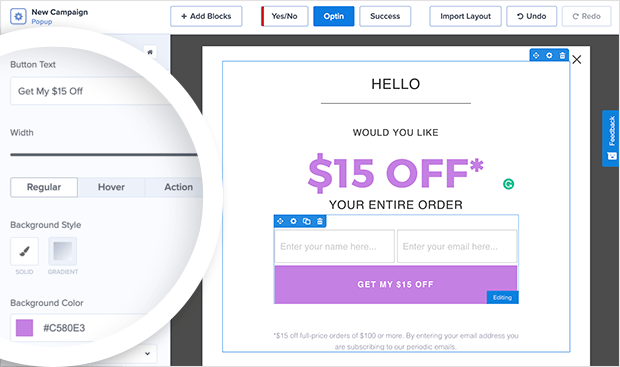
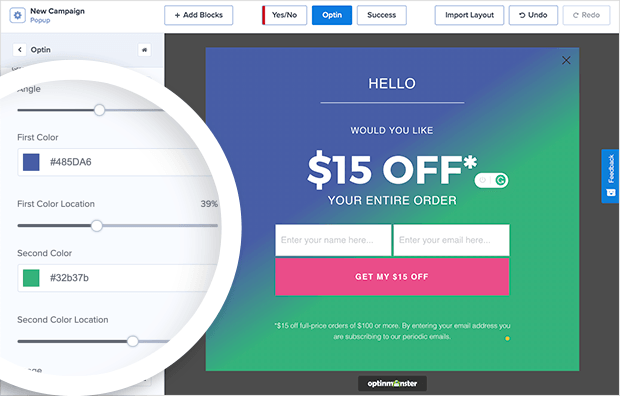
You can even add a background image or gradient color to match your website’s style and branding. To do so, click anywhere on your popup background and edit it using the tools provided in the left-hand panel.
Once your exit popup looks the way you want, you’re ready to set the display rules.
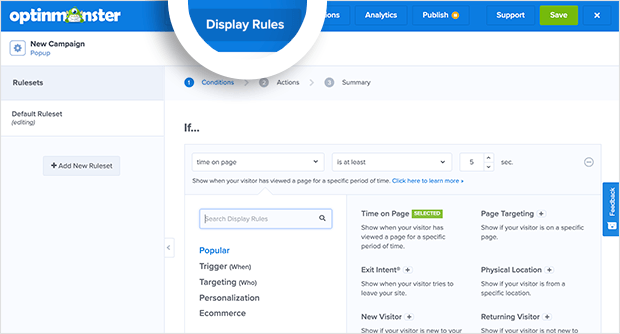
4. Choose Your Popup Display Rules
Display Rules in OptinMonster, control when your popup displays on your website, and who gets to see it.
Click the Display Rules button at the top of your screen to see the available settings. By default, your campaign is set to show to all website visitors after 5 seconds of landing on your page.
To create an exit popup, change the “if” condition to exit detected.
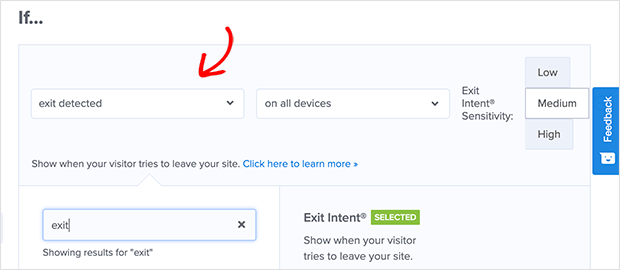
You can do that by clicking in the drop-down box, searching for “exit” in the search box, and clicking the Exit-Intent option. That means your pop will only show if someone indicates they’re about to leave your website.
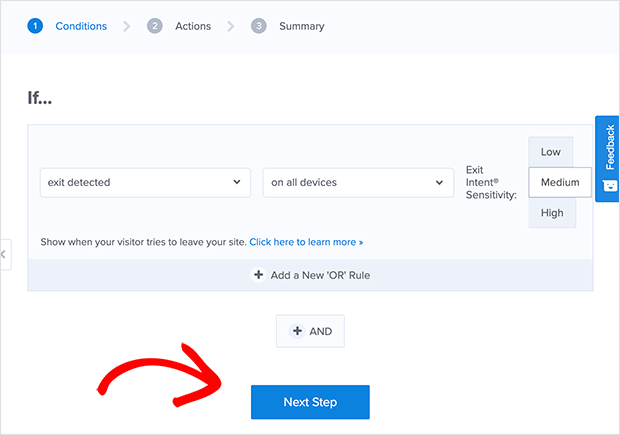
Now click the Next Step button to choose an action for your popup.
This is where you can select the campaign view you want people to see. In our case, we want people to see our exit popup when the ruleset passes.
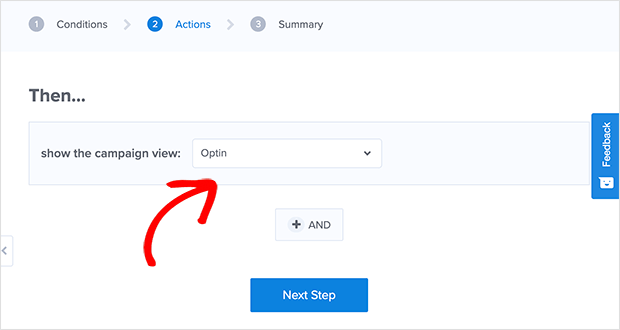
So make sure the Optin setting is selected from the drop-down menu, and click Next Step.
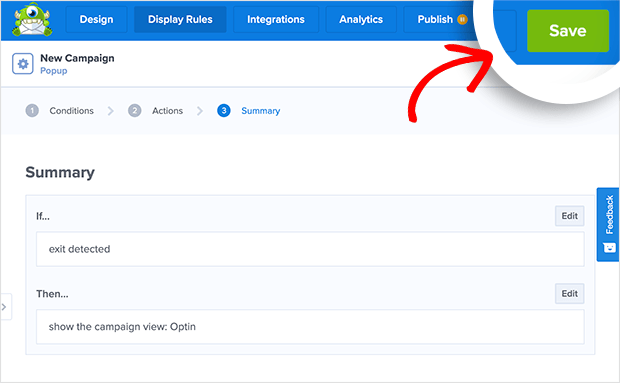
Now you’ll see a summary of your display rules. At this point, click the green Save button to preserve your settings before moving on.
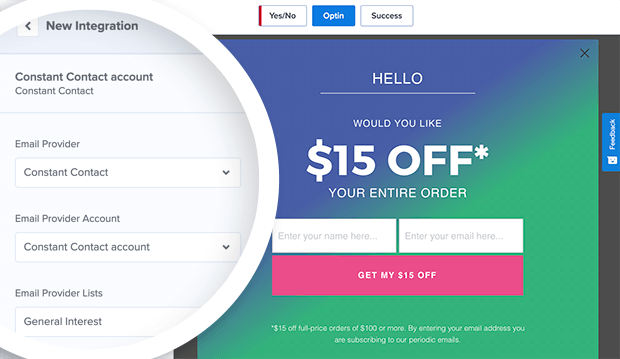
5. Integrate with Your Email Provider
Now it’s time to integrate your exit popup with your email service provider to manage your email list. So click the Integrations button at the top of the screen.
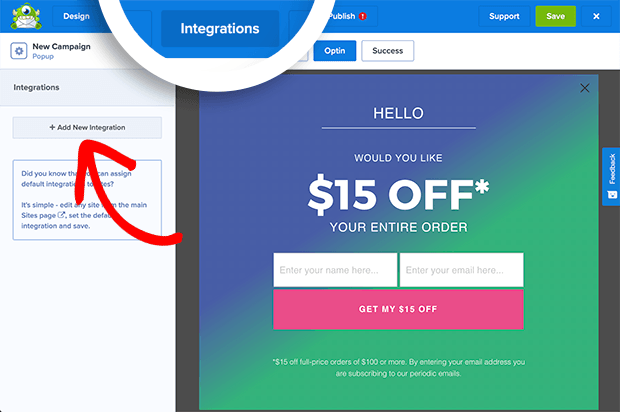
Next, you’ll see a preview of your popup and an Integrations panel on the left-hand side. Click the Add Integration button and choose your preferred email provider from the dropdown menu.
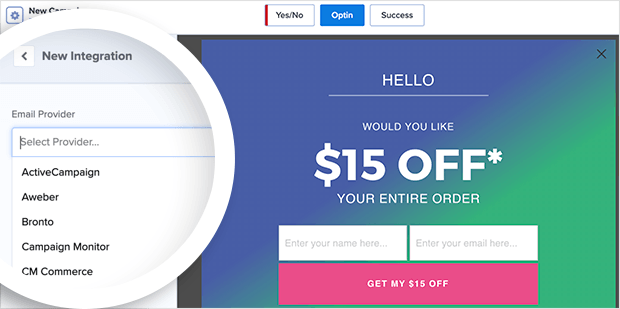
We’re integrating with Constant Contact since it offers a lightweight and user-friendly platform suitable for all manner of business sizes.
You’ll need to follow the on-screen instructions to connect your email service with OptinMonster.
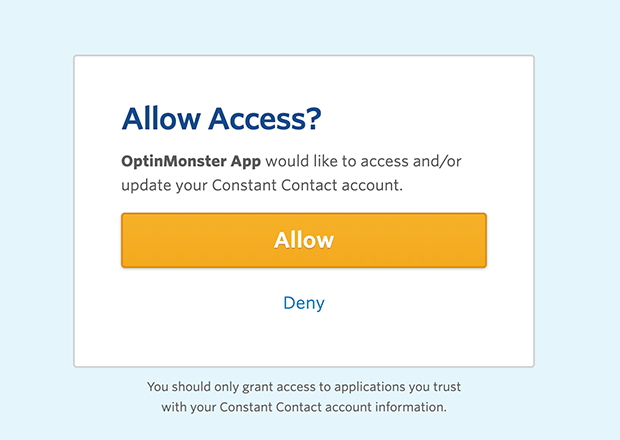
You can then choose an email list to save new subscribers when they optin via your exit popup.
Remember to click Save before proceeding to the next step.
6. Choose How to Publish Your Exit Popup
To publish your exit popup, click the Publish button at the top of your screen. If you didn’t add a website to your account during the setup process, you could do so now.

Just click the Add a new website button, enter your site name, URL, and click Save Website.

In the Preview section, you’ll see a notice similar to the one below.
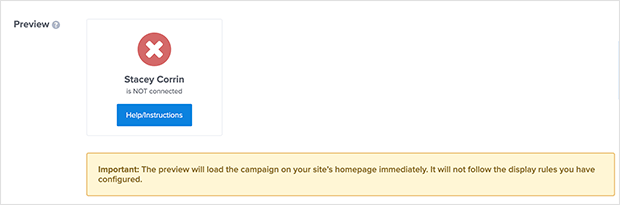
All that means is you haven’t connected your site to OptinMonster yet. But don’t worry. We’ll show you how to do that using the OptinMonster WordPress plugin next.
7. Install the OptinMonster Plugin
From the same page, scroll down until you see the Platform settings. To publish your exit popup easily in WordPress, click the WordPress option.
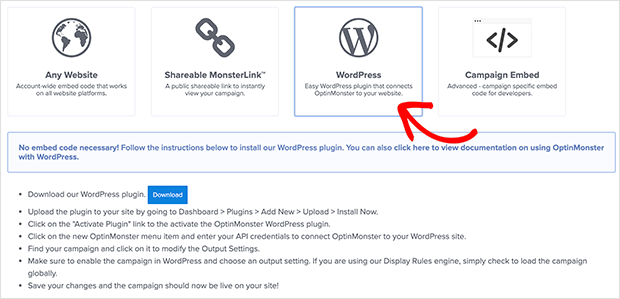
Doing so reveals instructions for downloading and installing the OptinMonster WordPress plugin. This lets you connect your account without having to embed the code manually in WordPress.
So click the Download button to download the plugin to your computer and follow these instructions to install and activate a WordPress plugin on your website.
If you prefer to add the WordPress embed code manually, you can see instructions in the documentation for embedding OptinMonster on your site.
8. Verify and Connect Your OptinMonster Account
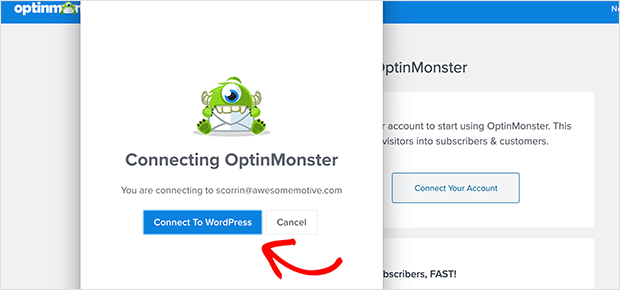
Upon activating the OptinMonster WordPress plugin, you’ll see a welcome screen prompting you to connect your account to WordPress.
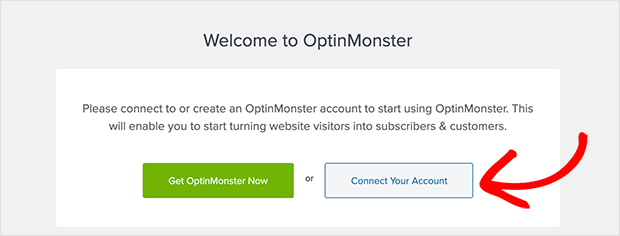
Click the Connect Your Account Button, which opens a popup overlay from OptinMonster. Now click the Connect to WordPress button to link your account.
After that, you should see a list of your OptinMonster campaigns in WordPress.
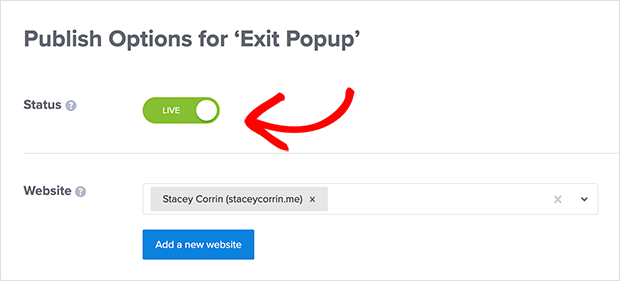
If you don’t see any campaigns, make sure the campaign status is set to Live in your OptinMonster account dashboard.
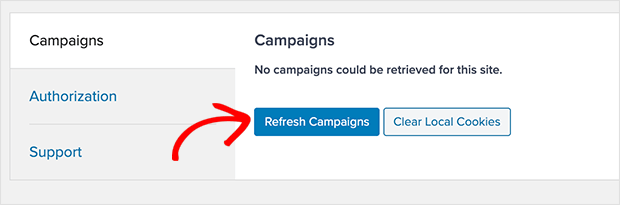
Then head back to your campaign list in WordPress and click the Refresh Campaigns button.
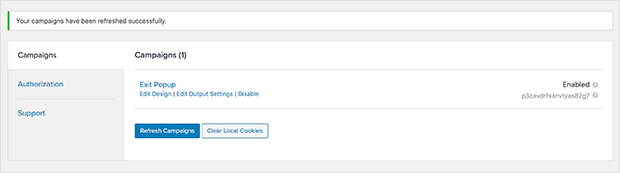
When you navigate to your live website, your popup will trigger if you or your visitors attempt to leave.
Congratulations!
Now you know how to create an exit popup on your WordPress site.
We hope this article has given you all the instructions you need to create a high-converting exit popup to recover abandoning visitors and drive more leads and sales for your business.
If you enjoyed the drag and drop functionality of OptinMosnter, you might like these drag and drop WordPress page builders.
And do follow us on Twitter and Facebook for similar WordPress tutorials.
The post How to Create an Exit Popup on Your WordPress Site appeared first on SeedProd.