Do you want to learn how to track the activity of logged-in users on your website? With accurate user-tracking, you can easily see what logged-in users are doing and which device they use to access your site.
While it might seem difficult to set up this type of tracking, it’s actually pretty easy with the right tools. In this article, we’ll show you how to track WordPress user activity in Google Analytics.
- What is WordPress User Activity?
- 1. WordPress User Activity Helps Track Data Accurately
- 2. WordPress User Activity Helps Tailor User Experience
- How to Easily Track WordPress User Activity
- 1. Install and Connect MonsterInsights
- 2. Activate User Tracking in MonsterInsights
- 3. Enable User Tracking in Google Analytics
- Finding WordPress User Activity Reports in Google Analytics
Before we start, let’s get to the bottom of what WordPress user activity actually is.
What is WordPress User Activity?
WordPress user activity is a range of actions logged in users take on your website. The actions could be anything from which pages they visit and how long they spend there, to the type of device they use to browse your content.
This kind of data is helpful for websites that allow users to register for an account, such as membership and eCommerce websites.
With logged-in user tracking enabled, you can:
- Learn how people use your website regardless of which device they use.
- Track unique visits and interactions so you can understand the buyer journey.
- Create a personalized user experience to boost conversions based on each users specific interests.
Let’s explore how WordPress user-activity tracking can help you in a little more detail.
1. WordPress User Activity Helps Track Data Accurately
With WordPress user activity tracking enabled, you can keep tabs on individual users, regardless of which device they use to log in.
Instead of using the Client ID, Google Analytics will use the WordPress User ID to identify registered users.
The Client ID describes the unique device people use to engage with your content. So if a single person uses 2 different devices to browse your website, it’s recorded as 2 different users instead of 1.
On the other hand, the WordPress User ID represents just one user, even if they use multiple devices.
For example, if someone arrives on your website through a social media campaign on their phone, then completes a conversion like purchasing a product from their desktop, you can link that conversion back to the original campaign as a single user, to understand their journey better.
2. WordPress User Activity Helps Tailor User Experience
You can also use WordPress user activity tracking to learn what each user does on your website. Then you can use that data to offer each person a more personalized experience.
Let’s say a specific user added several products to their shopping cart but abandoned it before completing the purchase. Later you can find their contact details from your WordPress admin panel and send them an email with a special discount to check out.
It’s also possible to use logged-in user activity tracking to offer content tailored to individual user’s interests to boost your conversions. For example, product suggestions based on previous purchases, etc.
Now that you know the benefits of WordPress user-activity tracking let’s explore how to implement it in Google Analytics.
How to Easily Track WordPress User Activity
The easiest way to track logged-in WordPress user activity is with the MonsterInsights WordPress plugin. MonsterInsights is the best Google Analytics plugin for WordPress, and it lets you replace the anonymous Client ID with the WordPress User ID with a few clicks.
What’s more, it integrates with popular membership plugins like MemberPress to better tack and manage your registered users.
Follow the steps below to enable user activity tracking for WordPress using MonsterInsights.
1. Install and Connect MonsterInsights

First, click here to get started with MonsterInsights. Then upload and activate the plugin on your website. If you need help, you can follow this step-by-step guide to install a WordPress plugin.
Once the plugin is installed, you need to connect MonsterInsights to your Google Analytics account. The process is pretty straightforward and doesn’t require any coding knowledge.
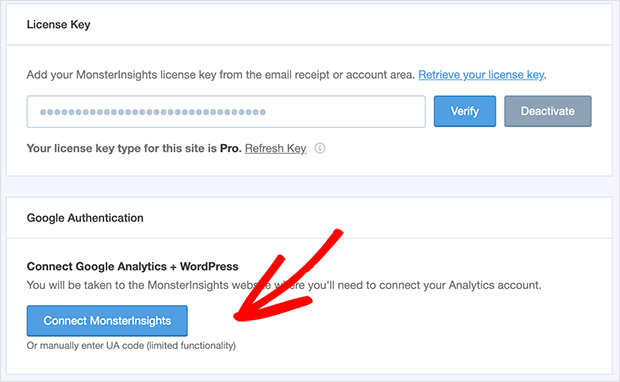
To get started, click on Insights » Settings from your WordPress dashboard menu. Under the Google Authentication heading, click the Connect MonsterInsights button.
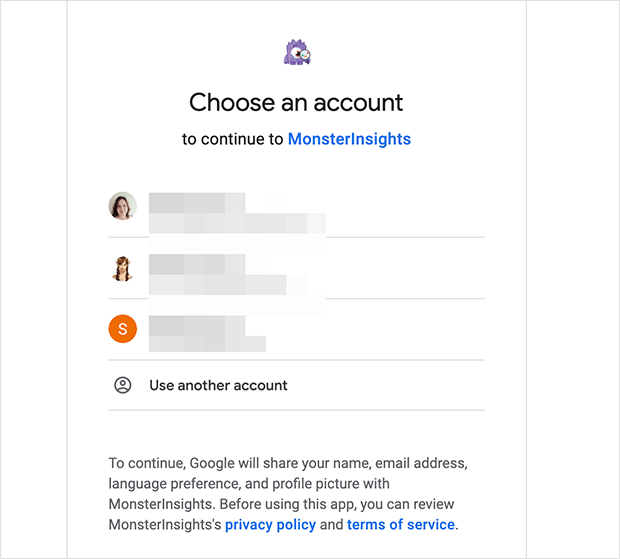
On the next screen, choose the Google account you’d like to connect.
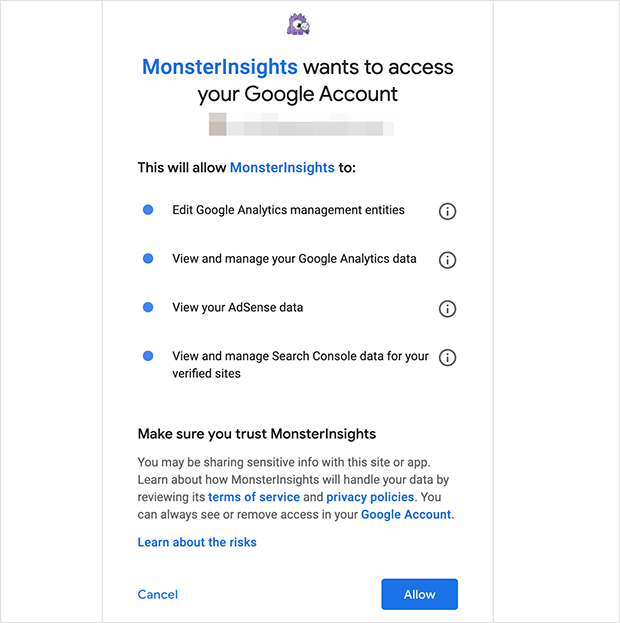
Next, click the Allow button to give MonsterInsights access to your Google Analytics data.
After that, choose the website profile you want to authenticate and click the Complete Connection button.

Now that you’ve properly connected MonsterInsights with Google Analytics, you can move on to activating user tracking.
2. Activate User Tracking in MonsterInsights
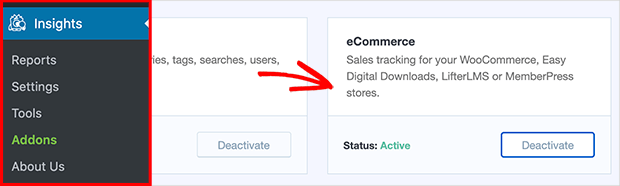
For this step, you need to ensure the eCommerce addon is installed and activated in MonsterInsights.
To do that, navigate to Insights » Addons and find the eCommerce addon. Then click Install and Activate.
Next, to enable user tracking in MonsterInsights, navigate to Insights » Settings from your WordPress dashboard and click the eCommerce tab at the top of your screen.
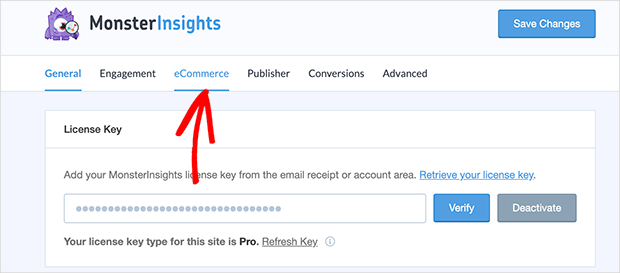
Then scroll to the User ID Tracking section and turn the Enable User ID Tracking toggle to the on position.
After that, click the Save Changes button at the top of the page.
3. Enable User Tracking in Google Analytics
Once you’ve enabled user tracking in MonsterInsights, you also need to enable the same feature in Google Analytics and create a new User ID View.
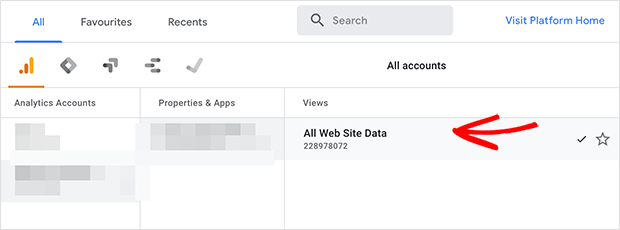
To do that, log in to your Google Analytics account and click the website where you’d like to enable user tracking.
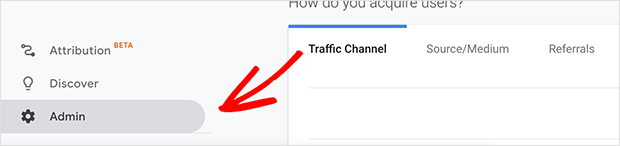
Next, click the Admin button at the bottom-left of the page.
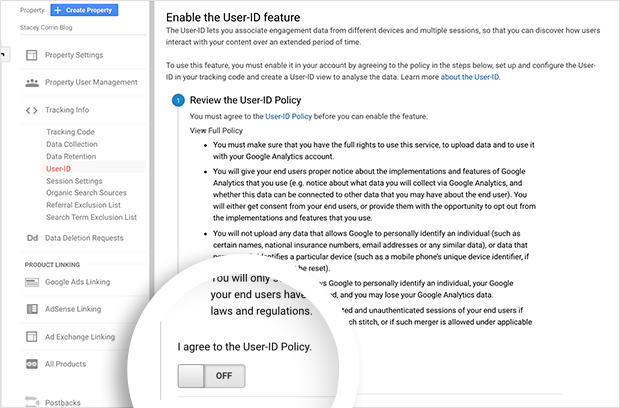
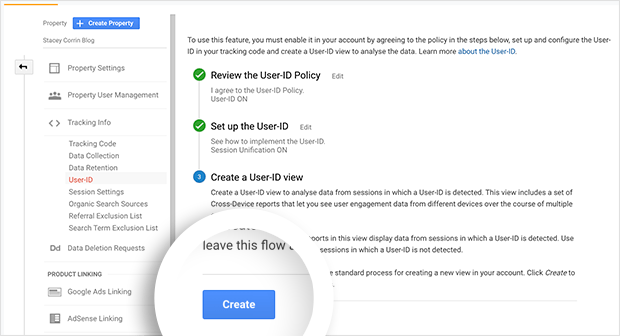
Now, click the Tracking Info link in the middle column, and click the User ID link below.
Now, a new area expands, revealing the User-ID Policy. To agree to the policy, turn the switch from the OFF position to ON and click the Next Step button.
On the next page, you only need to click the Next Step button.

For the following screen, click the Create button to create the User ID View.
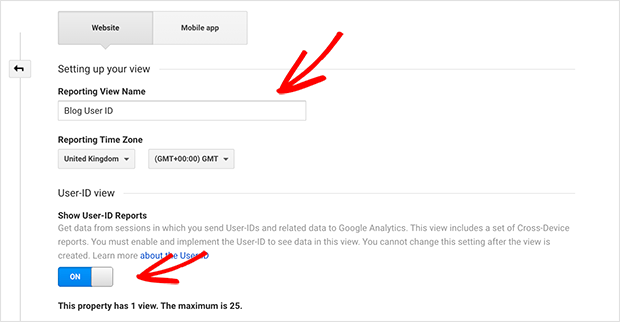
The next screen asks you to enter a Reporting View Name. It’s good practice to add “User ID” somewhere in the name, so you know which view has user tracking activated.
You also need to turn the Show User ID Reports button to the ON position.
After that, you can click the Create View button.
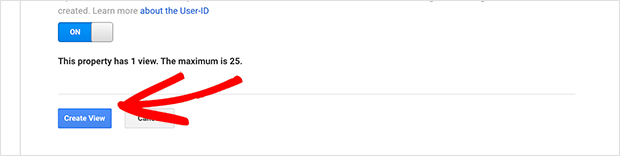
In Google Analytics, you’ll see a quick success message, then it will revert to the Admin screen.
Finding WordPress User Activity Reports in Google Analytics
It’s important to note that you won’t see any data in the User ID view right away. It can take up to 24 hours to collect data, and it won’t include any data from the past. However, Google Analytics will start gathering information now so you can see it in the future.
When you want to view WordPress user activity data in Google Analytics, you can see it in the user activity tracking reports.
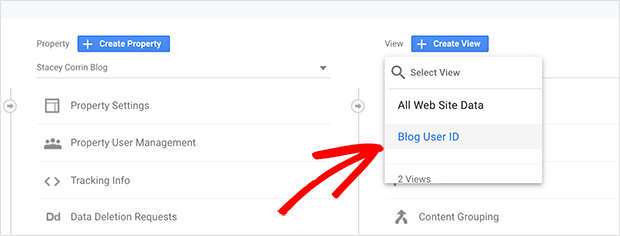
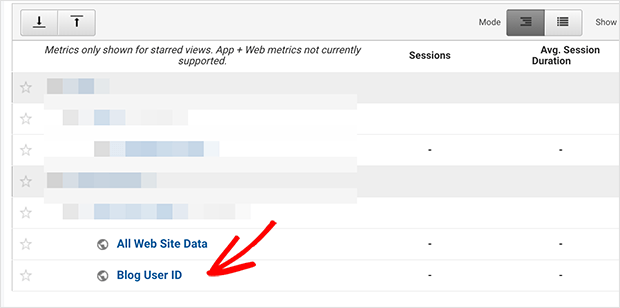
To find the reports, click the Google Analytics logo at the top of your screen.
Then click the User ID view you created earlier.
As you can see below, each user is listed with their WordPress user ID.
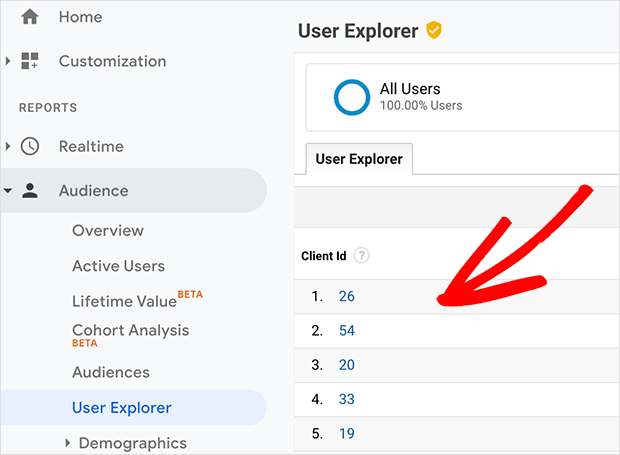
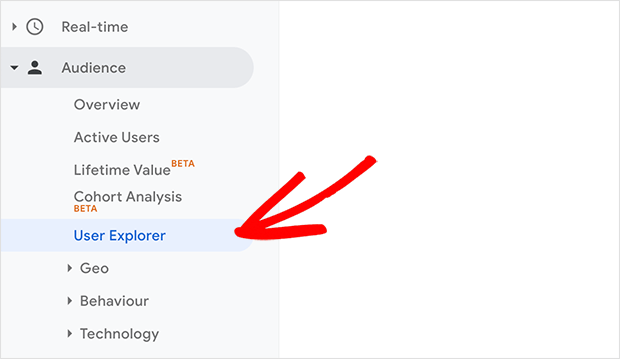
After that, click Audience » User Explorer to see your user data.
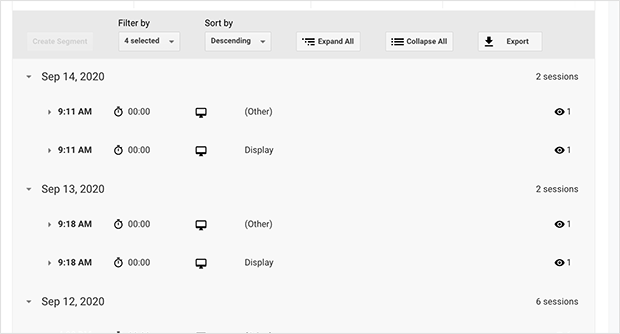
Clicking each User ID reveals more information about each person.
If you want to match a particular User ID to the right WordPress user, simply head to your WordPress dashboard and navigate to Users » All Users.
Next, hover your mouse over the user whose ID you want to find. Doing so reveals a URL at the bottom of your browser.
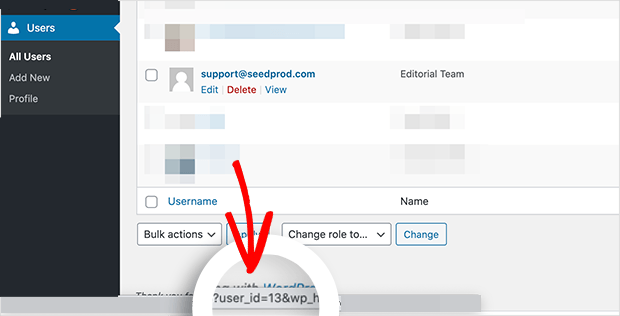
Near the middle of that URL, you’ll see this phrase: “user_id=.” The number after the phrase is the user’s ID number.
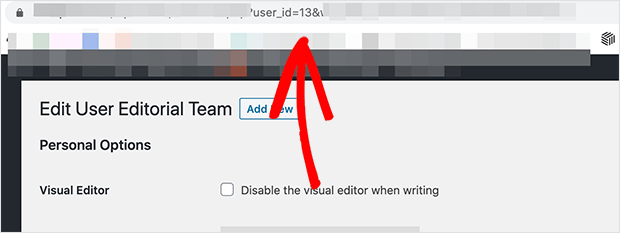
You can also click Edit on a user to show the same URL in your browser’s address bar, as demonstrated below.
That’s it!
You now know how to track and find logged-in WordPress user activity successfully. This will not only make it easier for you to correctly track how people use your website, but also tailor their experience to drive more conversions for your business.
If you’re interested in more ways to improve user experience and drive more leads and sales, check out this guide on how to customize the WordPress login page.
And don’t forget to follow us on Facebook and Twitter for more helpful tips and tutorials.
The post How to Track Logged In User Activity in WordPress appeared first on SeedProd.