Are you looking for an easy way to customize password-protected pages on your website? Doing so keeps your branding consistent across your entire site and lets you utilize the space to promote other pages.
But changing the design of locked pages isn’t easy without the help of a developer. That’s why in this article, we’ll show you how to customize a password protected page in WordPress without writing a single line of code.
Let’s get to it.
When to Customize Password Protected Pages?
There are several reasons for wanting to customize locked pages in WordPress. The most common reason is to hide specific content from the public.
For example, you might want to hide your WordPress site until it’s ready or want only to give your client access to preview your work.
Alternatively, you might have a membership website and want to password protect content, so only subscribers have access.
Whatever the reason, the result is a page where a password is required to gain access.
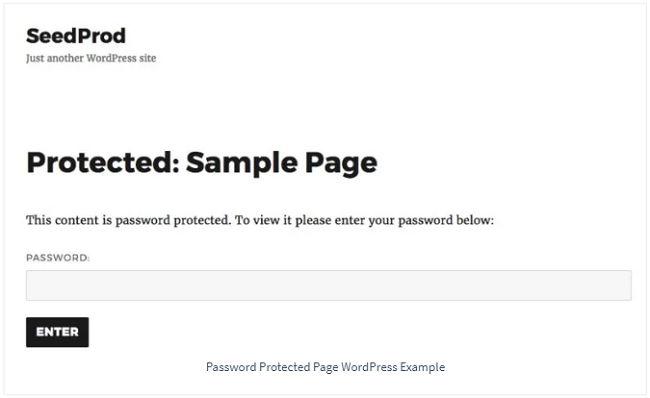
That said, when you lock a page or post in WordPress, the design is pretty basic.
You’ll see a simple page with a box for entering a password and a submit button. The design usually reflects the WordPress theme you’re using, but aside from that, there isn’t much you can do to make it more interesting.
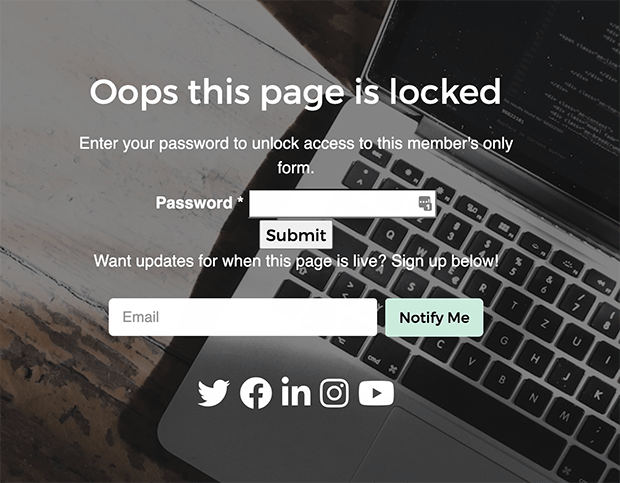
Yet if you customize protected pages, you can enhance your design with the following features:
- Your brand’s logo to increase trustworthiness and keep your branding consistent
- A custom message welcoming users and telling them how to access your protected content
- Social media buttons to encourage users to follow your social channels
- Contact forms for users to get in touch if they have any issues
- Links to other areas of your website to promote your products and services.
Instead of having a basic page, you can turn locked pages into the perfect place to engage your visitors and generate leads.
How to Customize Password Protected Pages
Customizing password-protected WordPress pages is a challenge if you’re not tech-savvy. Usually, you’d have to hire a developer to implement the design changes you need. That said, we understand that hiring expert help isn’t an option for many site owners.
With that in mind, we’ll walk you through 4 methods to customize a password protected page in WordPress, with the help of 3 easy-to-use WordPress plugins.
1. Customize Password Protected Pages with SeedProd
The first method uses SeedProd, the best Coming Soon Page plugin for WordPress to customize password-protected posts and pages.
The powerful SeedProd builder and built-in design controls let you customize virtually every aspect of your page in minutes with no coding required. Even better, you can password protect your whole site or specific WordPress content with a few clicks.
Let’s look at the steps to customize protected pages in WordPress with SeedProd.
First, get started with SeedProd here, then follow these instructions for installing a WordPress plugin to install and activate SeedProd on your website.
Step 1: Password Protect Your WordPress Pages
The first step is to protect your WordPress pages with a password. You can learn how to password protect pages in WordPress using SeedProd here.
Once you’ve done that, click the Edit Coming Soon / Maintenance Page button to open the SeedProd builder.

Step 2: Choose a Page Theme
From the SeedProd builder page, click the Choose Theme button to select a theme for your page.
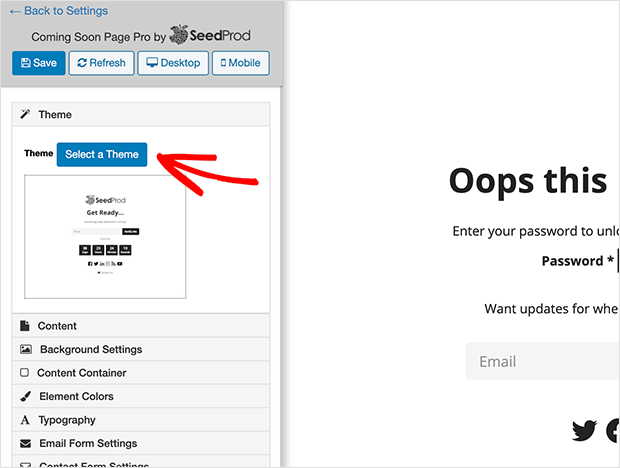
SeedProd comes with several professionally designed themes to make setting up your password-protected page a breeze. Choose a theme that matches your desired look as closely as possible.
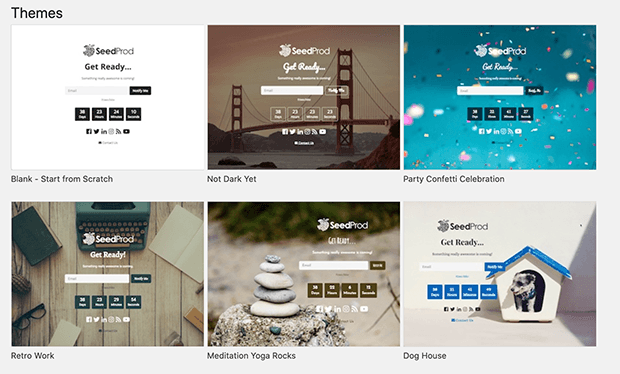
Then when you click it, it’ll be automatically added to your page builder.
Step 3: Customize Your Page Content
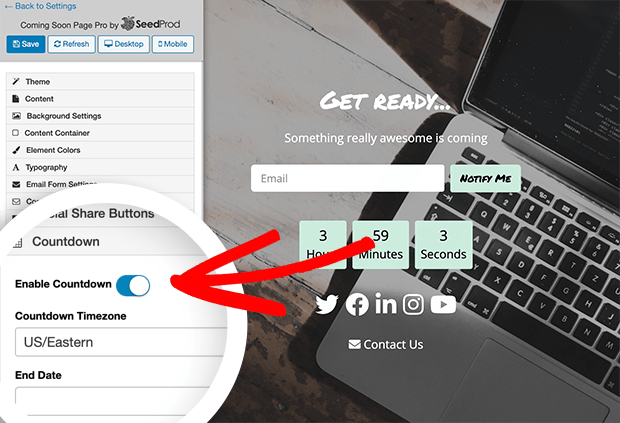
By default, SeedProd enables several content features on your page including:
- A welcome message
- Optin-form
- Countdown timer
- Social profile buttons
- Contact form
You can disable or enable those features by choosing the appropriate section in the left-hand sidebar and sliding the toggle to the disabled position.
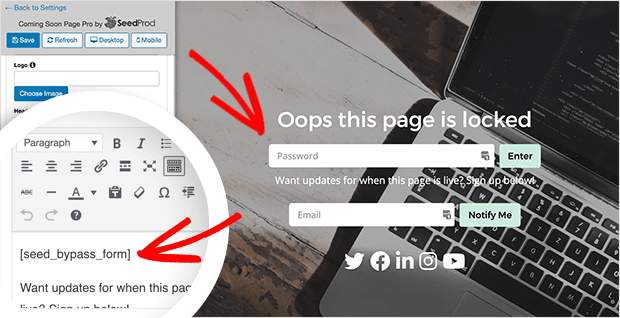
It’s also easy to edit the content to include specific instructions for people viewing your page. Simply expand the section you need and change the content.
For example, we want to include a password input field on our page, so users have to type a password for access.
To do that, expand the Content section and paste the shortcode seed_bypass_form into the content editor.
Step 4: Publish Your Customized Password Page
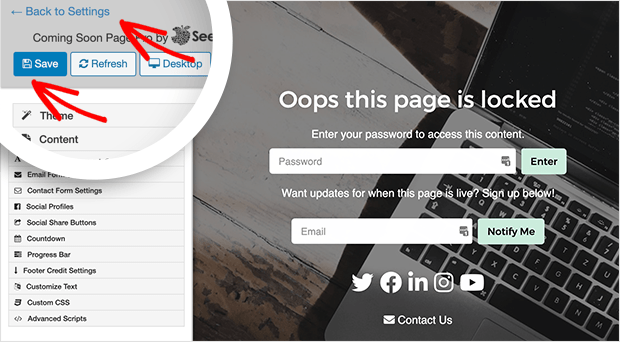
Once you’re happy with the customizations for your protected WordPress page, it’s time to publish it.
To publish a password protected page in WordPress using SeedProd, click the Save button, then click the Back to Settings link at the top of the builder.
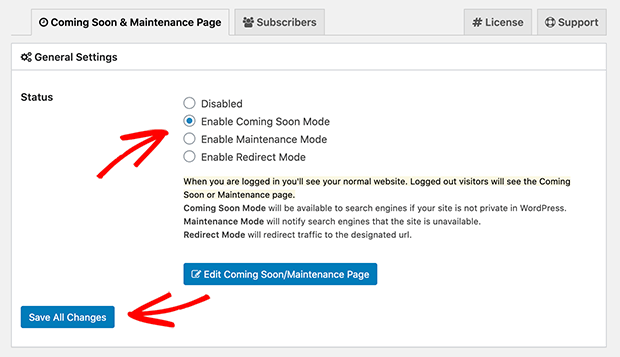
This takes you back to the General Settings page. From there, click Enable Coming Soon Mode and click the Save All Changes button.
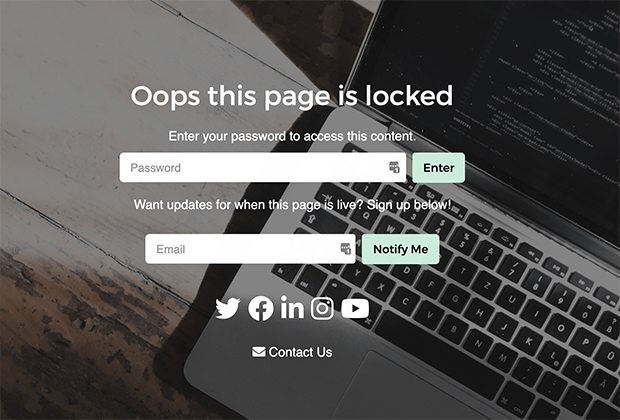
Now when you navigate to your locked pages, you’ll see your customized design in place.
2. Customize Protected Form Pages with WPForms
It’s also possible to customize password-protected form pages in WordPress. Then anyone trying to access specific forms on your site will have to enter a password.
The easiest way to do that is to make a password protected form in WordPress using WPForms with the Form Locker addon. Then you can customize the page containing your form with the Form Pages addon.
Let’s look at the steps needed to customize protected forms next.
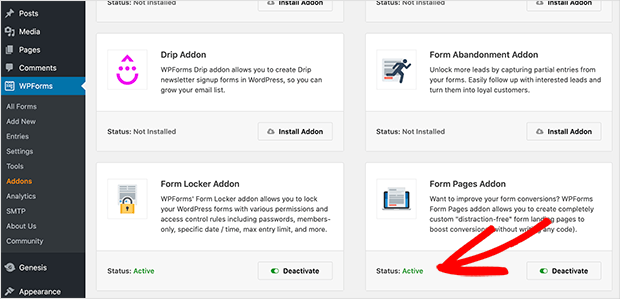
First, make a password-protected form using these instructions. Then make sure you’ve activated the Form Pages addon.
You can do that by navigating to WPForms » Addons and making sure the Form Pages addon status is set to Active.
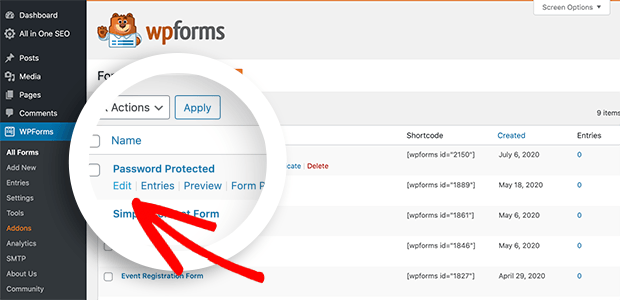
Next, head to WPForms » All Forms and click Edit on the form you created in the previous step.
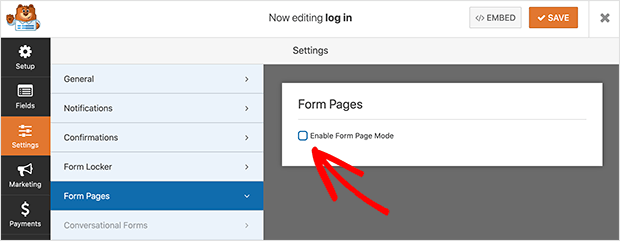
Then click the Settings tab and choose the Form Pages option. On the right-hand side, check the Enable Form Pages Mode box, and further settings will appear.
Here you can enter a title and message for your form page and choose a custom permalink. Then you can add a custom logo image and choose a color scheme that matches your site’s branding.
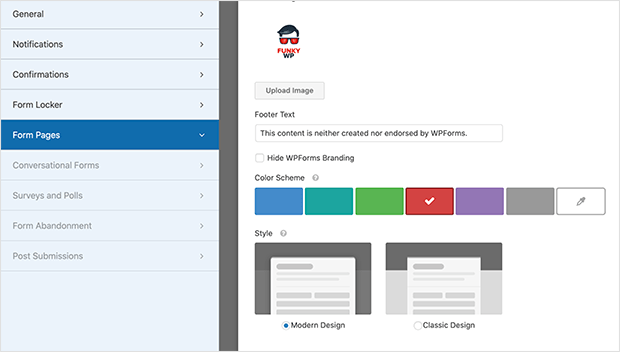
Remember to click the Save button to preserve your changes.
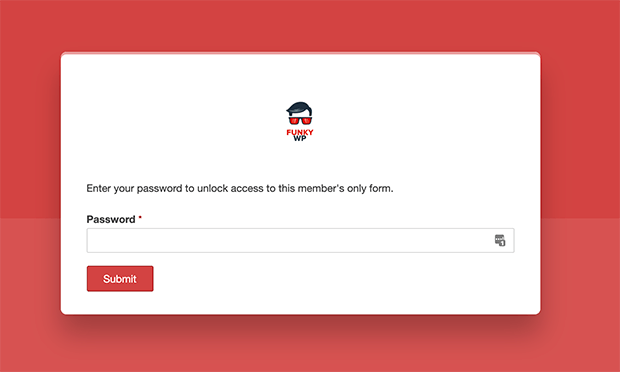
Now when you navigate to that particular form’s page, you’ll see a modern, customized password-protected form with its own dedicated page.
3. Customize Protected Form Pages in SeedProd
Another way to customize password-protected form pages in WordPress is to use a combination of SeedProd’s page builder and WPForms.
First, create a password-protected form using the instructions linked earlier, then navigate to Settings » Coming Soon Pro.
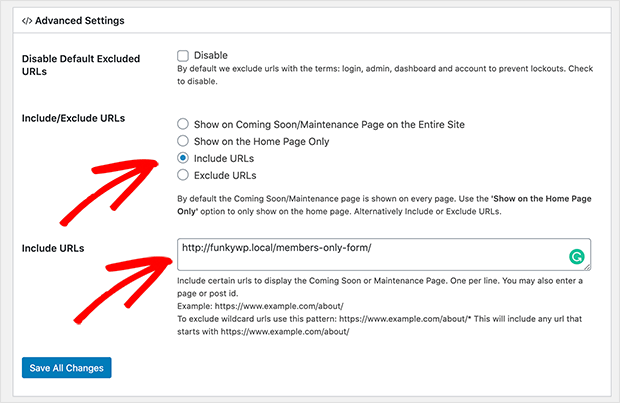
In the Advanced options panel, click the Include URLs option, and paste the page where your protected form is published. Now click the Save All Changes button.
Next, scroll back to the top of the page and click the Edit Coming Soon / Maintenance Page button to open the SeedProd page builder.
Now expand the Content section and click the Add Form button. This reveals a lightbox popup where you can choose a form from the dropdown menu.
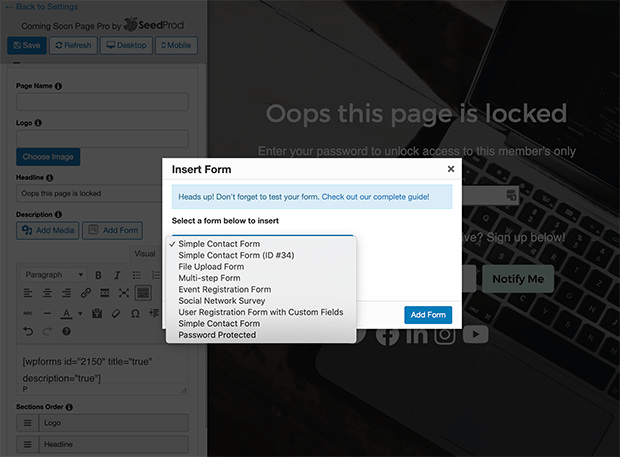
Select your password-protected form to embed it in your content area automatically.
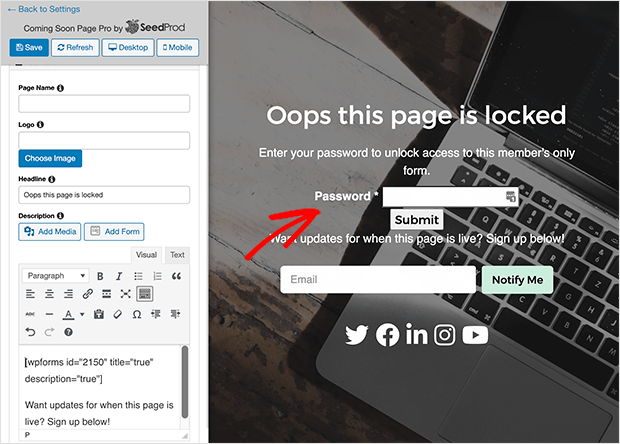
From now on, when users navigate to your form page, they’ll have to enter a password to unlock it.
4. Customize Default Password Pages with CSS Hero
Our final solution for customizing WordPress pages protected with passwords is to edit your CSS with a visual editor plugin. This means you can edit the CSS of any page without having to edit the code manually.
For this method, we’re using CSS Hero, one of the best plugins for easily customizing your WordPress site by pointing and clicking.
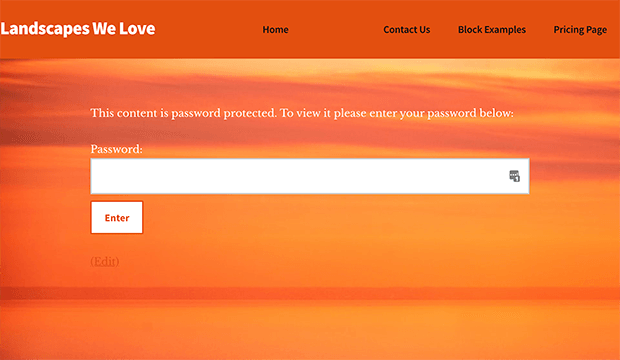
CSS Hero is ideal for customizing the standard page you see when password protecting WordPress using the default WordPress visibility option.
So instead of a password page like the one below, you can pinpoint each area individually and change the look.
To do this yourself, get CSS Hero here and install the plugin on your website. Then navigate to your password-protected page in WordPress.
Now from the WordPress admin bar at the top of your page, click the Customize with CSS Hero option.
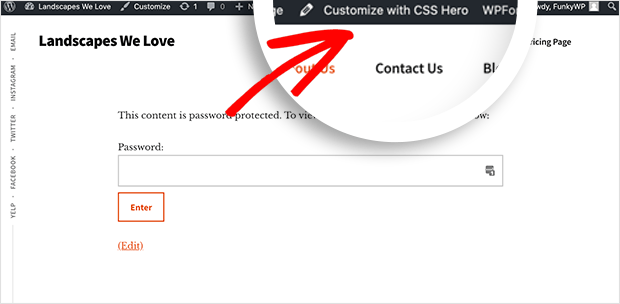
This will reveal a simple point-and-click visual editor you can use to customize your page.
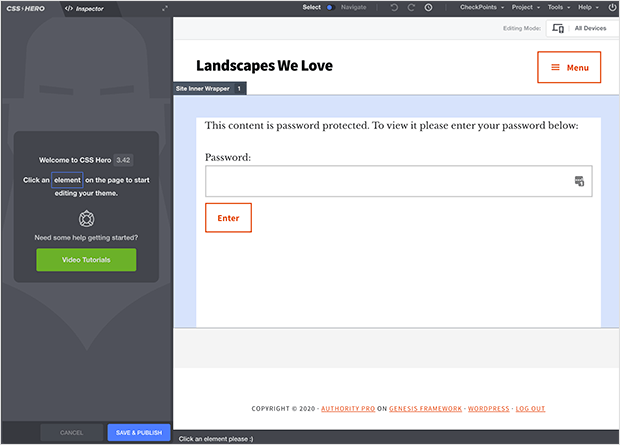
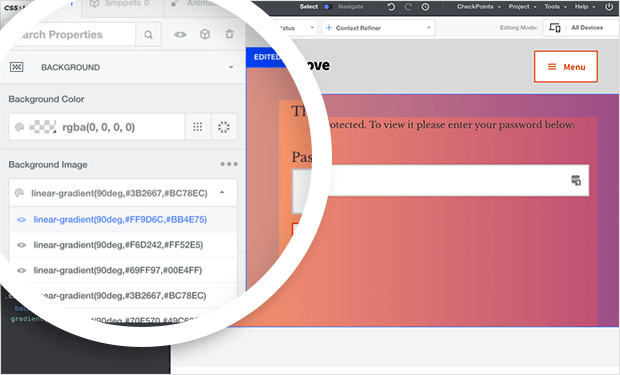
For example, to customize the background color for the header area, simply click it to open the options panel on the left-hand side. Then you can choose a color from the color picker tool.

To change your background color, click your page’s background and choose a color or gradient from the list. You can also add your background image.
The only drawback with using CSS Hero is that you can’t add crucial elements like contact forms, signup forms, social buttons, and so on. For that, we suggest using the SeedProd method above.
Continue customizing your page, clicking different elements, and adding custom colors and fonts.
Then when you’re happy with your design, click the Save and Publish button and click the Quit icon in the top-right corner of your screen.
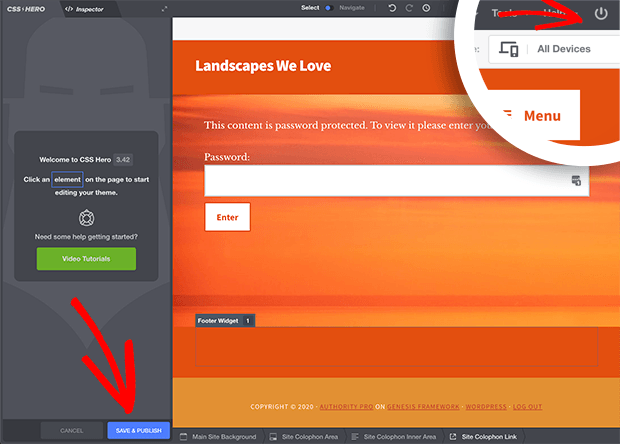
This will take you to your newly edited password protected page, complete with its’ custom design.
There you have it!
Customizing Password Protected Pages is Easy
While customizing protected pages in WordPress can seem like a daunting task, it doesn’t have to be. Using the methods above, you can create stunning locked pages without having to write a single line of code.
And with SeedProd’s handy page builder, you won’t have to start from scratch and can include essential lead generation elements like optin forms to grow your business.
So what are you waiting for?
Get started with SeedProd today.
We hope this article helped you learn how to customize a password protected page in WordPress easily. For updates on more useful content like this, please go ahead follow us on Facebook and Twitter.
The post How to Customize a Password Protected Page in WordPress appeared first on SeedProd.