Do you want to customize the WordPress login page for your website? If you run a membership site or an online store, your users will need a login page. So customizing the default WordPress login area will help you reflect your brand and offer a better user experience.
In this article, we’ll show you how to customize the WordPress login page with 2 different methods.
Here’s a table of contents to help you navigate this article. Click any section you need to jump straight to it:
- Why create a custom login page?
- Choosing the right login page plugin
- Method 1: Using Login Page Pro
- Method 2: Creating a Login Page with WPForms
Before we start, let’s explore why creating a custom login page in WordPress is a smart idea.
Why Create a Custom Login Page in WordPress?
By default, the WordPress login page shows the WordPress branding and logo. If you’re a small blog or website, this is perfectly fine because you’re likely the only person with admin access.

But if your site lets people become registered users and login to your dashboard, a customized login page offers a better, more professional user-experience.
When you use your own design and logo, users feel more at home because they recognize your branding. However, if you send users to a login screen that looks nothing like your website, it could look suspicious to inexperienced users.
Furthermore, the default WordPress login screen doesn’t have anything but the login form. So you can’t take advantage of the space to promote other pages or craft a custom message for your users.

With this in mind, let’s explore the different methods to customize your login page in WordPress.
Choosing a Plugin to Customize the WordPress Login Page
The easiest way to create a custom WordPress login page is to use a WordPress plugin. WordPress plugins extend the functionality of your website, helping add extra features without needing to hire a developer or mess around with code yourself.
We’ll walk you through creating a custom login page using the best WordPress plugins for the job, Login Page Pro, by SeedProd and WPForms.
Method 1: Using Login Page Pro
Login Page Pro is a premium WordPress plugin offered on checkout when purchasing the SeedProd Coming Soon Page plugin.
There is a free version available on the WordPress repository called Custom Login Page that lets you make the most requested edits such as, changing the background, login text, page fonts, and colors of your login page.
But if you want to add more functionality and branding to your page, it’s best to pay for the pro version.
In addition to being able to perform all the edits you can in the free version, you can also perform the actions listed below on your login page.
- Edit the Login Page Logo Alt Text and Logo Link
- Add a message above or below the login page form
- Change any of the text on the page page. For example, change the Username/Email or Password Label.
- Add a color overlay to your background image
- Add a background slideshow or video on the login page
- Change the white login form background to any color or make it transparent.
- Change the position of the login form
- Change the color of any element on the WordPress login page
- Integrated with Google Fonts
- Add Social Media Profiles to the WordPress Login Page
- Add a Google Recaptcha to the WordPress Login Page
Click here to get started with Login Page Pro by SeedProd.
Then follow the steps below to customize your WordPress login page with this plugin.
Step 1: Install and Activate Login Page Pro
The first step is to download and install the Login Page Pro plugin on your WordPress website.
If you’re unfamiliar with how to do that, check out this step-by-step guide to install a WordPress plugin.
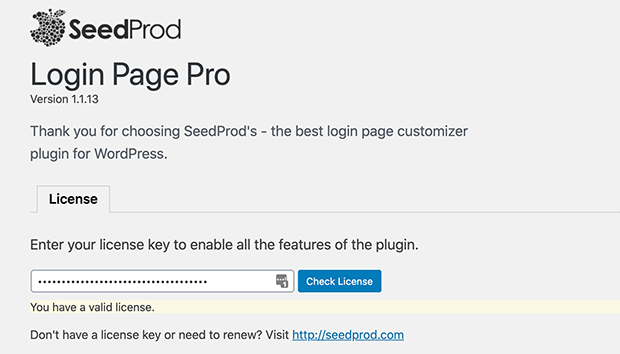
After installing and activating the plugin, you’ll see the SeedProd welcome page where you can enter your license details and view the quick start video.
Step 2: Edit Your Login Page
To start editing your login page, navigate to Settings » Login Page Pro from your WordPress dashboard. This takes you to the login page settings where you can enable, disable, and edit your login page. By default, the login page is set to Disabled.
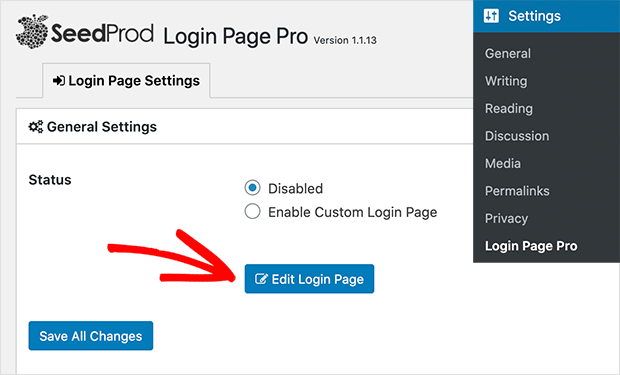
Click the Edit Login Page button to start customizing your page.
The next screen you see will be the default WordPress login page on the right-hand side, while on the left are the options to customize your page.
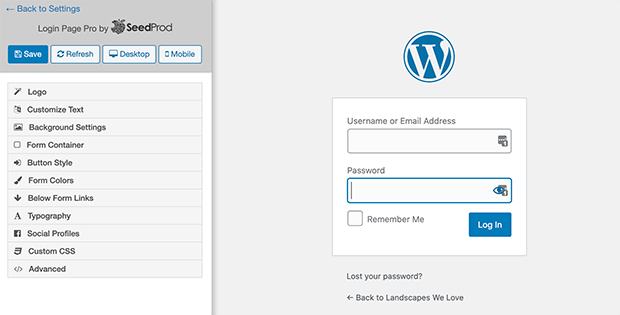
Let’s start by customizing the login page logo.
Step 3: Customize The Login Page Logo
To add a new logo to your login page, click the logo heading on the left, then click the Choose Image button. This lets you choose a logo from your WordPress media library, or upload one from your computer.
After, you can add a URL and some Alt text for your logo. This helps users navigate back to your main website.
You can also adjust the margin at the bottom of your logo to reduce space.
Step 4: Customize The Login Form Text
The next step is to customize the text on your login form by clicking the Customize Text heading.
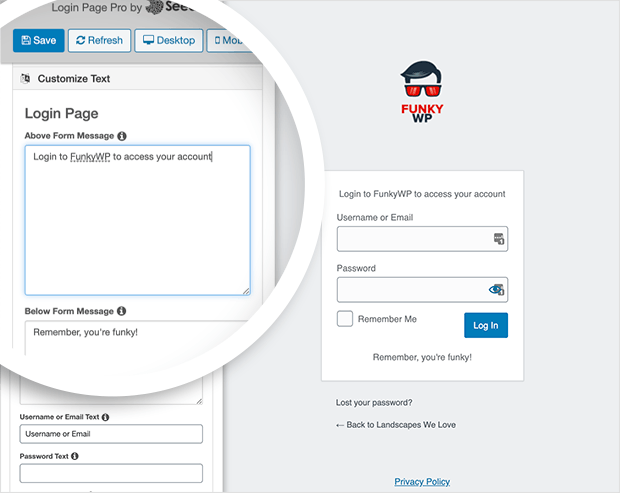
In this area, you can enter a message before and after your form, change the form text, error messages, and button label.
Step 5: Add a Custom Background Image
Now let’s look at adding a custom image to your login page background. To do that, click the Background Settings heading.
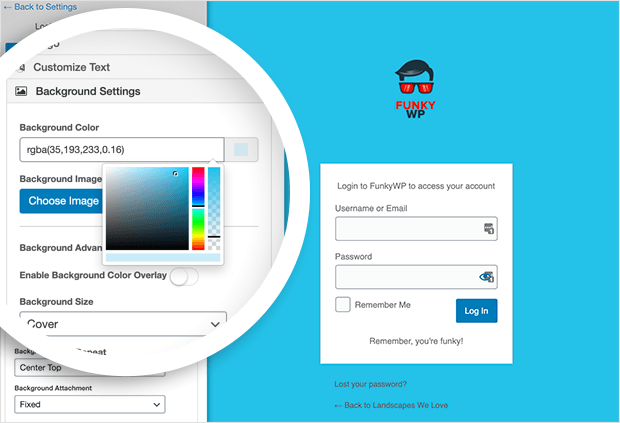
Here you can use the color palette to choose a color for your background, or click the Choose Image button to upload a photo.

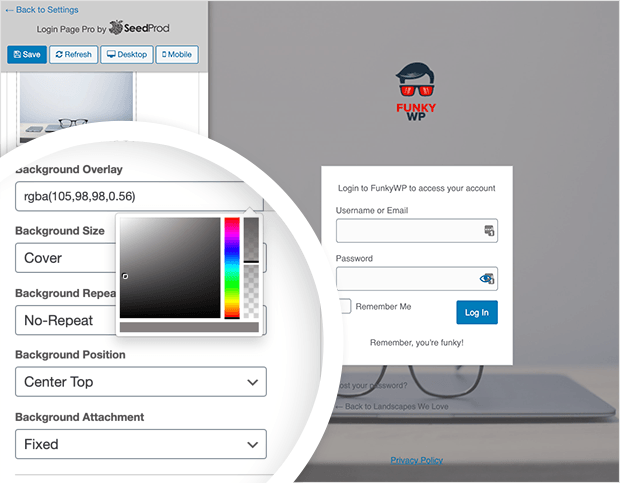
Below that, you can add an overlay color to the background to make your page elements stand out and choose how you’d like the image to display. For example, it can cover the whole page, or auto fit the page container.
Alternatively, you can create a slideshow background by uploading multiple images or enter the URL of a video to use a video background.
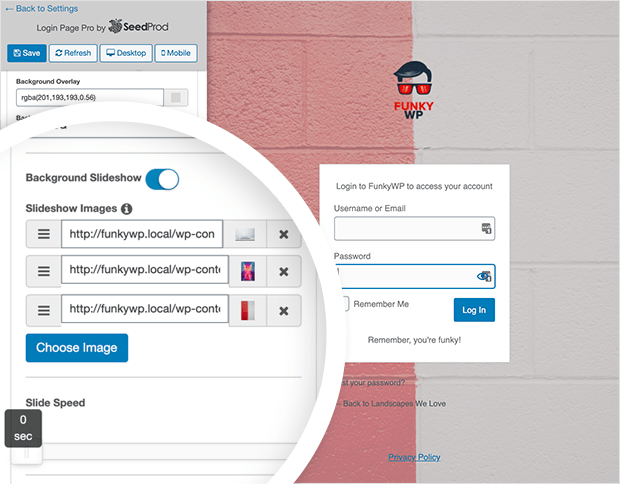
Remember to click Save periodically to preserve your settings.
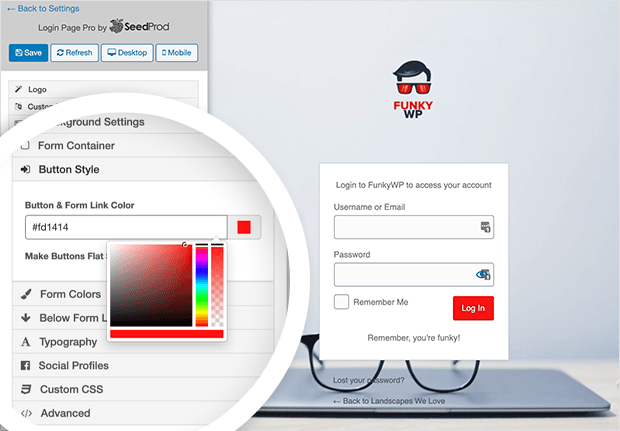
Step 6: Customize Your Buttons, Colors, and Fonts
The next few headings deal with your login page’s styling.
The Form Container heading gives you the ability to adjust the margins and padding in your page’s form. You can also change the position of the form, its opacity, and add an animation.
The Button Style section lets you change the color of your login button, and give it a flat style.
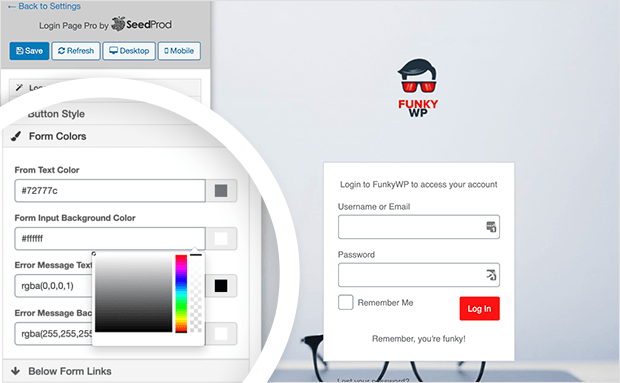
After that, you can change the color of your form’s text, background, and error messages.
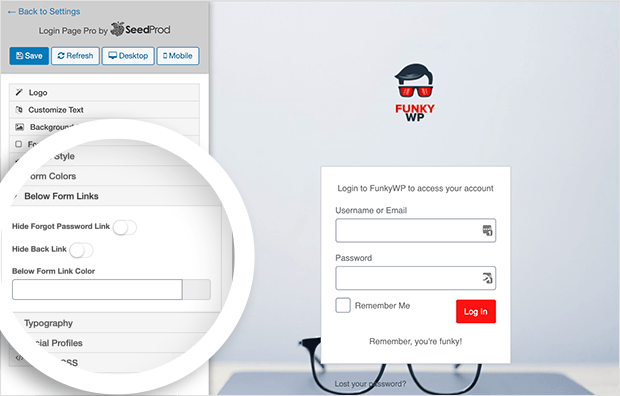
The Below Form Links section lets you hide the forgot password and back link on your login page. You can also give those links a custom color to stand out if needed.
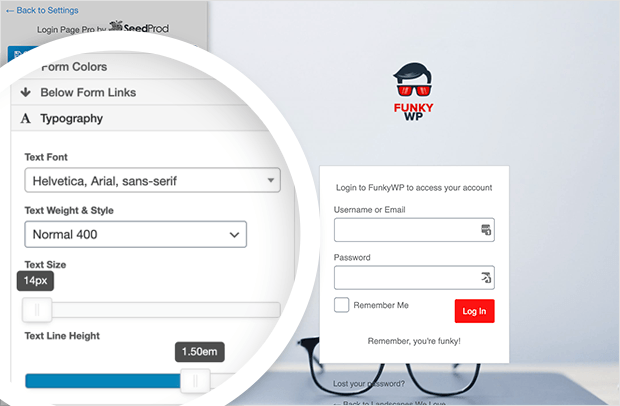
Then there’s the Typography section. This is where you can choose from a vast range of Google Fonts to match your site’s branding and theme. Then you can change the font weight, size, and height to get things looking just right.
Step 7: Add Your Social Profile Buttons
Another stand-out feature of Login Page Pro is the ability to add custom social icon buttons to your WordPress login page.
Simply click the Social Profiles heading and click the Add Profile Link button to add a social channel.
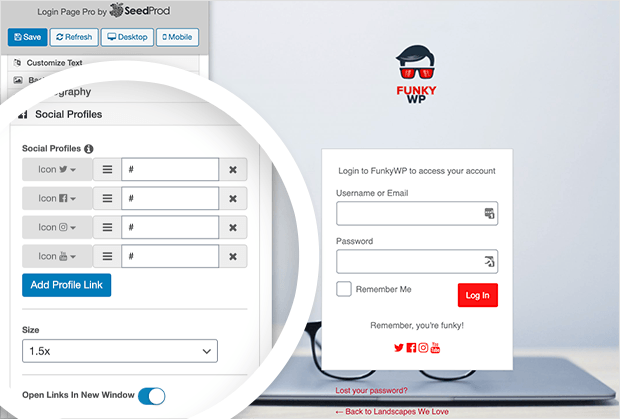
There are 19 different social icons to choose from when you click the drop-down arrow beside the URL field. Then in the link field, add the URL for your social media profile.
Below that, you can adjust your social profile buttons’ size and choose to open them in a new tab when clicked.
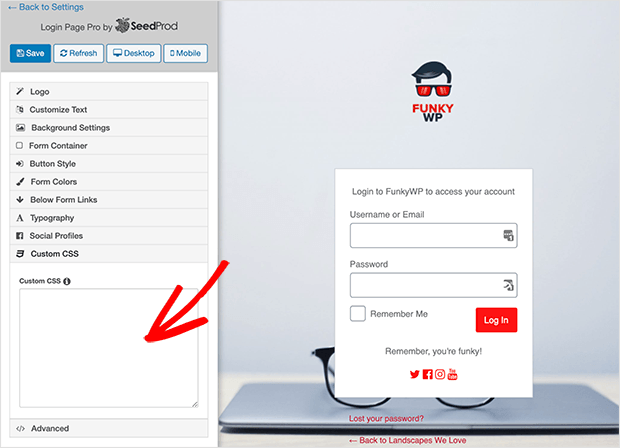
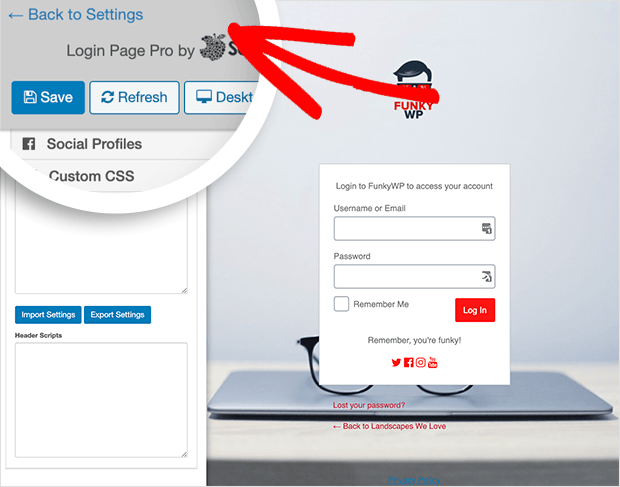
After this section, is an area to enter Custom CSS to customize your login page further. Then you can use the Advanced section to enable ReCaptcha for your page, and import, or export your settings.
When you’re happy with how everything looks, click Save, and the Back to Settings link.
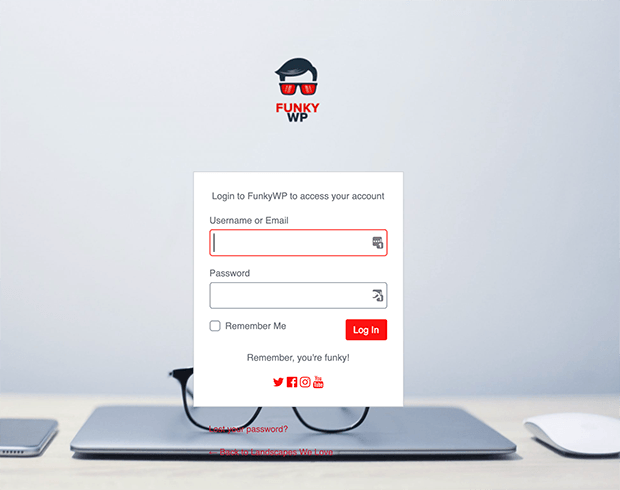
Step 8: Enable your Custom WordPress Login Page
Now that you’ve finished customizing your login page, it’s time to make it live for your website users.
To do that, click Enable Custom Login Page from the General Settings page and click Save All Changes.

Now when users visit your login page, they’ll see the custom design you just created.
Method 2: Using WPForms to Create a Custom Login Page
The second method to customize the WordPress Login Page we’ll cover today involves using the popular WPForms plugin.

WPForms is the best drag and drop form builder for WordPress. And what you might not realize is that you can use it’s handy User Registration addon to build a login page for your website.
With over 3 million website owners using WPForms to build smarter forms and surveys, you can be confident knowing you’re in good hands.
So if you don’t need a plugin dedicated to creating login pages, follow this step-by-step tutorial for how to create a WordPress custom login form using WPForms.
That’s it!
We hope this article helped you learn how to customize the WordPress login page for your website. Now you can keep your site looking professional and offer an excellent user experience for your customers.
So what are you waiting for?
Click here to get started with Login Page Pro today.
And don’t forget to follow us on Facebook and Twitter for more helpful tips and tutorials.
The post How To Customize the WordPress Login Page appeared first on SeedProd.