Do you want to redesign your website but are afraid that you might lose your SEO rankings?
There are many site owners who are afraid to redesign their websites because of this fear. It makes sense that you want to hold onto your rankings after you’ve put so much time and effort into gaining them.
But the truth is, peoples’ tastes change and the longer you leave your redesign the more outdated your site will look. What’s more newer design methods often improve the functionality and experience of your site for users.
So redesigning can not only make your site look more modern and up-to-date it can make your visitors happier too. And happier visitors make for more leads!
In this article, we share our step-by-step guide for how to redesign a website without losing SEO rankings.
How to Redesign a Website Without Losing SEO
Here’s a quick rundown of the steps we’ll cover today:
- Make a back-up of your website.
- Create a “site under maintenance” page.
- Check your current SEO rankings.
- Keep the same content and structure.
- Do on-page optimization of your content.
- Test your new design on a staging site.
- Launch the site.
- Post-launch audit.
We know all this may sound overwhelming but don’t worry. We’ll discuss each of these in detail and make it as simple as possible.
1. Make a Back-Up of Your Website
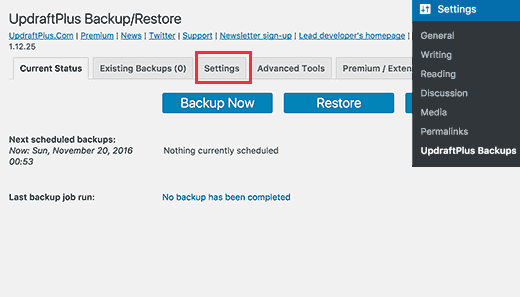
As a precautionary measure, it is always good to create a backup of your website. You should make a backup of your theme files, plugins, and database. That way if things go sideways you can revert the website back to the previous version.
Creating a backup is actually pretty easy. In this guide, you can create a backup of your website using a plugin called UpdraftPlus if you follow the simple steps.
2. Create a “Site Under Maintenance” Page
You don’t want your visitors to see a broken page when they visit your website. So, it’s best you turn on maintenance mode for as long as it takes for you to make the changes.
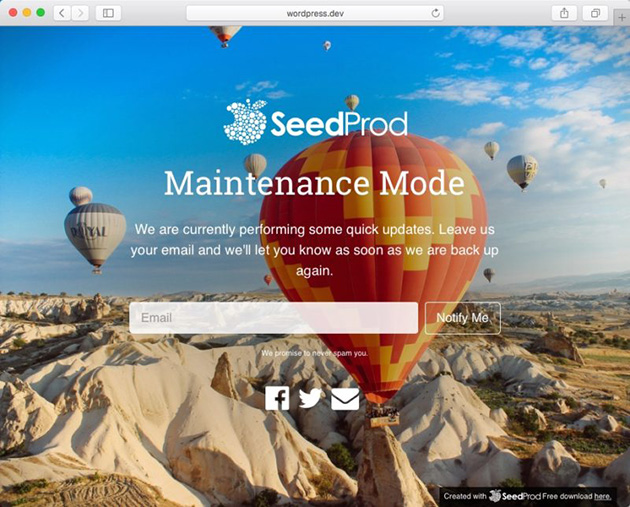
Creating a maintenance mode page is simple with SeedProd, the best coming soon and maintenance mode plugin for WordPress. You can learn how to put your site into maintenance mode here.
Make sure that you’ve tested everything in the staging environment before you take down the maintenance page.
3. Check Your Current SEO Standings
After setting up your maintenance page it’s important to collect your website’s SEO data before changing your site’s design. This will help you compare your site’s performance after you’ve made your changes.
To do this, go to your analytics tracking tool and export the list of your top-performing blog posts and pages.

Then head to the Google Search Console or whichever tool you use to track your keyword’s ranking. Once you have that data download it and keep it safe so that you can compare it after you have made the changes in your design.
4. Keep the Same Content and Structure
Moving on from gathering your SEO data you next need to consider the content and structure of your site. To put it simply you should keep the content of your website as unchanged as possible when updating your design.
Your site structure refers to the hierarchy of your site pages and the URL structure.
So you shouldn’t add or remove any pages of your website or change the URLs. If you do you’ll have to implement 301 redirects which can make things more complicated than they need to be.
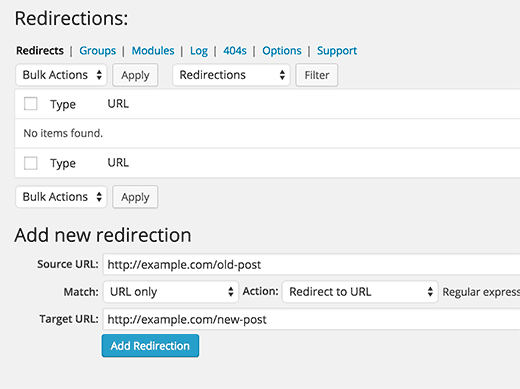
However, if you decide to change some of your pages or the URL structure then do follow the steps below:
- Download the sitemap of your website. Go to https://www.yoursite.com/sitemap.xml
- Redirect the old URL to the new URL and make a spreadsheet to keep track of your progress.
- Create a new sitemap with the updated URLs and upload it to the Google Search Console.
- Audit the URLs after you have implemented the changes to see if they are working properly.
5. Do On-Page Optimization of Your Content
With your design changes in place, you’ll now need to do an on-page analysis of your content. If you need help with the optimization then refer to this detailed SEO guide for beginners.
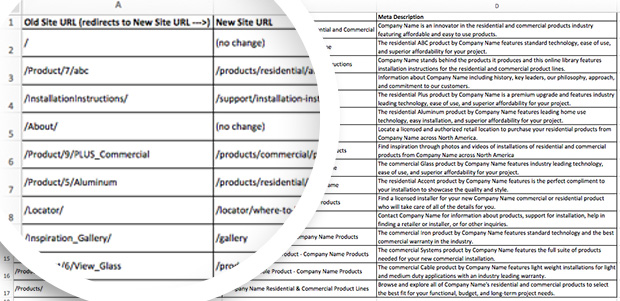
Try to keep the title, headers, meta-descriptions and the body of the content the same while you are designing your website and make a spreadsheet that can help you compare the changes that might have occurred during the redesigning process. You can make a similar spreadsheet shown in the screenshot below.
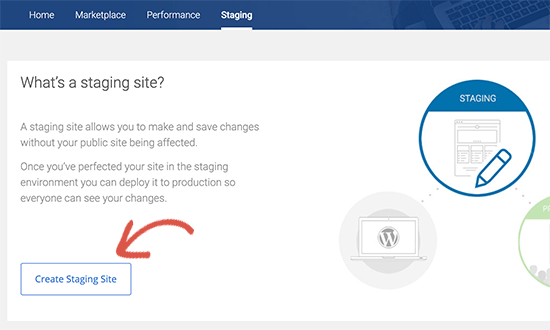
6. Test Your new Design on a Staging Site.
This next step is very important! Make sure you read this twice.
Whenever you are developing or redesigning a website it should usually be done on a staging server. This is typically so you can audit your website and test its functionality. If you find any errors you can then easily solve them before you take your site live.
An SEO’s biggest nightmare is when he forgets to check the box that says, discourage search engines from indexing this site.
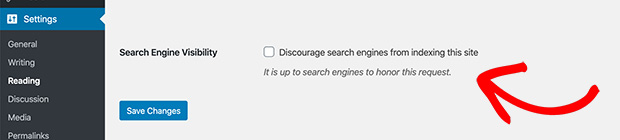
If you forget to check this box then your staging site will also get indexed and Google may drop your rankings for duplicate content.
You absolutely don’t want that to happen!
Make sure you double-check before you start working on your staging site.
7. Launch the Site
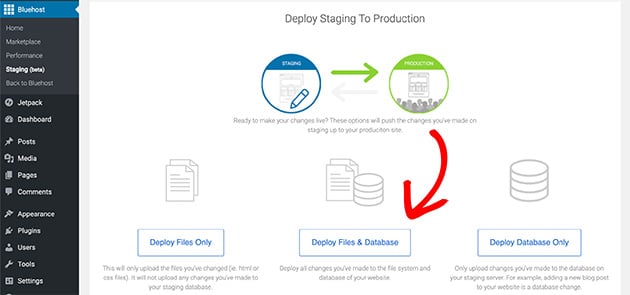
Now it’s time to put all your hard work to the test.
Publish your new site to the live server and remove it from the staging environment.
Turn off maintenance mode and let your visitors know about the new design. They might be able to help you by reporting bugs that might turn up.
8. Post Launch Audit
Your job is far from over even when you take your site live. You still have to check for any errors.
You might be wondering, “but I just checked for errors on the staging site”. But trust us when we say this because you can never be too sure when you are making design changes.
There are a few things you need to check during the auditing process. Take a closer look at the following:
- Test the top-performing content and make sure that it’s working.
- Check all redirects if you have implemented any.
- Check if the meta descriptions, titles, and headings are exactly the way they are supposed to be.
- Compare the page speed of your new website with the old one. You can use various tools to test the page speed like this WordPress speed test tool.
- Remove the WordPress plugins that you don’t need anymore. They might slow down your website.
- Check the sitemap.xml and look for any 404 errors. Fix them if you find any.
- Test the cross-browser compatibility. The easiest way to do this is to open the same page on different browsers and check if they load properly.
- Make sure your website is 100% responsive on mobile devices.
- Copy the tracking codes to the new website design so that you don’t lose any valuable data.
You are now done with the auditing process but even after all these checks and double-checks there might still be some errors on your website.
Like we have mentioned before, the best way to find these errors is to ask your visitors. They will send you bug reports for free.
All you have to do is make it easy for them to report them. You can ask them to comment or send you an email or you can build a bug reporting form.

A Final Note on Website Redesigning
Website redesigning without losing your SEO can be very hard if you don’t have a road-map. Make sure you do your homework before you even decide to make a new design for your website.
Monitor the staging environment as well as the new production environment. Remove any errors you find on the staging site before you take the new design live.
You’ll also have to conduct audits every now and then until you are sure that there aren’t any errors left.
We hope that our guide has helped you in streamlining the process. And if you want to learn how to market your website before you launch this step-by-step guide will show you how.
While you’re here, why not give us a like on Facebook and follow us on Twitter to keep up with our latest WordPress guides.
The post How To Redesign a Website Without Losing SEO (Step By Step Guide) appeared first on SeedProd.