Are you having trouble with your image sizes? Many people often overlook the simple option WordPress has for resizing images.
Getting a handle on resizing your images in WordPress can have a significant impact on how fast your site loads, as well as, saving server space.
In this article, we’ll cover exactly how to use WordPress to resize images so you’re not bogged down with sluggish page loading times.
Before we begin, here’s a quick summary of the topics we’ll cover:
- Why use WordPress to Resize Images
- How to resize an image in WordPress
- How to crop an image in WordPress
- How to rotate an image in WordPress
- How to flip an image in WordPress
- How to restore an original image in WordPress
Shall we get started?
Why use WordPress to Resize Images?
Resizing the images you add to WordPress is important for 2 reasons:
- To make sure your site doesn’t slow down from the pressure of loading large images.
- To save space on your site’s hosting server.
If you haven’t already taken steps to improve the performance of your website, then image compression is a good place to start.
If you use high-quality stock photos or work with images taken from your camera, chances are your images have pretty big file sizes. While these large image files may be great for print, smaller image sizes work better on the web because it takes less time for browsers to load.
Most WordPress themes are optimized for a specific set of image sizes which are usually:
- Large
- Medium
- Small
- Thumbnail
Deciding which image sizes are called for in your theme and resizing your uploaded images to match is a great way to ensure your images load quickly.
Not sure what size your images should be?
First, find out the width of your content area in WordPress. Your content area is where any text or images you add to your site, is displayed.
You can do this in Chrome with the inspect tool. Right-click on any content on your site and choose Inspect from the menu.
A window with code will appear. Don’t worry about how scary this looks, you won’t need to do anything to the code.

Move your cursor over the code until you see a highlighted column, usually, in blue. You’ll notice a tooltip at the top of the highlighted area. The first number is the width of your theme’s content.
In our case, the width is 695 pixels. This means that any image we upload should be no more than 695 pixels wide.
Now you have the starting point for your image size, let’s take a closer look at how you can use WordPress to resize images.
How to Resize Images in WordPress
Using WordPress to resize images, is pretty simple.
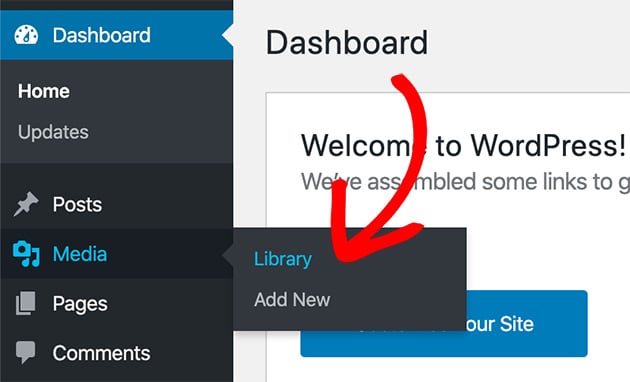
To get started head to Media » Library from your WordPress admin panel.
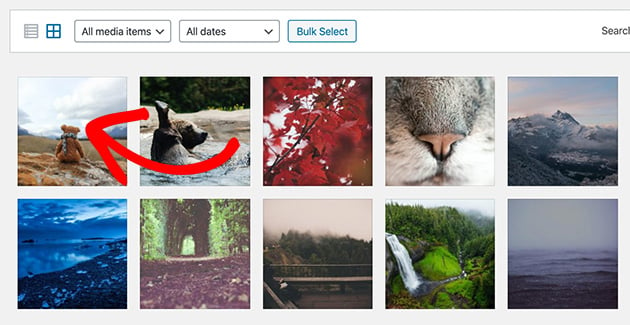
Now, upload or click on the image you’d like to resize in WordPress.
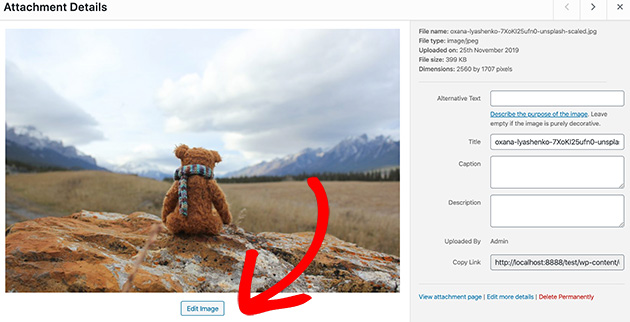
From here, click Edit Image.
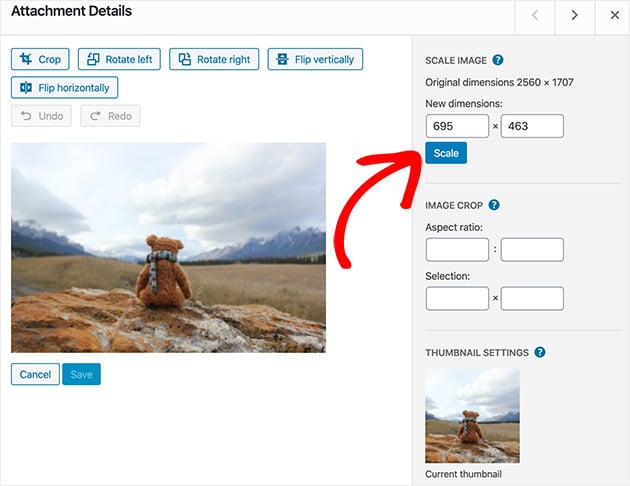
Under the Scale Image heading, you can enter new dimensions for your image. If you just enter a width, the height will automatically be calculated based on the image ratio or vice versa.
In the first box enter the width of your content area. In our case, this was 695 pixels.
When you’re done, click Scale to resize the image.
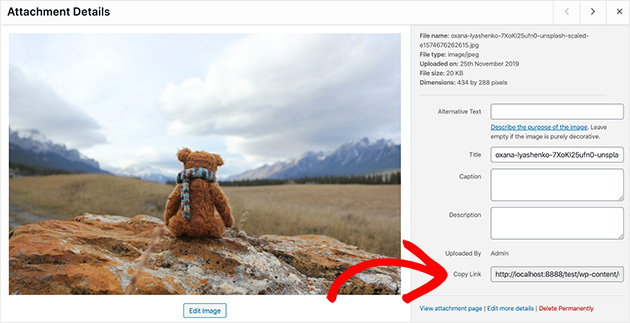
To use the resized image go back to the image details page, and copy the URL as shown in the screenshot below.

That’s it! You’ve now used WordPress to resize an image, and you can use it wherever you like.
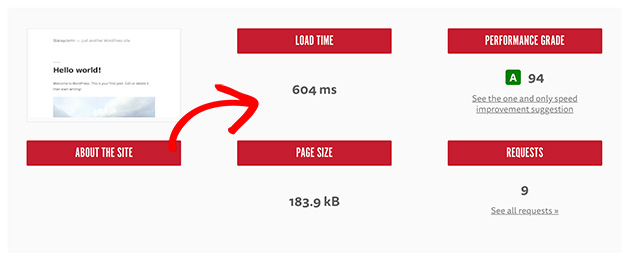
To give you an idea of how resizing an image can impact your page speeds, let’s take a look at the original image’s page speed compared to the resized image.
We used Blog Tyrant’s website speed test tool for this example.
Here’s the test result of the original image size when added to a standard blog post.
And, here are the results for the resized image.
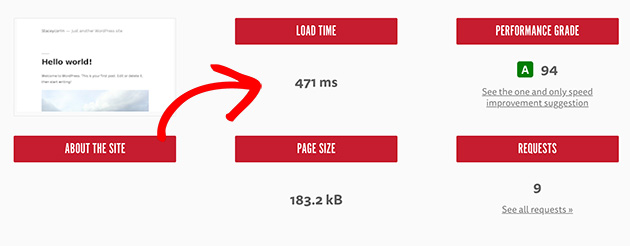
The difference may not appear to be much at first glance. But, imagine a website with hundreds of images. Even the smallest difference in loading times can have a huge impact on how likely visitors are to stay on your page.
Still, WordPress offers more than simple image resizing. You can use it to crop, rotate and flip images too. Shall we find out how?
How to Crop Images in WordPress
To crop an image in WordPress, we’ll follow the same first steps as we did with resizing an image.
Head to Media » Library, click the image you’d like to crop and click Edit Image.
Next, click and drag your mouse on the image to start the cropping process.
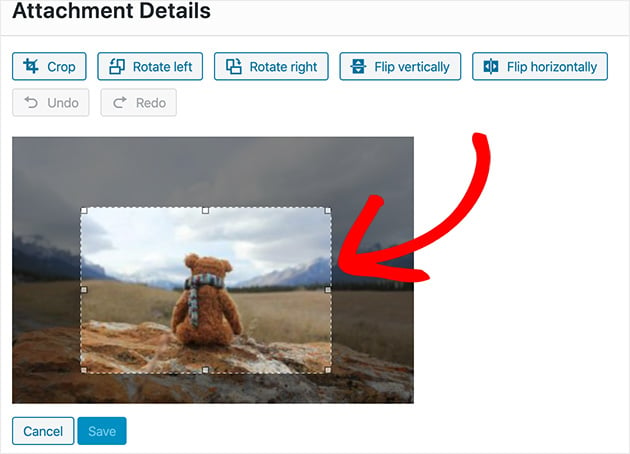
You can click on any of the little squares to adjust the cropped area or move the area around the image. Once you are satisfied click the Crop icon as shown below.
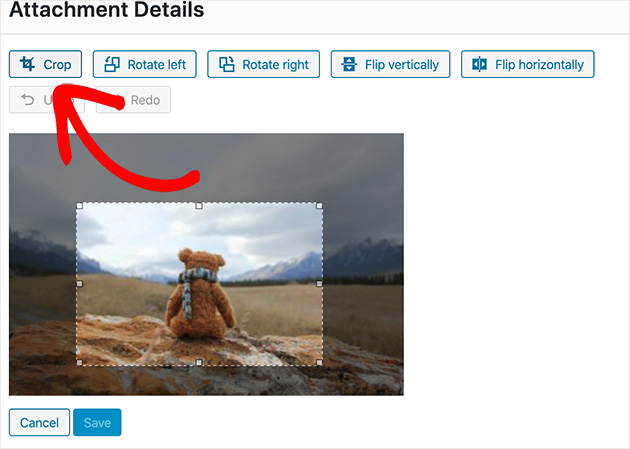
Now click Save.
Simple as that, you’ve cropped your image!
Again select the URL on the image details page to use the cropped image.
But what if you want to rotate your image in a different direction? Don’t worry, WordPress can handle that too. We’ll show you how next.
How to Rotate Images in WordPress
To learn how to rotate an image in WordPress, follow these instructions.
First, go to Media » Library, choose your image, and click Edit Image.
Now click the Rotate Left or Rotate Right buttons to rotate your image 90 degrees at a time.

If you mess up, don’t panic. Clicking the Undo button will reset the image to the last step.
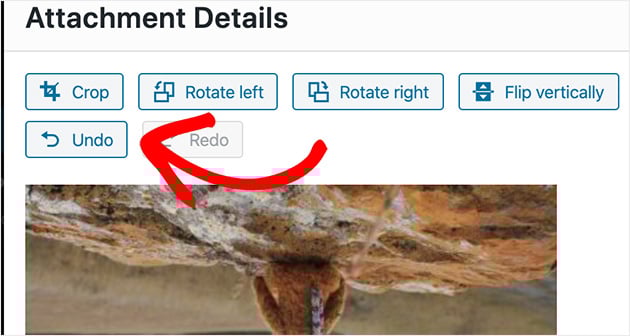
Click Save when you’re happy.
Great work! Rotating an image in WordPress is pretty easy, isn’t it? Now let’s look at how to flip an image.
How to Flip Images in WordPress
Flipping an image in WordPress follows the same basic steps as rotating an image.
First, go to Media » Library from your WordPress dashboard, select your image and then click Edit Image.
To flip your image, click the Flip Vertically or the Flip Horizontally button.

Click Save when you’re done.
With all the changes you’ve made to your image, what if you want to go back to the original image and start over? Keep reading to find out how you can do this.
How to Restore Resized Images in WordPress
We all screw up from time-to-time. We’re human right?
If you screw up using WordPress to resize your images, we’ve totally got your back. There’s an easy way to get back to the original image.
In the image below we’ve clearly cropped the image in the wrong place, and we’ve scaled the image to dimensions that are too small.
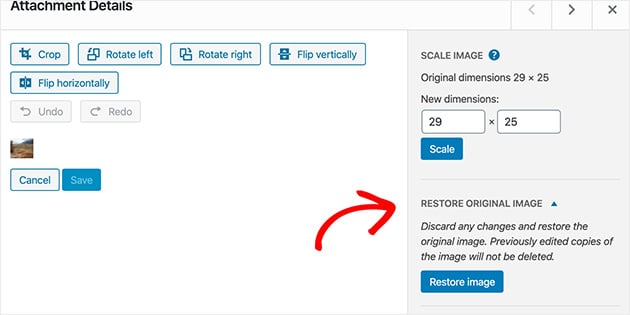
Look to the right-hand side of the image edit screen and you’ll see a heading labeled Restore Original Image.
Clicking this reveals a button that lets you restore the image to its original size.
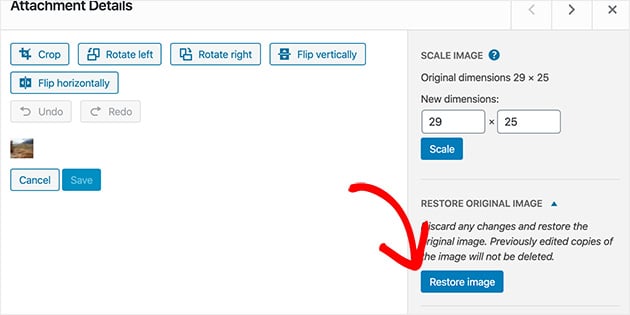
Click Restore Image to reset all of your changes.
Now your image is exactly the way it was when you first uploaded it. Pretty handy right?
There you have it!
Today you’ve learned how to use WordPress to resize images. Plus, how to flip, crop, rotate and reset them too.
You’ve also discovered how to find the ideal image size based on your WordPress theme’s content area. Now, when visitors head to your website, their browsers will load your images quicker, without losing quality.
We hope you enjoyed learning how to resize images in WordPress. And if you’re not convinced your WordPress theme is the best choice for you, this guide will help you find a better one.
While you’re at it, don’t forget to follow us on Facebook and Twitter for future WordPress guides and tutorials.
The post How to Resize and Edit Images in WordPress (The Right Way) appeared first on SeedProd.