Do you want to learn how to add a survey to your website? Doing so for the first time can be tricky without the right tools.
Using a survey and polls plugin like WPForms helps you learn the answers to questions you want to ask your visitors. This lets you make informed decisions to help grow your business.
In this article, we’ll show you how to add a survey to your website using the WPForms Surveys and Polls addon. Plus, we’ll break it down step-by-step, so it’s super simple too.
But, first, why use surveys in WordPress anyway?
Why Add a Survey to WordPress?
Surveys are a great way to collect important information about your business from your audience.
It can help you fix what your customers might be unhappy with. That way you can offer more of what they like, and create a better experience for them.
Examples of some surveys you can put on your website might be to:
- Start a Conversation. Asking the right questions on your survey could begin a discussion with your audience about topics important to your industry.
- Prioritize Issues. It’s easy to make decisions based on gut feelings. But with a survey, you can get objective information from visitors. This helps to make data-driven decisions to improve your sales and business.
- Collect Feedback. Surveys offer a way for visitors to give you honest feedback in a safe and anonymous way.
Surveys are cheaper to run than traditional market research. They’re also flexible, letting you ask the questions you want to ask, in any way you want.
Now that you know the importance of surveys, let’s look at how to create a survey in WordPress.
In this tutorial, we’re going to be using WPForms, the top-rated form plugin for WordPress with over 5,000 5-star reviews.

Ready? Let’s get started…
Step 1: Download the WPForms WordPress Plugin
The first thing to do is to download and install the WPForms plugin. You’ll need to get the Pro version to unlock the Surveys and Polls feature.

Once you’ve completed your purchase, here’s where you can download the plugin in your WPForms account.
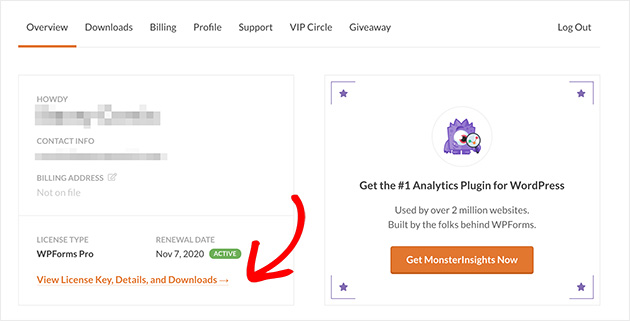
Click View License Key, Details, and Downloads to be taken to the download area.
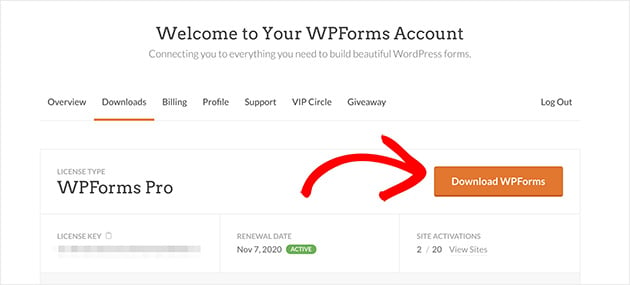
Next, you’ll need to log in to your WordPress site and go to Plugins » Add New from your WordPress admin area, and upload the WPForms plugin.
Step by Step Guide
If you’re not familiar with getting around WordPress, here’s a Beginners Guide to the WordPress Backend.
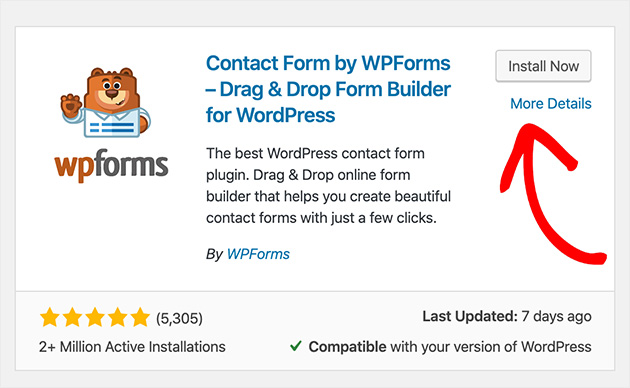
Once you’ve uploaded the plugin to WordPress click Install Now and Activate.
Now click Addons under the WPForms admin toolbar. This shows a list of available addons for your plan. Locate the Surveys and Polls Addon.

Click Install Addon, and Activate.
Step 2: Create a New Form
Now you’ll need to create a new form for your survey.
With WPForms you can use any template available, and then add your own survey questions if you like.
But, to keep things simple, today we’ll use a form made specifically for adding a survey to your website. You can even add multiple choice questions too.
To begin, go to WPForms » Add New and choose the Survey Form template.
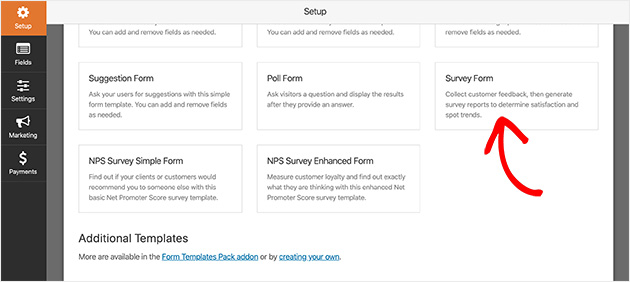
WPForms will then create a new survey form for you.
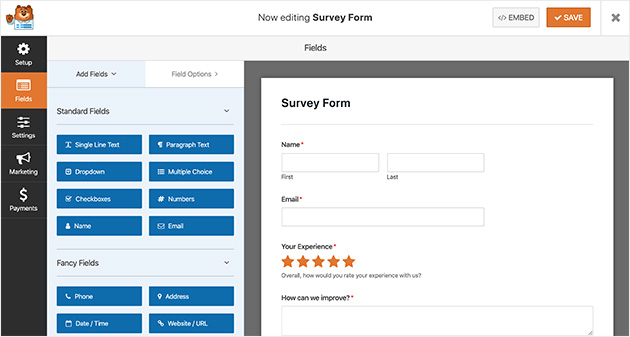
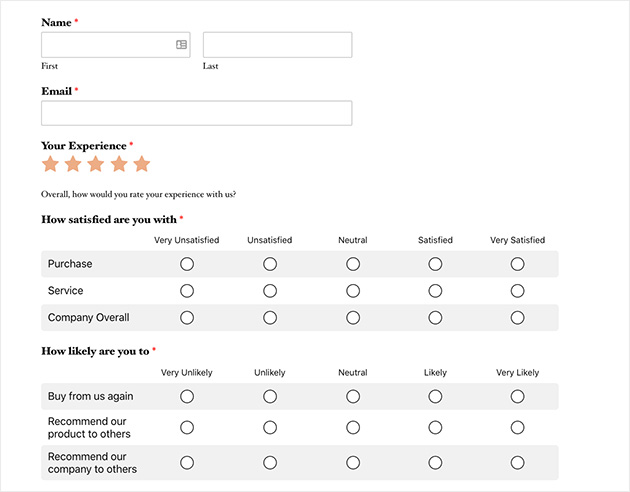
Your survey form will automatically have the following fields:
- First and last name.
- Email.
- Rating.
- Likert scale.
- Comment box.
This is a good place to start with your survey. But, if you like, you can easily customize things to suit your specific questions.
Step 3: Customize the survey form
Adding extra fields to your form is easy. Simply drag them from the left-hand panel, onto your form.
Clicking the form field lets you make changes. And dragging it allows you to re-order the fields in any way you’d like.
Customizing your form’s Rating Field is pretty easy too.
To begin, click on the Rating Field. In the left-hand panel, you’ll see the information you can change which includes:
- Changing the label.
- Adding a description.
- Choosing a satisfaction scale between 2 and 10.
- Making certain answers required.
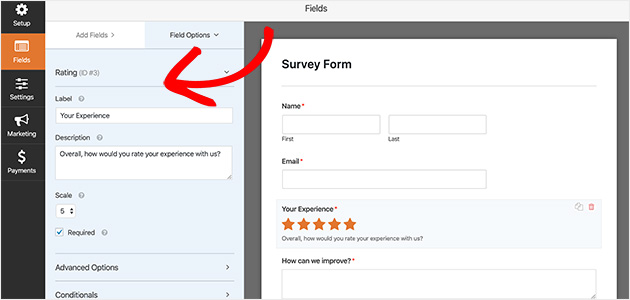
The Advanced Options let you change the icon type, size, and color. You can even add CSS classes for more customization.
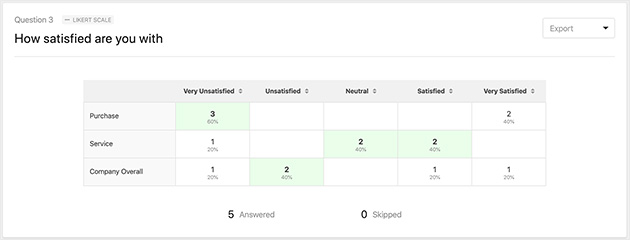
The Likert Scale is customized in the same way. Likert scales register how satisfied someone is with your product or service, and they typically have a moderate or neutral opinion on the scale.
By clicking on this field, you’ll be able to:
- Change the label to better describe what you’re measuring.
- Add, remove, and edit the labels of rows on your scale.
- Change the column options which are the responses your visitors can choose.
- Provide a description to give visitors more information.
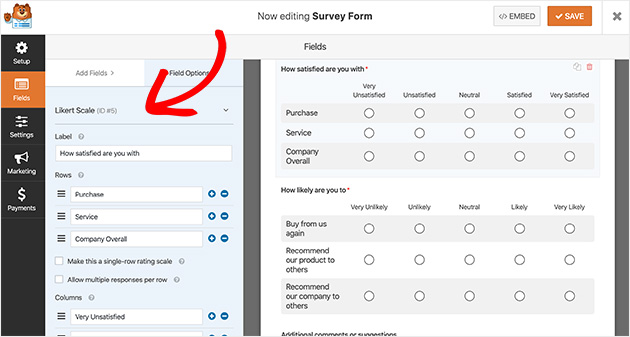
When you’re happy with your form details, and settings, click Save.
Step 4: Enable Survey Reporting
To receive, and view the results from your survey, you need to enable the survey reporting option.
By default, survey reporting is enabled automatically for Survey Forms. But, if you decide to use a different form template, you’ll need to ensure you enable this option.
You can do this by clicking on Settings » Surveys and Polls. Then click the Enable Survey Reporting checkbox.

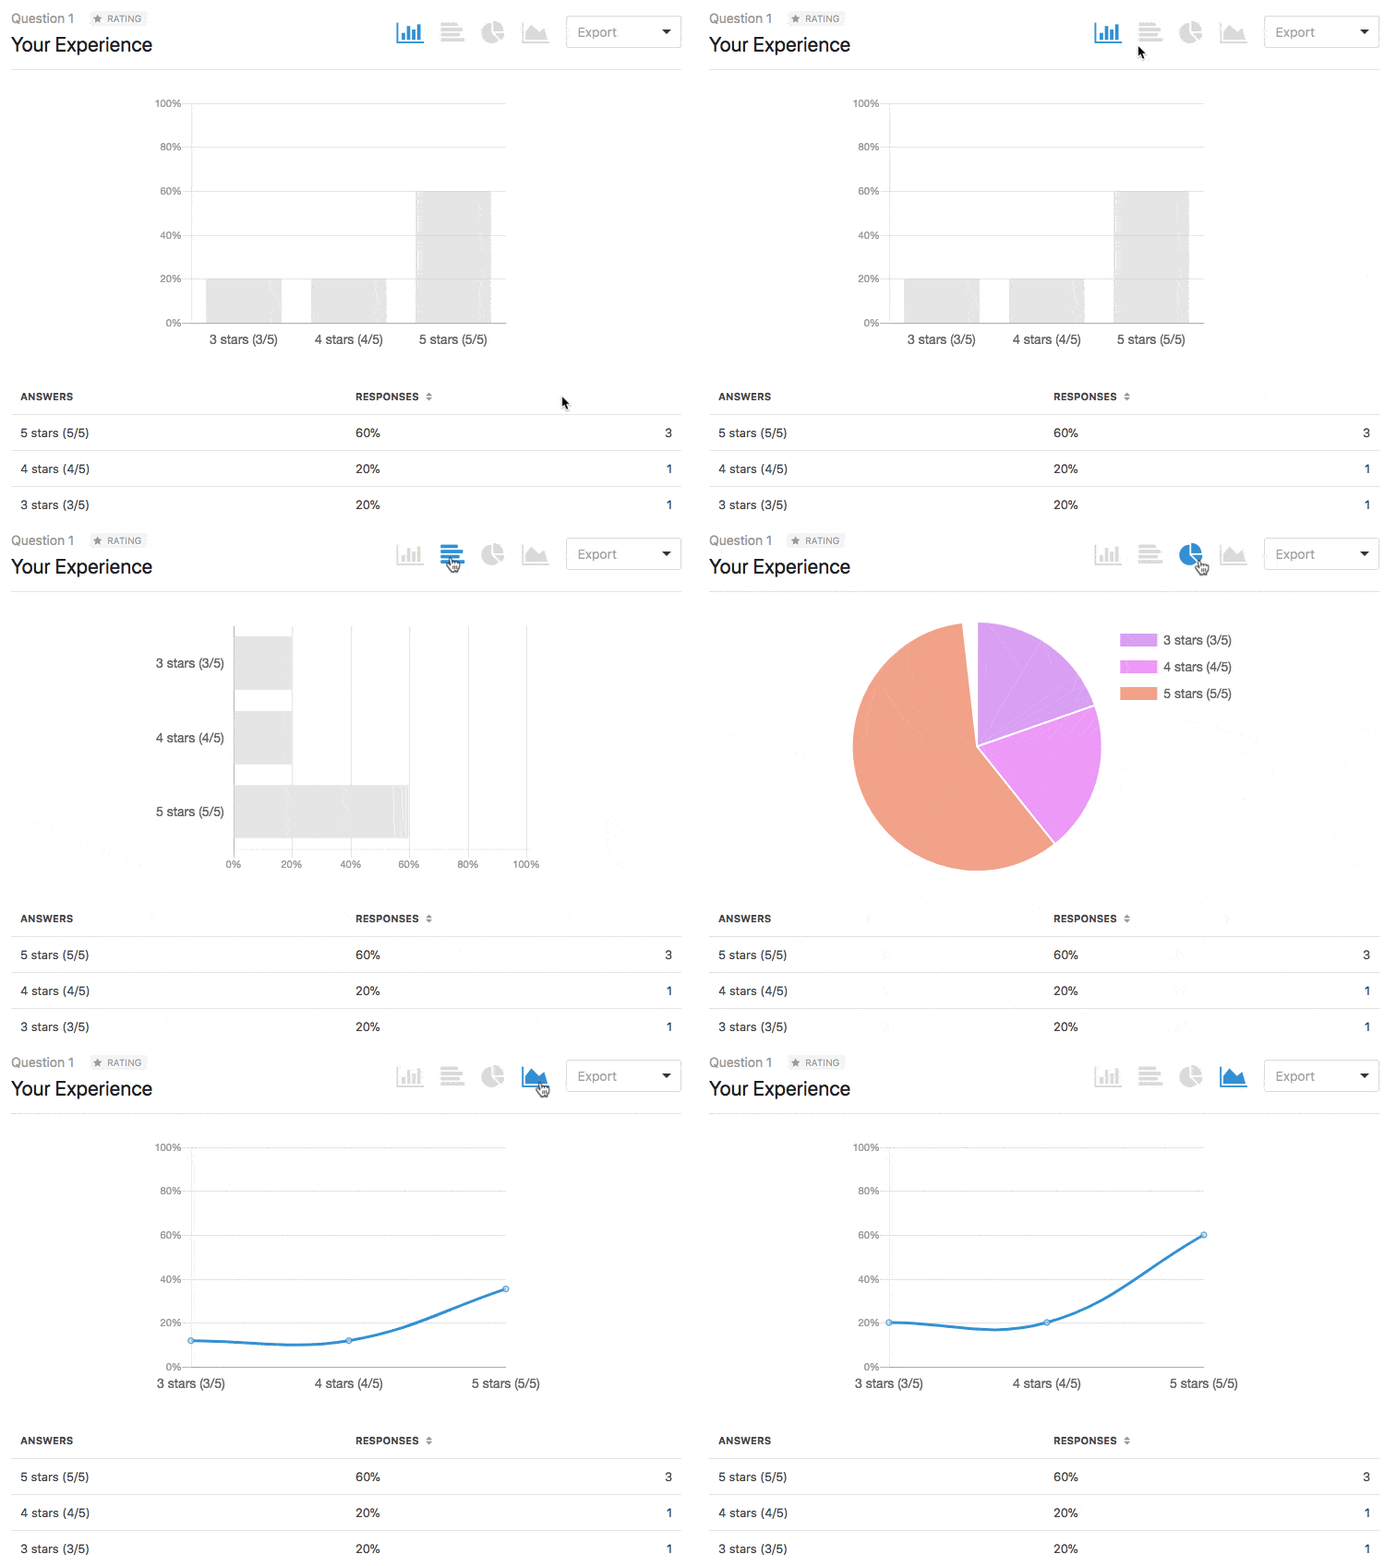
When this option is checked, WPForms will automatically generate beautiful reports and graphs for you to analyze your survey data.
What if you’re just asking a simple question or two in a larger form, and don’t need a report for everything in your form? With WPForms, it’s easy to only enable survey reporting for specific field instead of the whole form.
To only get reports on certain fields, just uncheck the Enable Survey Reporting box in your form settings. Next, go back to your form editor, and click the form field you’d like reports for.
Under the Advanced Options check the Enable Survey Reporting box. Only survey results for that field will be collected.

Follow the same steps for every field on your form that you’d like to enable reporting for.
Step 5: Configure the Settings of Your Survey
Your survey form will have the following 3 settings for you to set up:
- General. This is where you can change the form name, description, submit button, and enable anti-spam features. You can also disable storing user details in order to comply with GDPR.
- Notifications. Here you can set up email alerts for whenever someone fills in a survey on your site. Simply enter your details and toggle notifications on or off.
- Confirmations. Whenever a visitor completes a survey you can show them a message, or send them to another page on your website. Choose your confirmation type, enter the message, page, or URL you’d like to send visitors to and click Add New Confirmation.
Once you’ve finished setting up your form, you’re ready to publish it in the next step.
Step 6: Add your Survey to WordPress
Now you’re ready to add your survey to your website.
With WPForms you can put a survey anywhere on your site. This includes embedding forms into a post, creating a dedicated form landing page, or displaying one in your sidebar.
Embedding a survey is one of the most common options, so let’s look at how to do this.
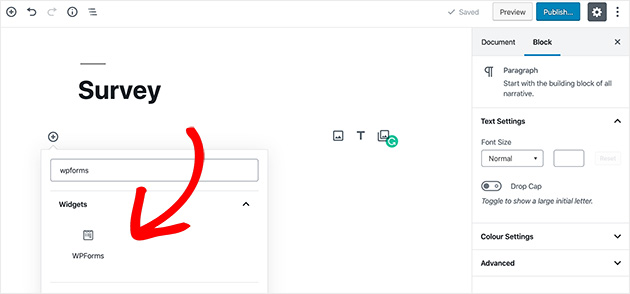
To start, create a new page or post in WordPress. Then click under the title to add a new block.
In the search box type in WPForms to reveal the WPForms Block. Click the block to add it to your post.
The WPForms widget will appear inside your block letting you select your form from a dropdown list. This is much easier than having to copy and paste the embed code.
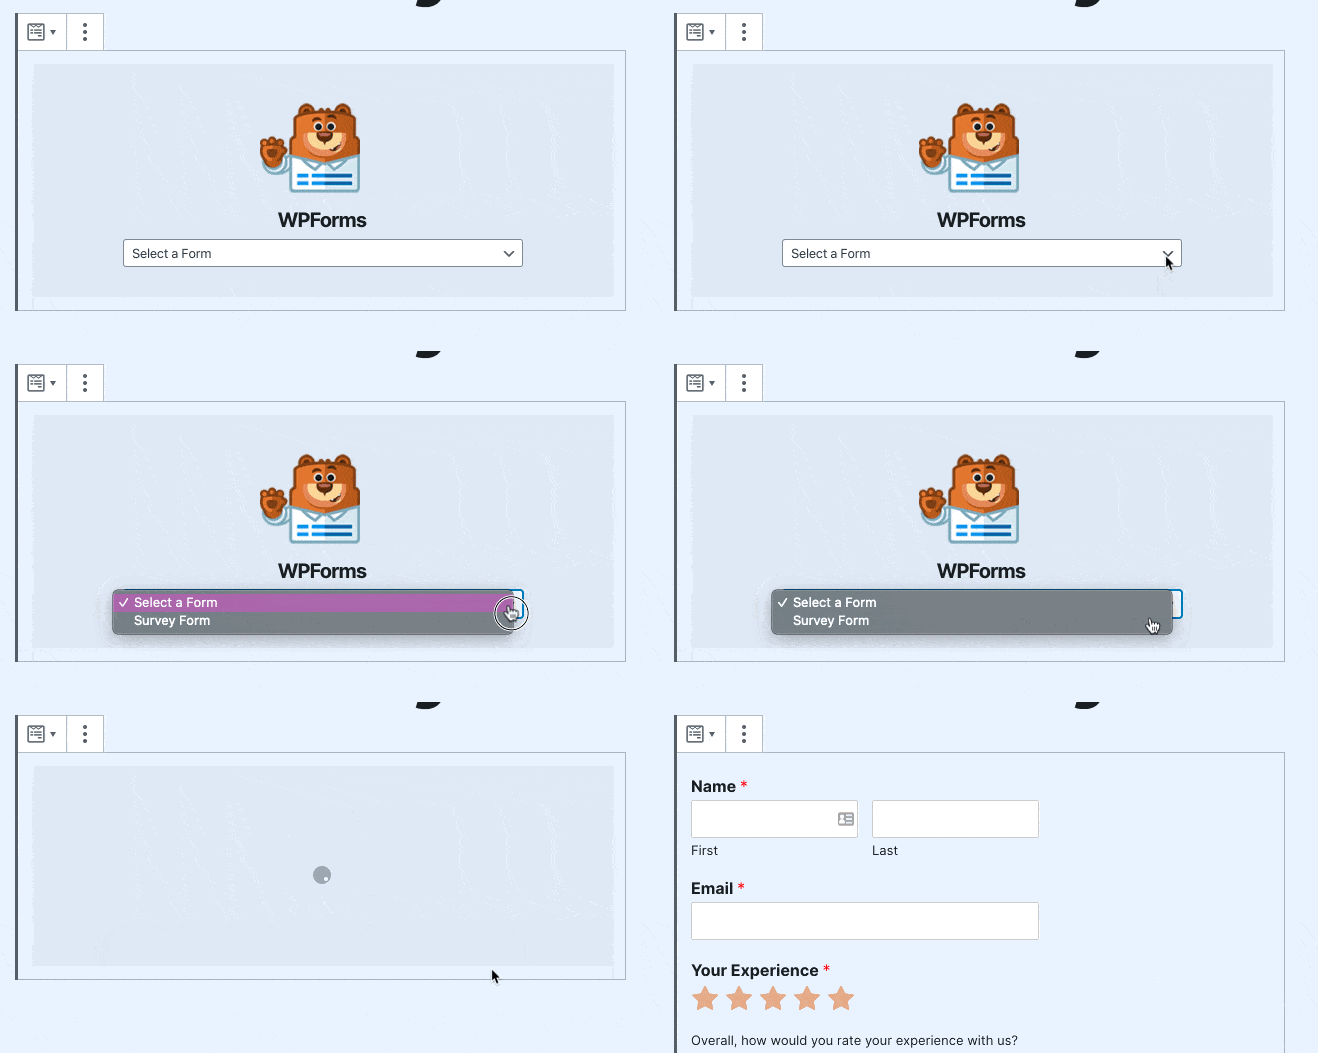
Select your survey from the dropdown list, then publish your post. Doing this allows your form to appear on your website.
Step 7: Generate Your Survey Reports
One of the best features of the WPForms Surveys and Polls Addon is reporting. Once people being to fill out your forms you’ll be able to see any data that’s been collected.
To create your first survey report head to WPForms » All Forms. Then hover your cursor over the form you’d like a report for to view the options.
Now click Survey Results.
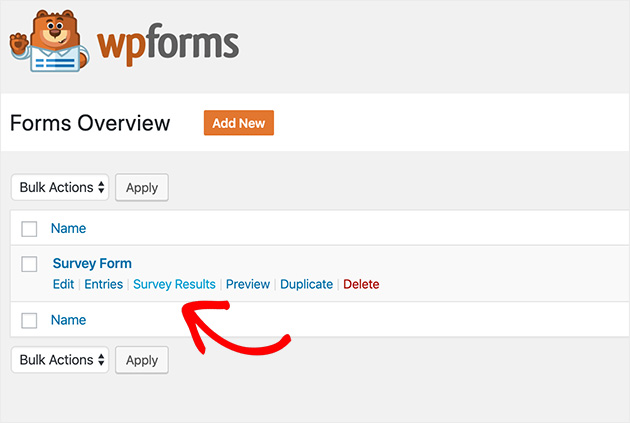
Your survey results will show data for all of the fields you enabled reporting for.
Here’s an example of what your rating results might look like.
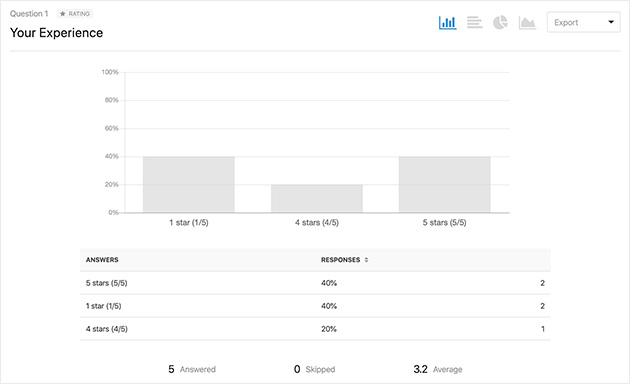
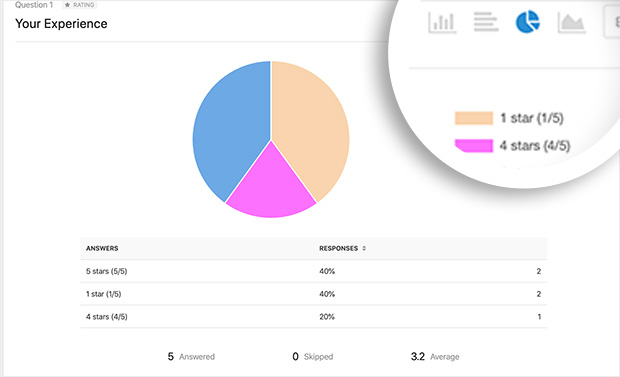
You can even change how your graphs are displayed by selecting either bar chart, pie chart, or line chart.
And, here’s what the results from the Likert Scale would look like.
If you prefer you can export your survey results by clicking Download Export (CSV), generate a printable PDF, or even save each question as an image to share on your blog or social media or in a presentation.
Congratulations!
You now know how to add a survey to your website along with how to view those all-important results in a way that’s easy to understand.
Even better, you can use it to boost the satisfaction of your customers, and ultimately, improve the performance of your business.
While you’re in the process of making improvements, why not check out our guide on digital marketing statistics and trends to help you make even better decisions.
What are you waiting for? Get started with the most user-friendly way to create a survey on WordPress today.
And if you liked this article, don’t forget to follow us on Facebook and Twitter.
The post How To Add A Survey To Your WordPress Website (Step by Step) appeared first on SeedProd.