Want to add Google Analytics to your WordPress dashboard?
Google Analytics is by far the most popular analytics tool for most website owners. It’s a great way of keeping track of your website traffic and getting detailed insights into your visitors and their behavior. Best of all, it’s free.
Using this data, you can take all the necessary steps to improve your business and maximize your profit.
Besides, you can completely rely on this data because it is backed by all of Google’s considerable technical resources.
Adding Google Analytics to WordPress
In this tutorial, we’ll show you 2 different ways to add Google Analytics to WordPress:
- Add Google Analytics With MonsterInsights (The Easy Way)
- Add Google Analytics the Manual Way (With Code)
Just click the method you want, to skip ahead.
Once you connect your Google Analytics account to your WordPress site, you’ll get a complete picture of your site traffic, demographics, how your content is performing and much more.
Ready? Let’s get started.
How to Add Google Analytics With MonsterInsights (The Easy Way)
MonsterInsights is the best Google Analytics plugin for WordPress.
MonsterInsights is not only the easiest way to add Google Analytics to WordPress, but it also has 2 important advantages over the manual method:
- You can see actionable analytics reports right in your WordPress dashboard
- You can easily configure Google Analytics to track more advanced data (like ecommerce tracking), without having to code.
Let’s take a look at how easy it is to set up Google Analytics in WordPress with MonsterInsights.
Step 1: Sign up for Google Analytics
Just like any other online tool, Google Analytics requires you to sign up for an account before you can start using it.
For that just log in to your Google Account and then go to the official Google Analytics site and click the Start for free button.

From there, follow the account signup process. Here you can start by choosing if your property is a website or a mobile app.
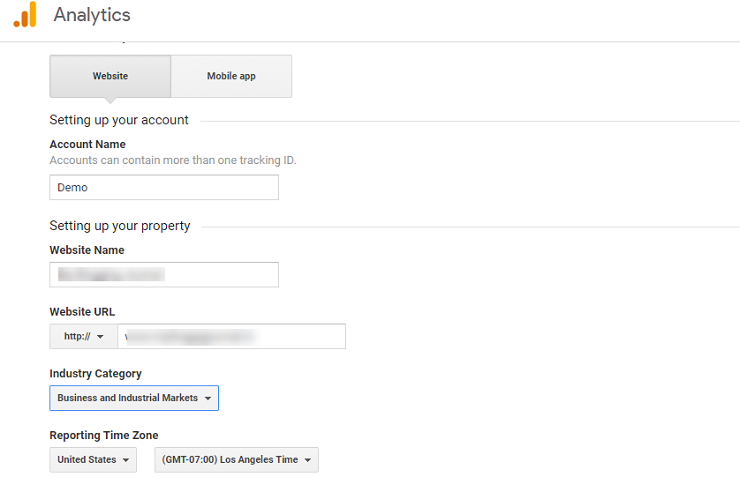
Then proceed by adding your account name, website/app name, and your website URL. You can also add your industry category, and add your time zone for accurate tracking.
Step 2: Set Up MonsterInsights
For the next step, you’ll need to log in to your WordPress dashboard.
If you have not downloaded MonsterInsights yet, download it here. Then install and activate the plugin like any other plugin.
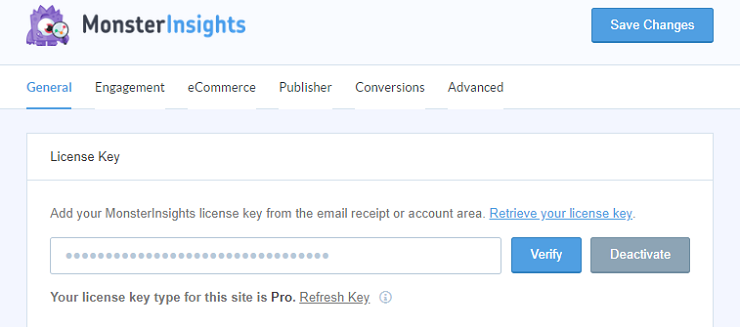
The next step is to verify your license key that you will get at the time of downloading the plugin.
Just copy the key and paste it on the blank field. It will automatically verify your license.
Once your license is verified, scroll further down the page. You will have two options here. Click on the Connect MonsterInsights option.

You will be redirected to another page, where you can log in to your Google account using your business account.
You will see a message from MonsterInsights asking for permission to access your account. Click on the Allow button.
On the next page, you can select your website for which you want your data.

Complete the process by clicking on the Complete Connection button. And that’s it.
Now you can view your reports directly on your WordPress dashboard. For that, on your WordPress dashboard, click on Insights » Reports.
You will see the reports right on your screen.

You can scroll down your page to view more details. So now, no more logging in to another platform to view your stats.
With MonsterInsights, you can check it right on your WordPress dashboard.
And if the bounce rate on your analytics shows is high like mine, here’s how you can reduce it.
Want more features in your reports? You can also use MonsterInsights for…
- eCommerce Tracking: Set up tracking for WooCommerce, Easy Digital Downloads, LifterLMS & MemberPress with 1 click.
- Affiliate Link Tracking: Find out which affiliate links are getting the most clicks so you can maximize your revenue.
- File Download Tracking: See how many downloads all your files are getting (no code needed).
- Author Tracking: Find out traffic and engagement stats for each individual author on your blog.
…and lots more! See all of MonsterInsights’ features here.
If you’re comfortable with coding and would prefer to manually track some basic stats, without those advanced reports, you can use the manual way instead.
Here’s how it works…
How to Add Google Analytics Manually (With Code)
After you set up your Google Analytics account as we walked through above, here’s how you add to WordPress manually:
Step 1: Get the Tracking ID
Once you are done with Step 1, you need to scroll down while on the same page to find the Get tracking ID option.
Once located. just click on it and proceed. Now check the Google Analytics terms box.
You should now be on your Google Analytics dashboard which looks something like this. And you can see your Tracking ID right on top of the page.
Now that you have your ID, it’s time to get your Google Analytics account connected to your WordPress website.
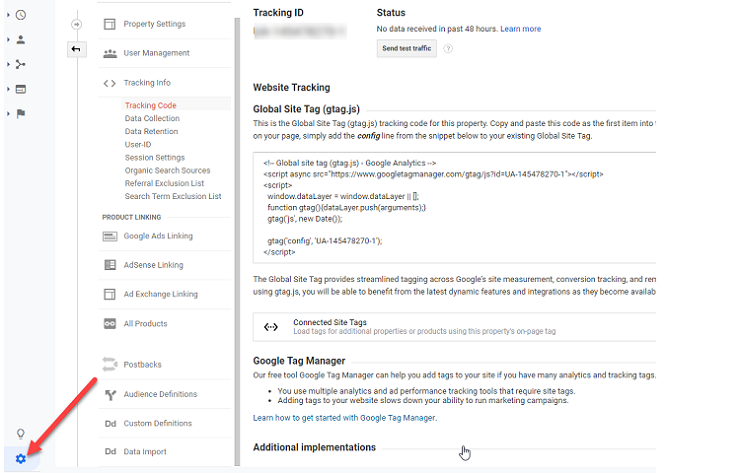
For that, start by clicking on the Admin sign on the bottom left corner of your screen.
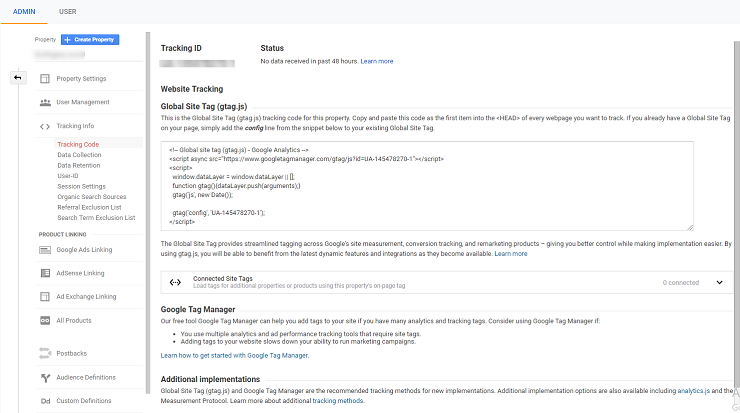
You will now be redirected to a new page. On this page, click on Tracking Info » Tracking Code under the property column.
You should now copy the entire code that is visible on your screen. This is available under the Google Site Tag option.
The next step is to log in to your WordPress dashboard and copy this code using the Insert Header and Footers plugin on it. Let’s see how to do that.
Step 2: Paste the Tracking Code on WordPress
The easiest way to copy the tracking code to your WordPress site is by using the Insert Headers and Footers Plugin. Here’s a little about the plugin.
Once you install and activate the plugin on your WordPress dashboard, go to Settings » Insert Headers and Footers.
Here you will have two different sections – the Header and the Footer.
Ideally, Google analytics recommends you to paste the code in the Header section.
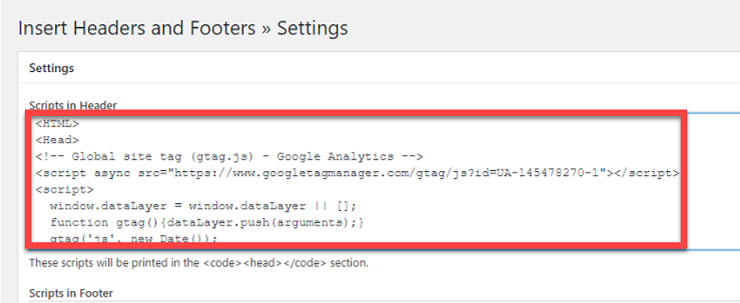
Now click on the Save button and that’s it. You are now ready to use Google Analytics on your WordPress site.
Step 3: Analyze Your Data
Now that you have integrated your WordPress website with Google Analytics you can now start checking your data.
However, it takes Google a while to collect and report the information to you through its dashboard.
So wait for at least 48 hours before you start looking for your analytics data after you’ve added the tracking code to your website.
Once the waiting period is over, you can access your data by visiting analytics.google.com. If you’ve used the manual method, you won’t be able to see any stats in WordPress.
That’s it! If you liked this tutorial, you might want to check out our tutorial on how to put your WordPress site in maintenance mode.
And don’t forget to follow us on Twitter to see our latest blog posts.
The post How To Add Google Analytics To WordPress (The Easy Way) appeared first on SeedProd.