Wondering how to put your WordPress website into maintenance mode?
Adding a maintenance mode page to your site can be a great way to hide the broken pages from your visitors while you tweak your theme, plugins, content or anything else in the backend of your website.
But most importantly, it saves your website from potentially losing search engine rankings by notifying it that your site is temporarily down for maintenance.
So instead of indexing your broken site, Google skips indexing any changes on the site that are not complete. This also saves your SEO from being affected.
In this article, we will tell you how to put your WordPress website into maintenance mode in a quick and easy way.
Putting Your WordPress Site into Maintenance Mode
Being a WordPress user, your first plan of action is definitely to install a plugin. With so many of them around in the WordPress repository, you are free to pick any maintenance plugin of your choice.
We would recommend you to use the SeedProd plugin that lets you come up with beautiful maintenance pages within a matter of minutes.
Plus, it has a ton of extra features to help you turn your visitors into social media followers and email subscribers, even when your site is down for maintenance.
So let’s check out how to use this plugin to enable WordPress maintenance mode.
Step 1: Setting Up SeedProd
Once you have installed SeedProd on your WordPress website, it will ask you to verify your license key. On purchasing the plugin, you will get a license key on your registered email address. Paste the key in the blank field you see on your screen.
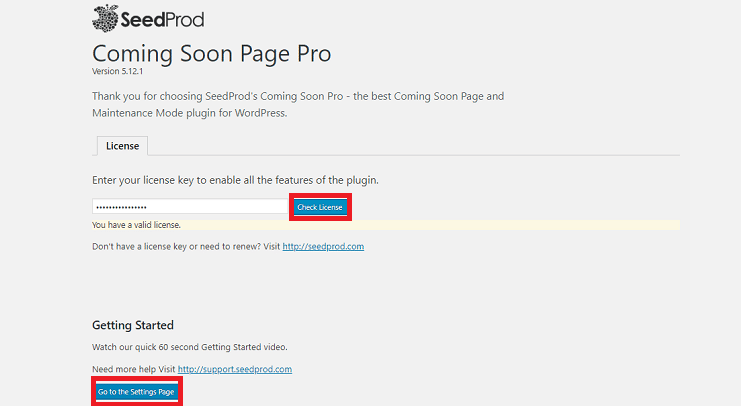
Once your license is verified, click on the Go to the Settings Page option. You will now be redirected to the SeedProd dashboard.
This page will also have a quick video showing you how to use the plugin. You can use it for a better understanding of the plugin. Let’s now move on to creating the maintenance mode page.
Step 2: Enabling the Maintenance Mode Page
You should now be on the following page. This page will show you 4 different options. By default, the first option will be selected when you land on this page for the first time.
To enable the maintenance mode on your website check the third option.
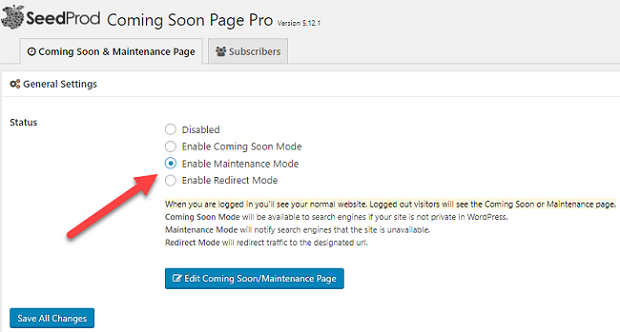
You will see a few other options too like Enable Coming Soon Mode and Enable Redirect Mode.
This is because using SeedProd, you can create with a beautiful coming soon page, and enable redirections as well.
Many people get confused between the Coming Soon mode and the Maintenance mode. Coming soon pages are generally used on websites that are not live yet and is still under construction.
On the other hand, Maintenance Mode should be used on already established sites that are currently inactive due to maintenance, like switching your WordPress theme or other big changes that can take a while.
Now that you have selected the Maintenance Mode, click on the Edit Coming Soon/Maintenance Page option to proceed further. It will redirect you to a page builder where you can start designing your maintenance mode page.
This real-time page builder lets you take full control over the look and feel of your entire page.
You can see the live changes on the right side of your screen as and when you use the options on the left to style your page.
Step 3: Designing Your WordPress Maintenance Mode Page
SeedProd offers you tons of design options. You can either build your page from scratch or use a ready-made theme from its library of more than 50 beautiful themes.
You can select your theme by clicking on Theme » Select a Theme option on the left side of your page builder. On doing that you will have several beautiful themes on your screen.

Let’s select one of these themes. You can pick a style that resembles your brand closely, and then change the design as you wish.
You will now see the template on the right side of the page builder. You can edit every single part of the template by using the options on your left.
To change the maintenance message on your page, click on the Content tab on the left.

You can change all your texts here. From changing the page name, uploading a logo, adding headlines and descriptions, you can do a lot here.
You can also change the order of your content by simply dragging and dropping them in the desired manner under Section Order.
Below that, you will have options to upload a favicon, add your own SEO title and description and upload your social media thumbnails.
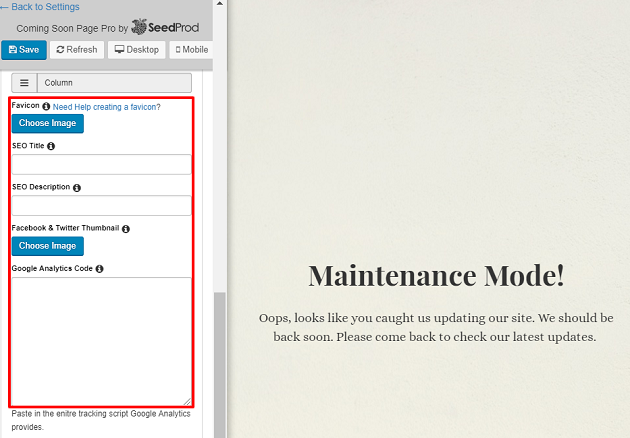
Scrolling further down the page, you can add your Google Analytics code so that you can keep track of your visitors.
The next option is Background. Click on the Background settings tab and it will expand to offer a lot of options.
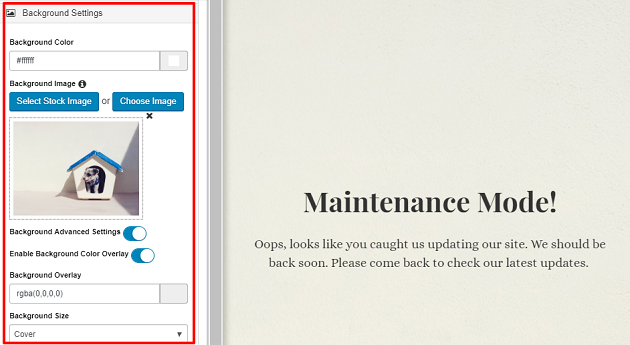
So again like the content, you can work on your background here. You can use these options to change your background image, color, alignment of it and do a lot more. It also lets you upload a video and add a slider for your background.
You can also use the Select Stock Image to use a picture from the library of more than 5k images that the plugin comes with. If you want a custom image to be uploaded, you have that option as well.
Let’s change our image. Just click on Select Stock Item option and you will see hundreds of image to choose from. You can also use the search box to find an image of your choice.
The next option is Container transparency. Here you can set how transparent you want your content containers to be. You can also set the container position, and width if you want.
This section also lets you add an animation effect to your container.
Next, you have the Element color option. To use this option your first have to add the elements to your page. You can enable them by scrolling further down the page.
The email form, social icons, count down timer and the progress bar are all different element options that you have.
Step 4: Adding Elements to the Maintenance Page
Let’s now add some elements to the page.
We’ll start with the email form. This option is available two options after the Element color option.
Click on it and swap on the Enable form option. If you want you can also display the name and add a checkbox to enable sending notifications to your users.
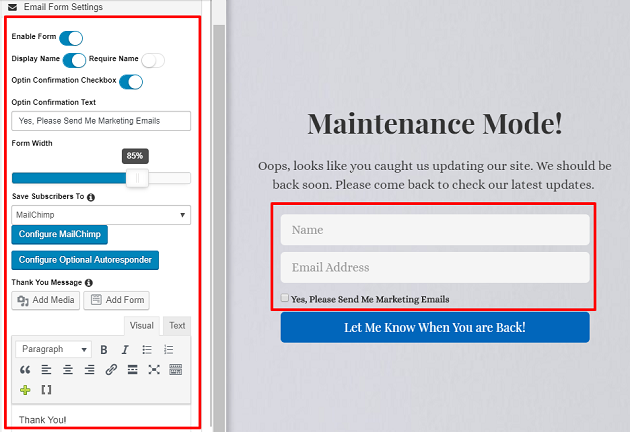
You can see that the email field is added to the page on your right.
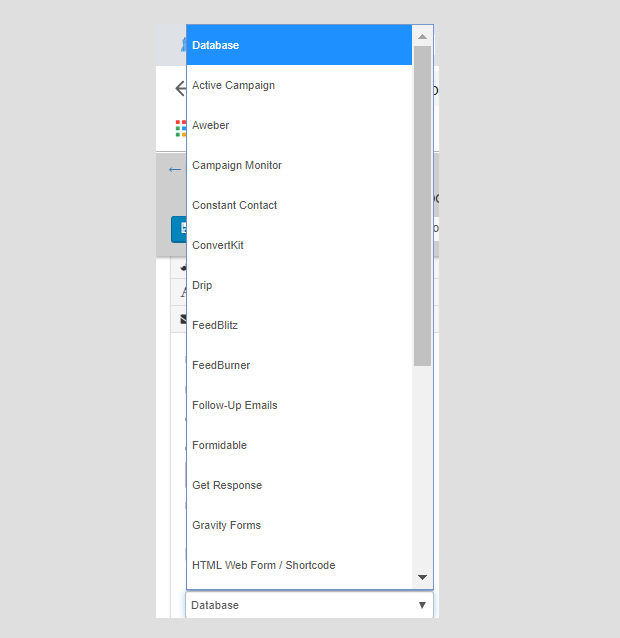
To make things easier for you SeedProd comes with more than 23 different email marketing service platform options for you.
You can select the platform where you want the subscriber’s information to be saved, just click on the drop-down arrow under the Save Subscriber’s to option and choose your platform.
The plugin also lets you enable the auto-responder option. For that, just click on the Configure optional Autoresponder tab. You’ll immediately be redirected to a new page where you can add your subject line and the message that you want to send.
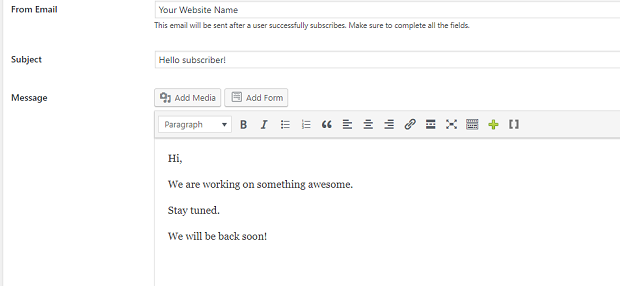
Don’t forget to hit save after every step. You can then click on the Go back to the customizer page option to continue working on your page builder.
Now let’s save the changes and move ahead.
Like the email form, you can also enable a Contact Form on your page. Just toggle the Enable contact form option and you are done. You can then customize it just like the email form.
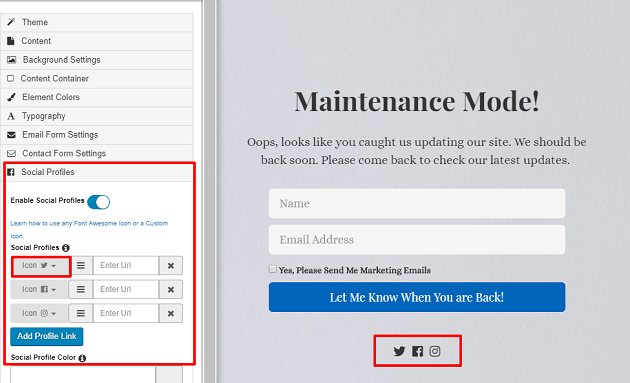
The next option is for adding social profiles. You can do that by selecting your favorite social icon from the drop-down arrow. Then add the link to your social account in the blank field next to it.
There are more than 20 social networking options that the plugin offers. You are free to select whichever platform you want.
You can also enable a countdown timer. This will keep up the excitement because people would surely want to know what changes after the countdown is over.
You can select the time zone, and end date and a format for your timer. It will automatically disappear on the set end date.
The last element is the progress bar. You can either set a manual percentage to show the progress of your work or set a start and an end date.
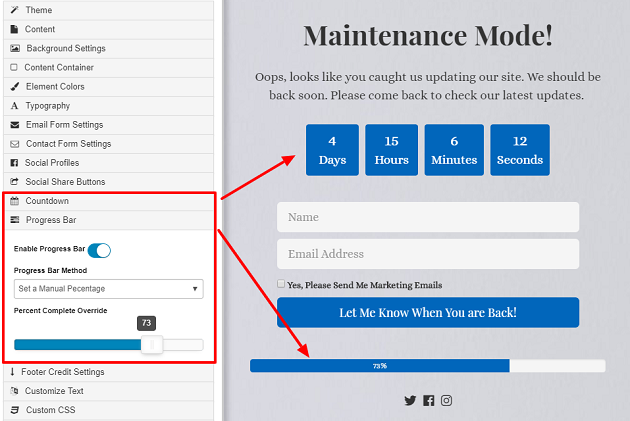
By choosing the date, you let the bar work on its own to show its progress as it approaches the end date.
Step 5: Customizing Element Colors and Typography
Finally, you can change the color of your elements under the Element color option that we previously skipped.
Use this option to take control of the color all the elements that you added to your page. You can change the color of your buttons, count down timer, form input background and progress bar.
To change the typography, you can use the option just next to it. You can take control of the fonts, sizes, and text color using this option.
If you want to change your texts, you have the option for that as well. It is just one option below the Progress Bar option in your page builder.
For inspiration, you might want to check out our roundup of coming soon page examples.
Now that your page is ready, its time to check the responsiveness before you hit the publish button.
Step 6: Checking Responsiveness
By checking the responsiveness of your page, you make sure that your page looks equally stunning across devices.
The option for checking responsiveness is available at the top left corner of your screen.
If you click on Desktop you will see how it appears on bigger screens. Similarly, by clicking on Mobile you can check its appearances on smaller screens like mobile phones.
Step 7: Publishing Your Page
The final step is to hit the publish button so that your page goes live. To do that you will have to click on the Back to Settings option on the top left corner of your screen.
You will now be on the main page where you enabled your Maintenance mode. On this page, click on the Save All Changes button. And that’s it. Your page is live now.
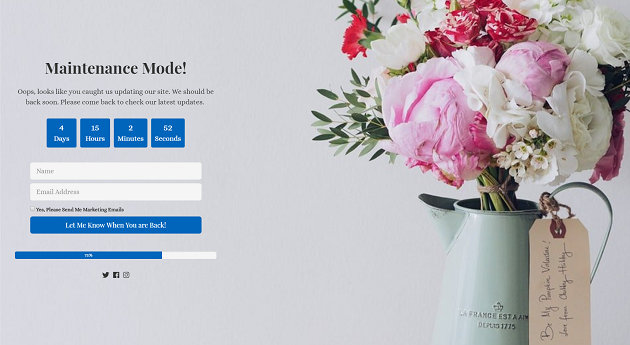
This is just an example. Using your creativity, you can come up with much better-looking maintenance mode pages for your WordPress site.
You will be able to access the backend normally just like you did before. But your visitors will see the maintenance page that you just created with SeedProd.
How to Turn off the Maintenance Mode
You can use this process to put your website on the maintenance mode, any time you want to take down your site for a quick fix.
When you are done with all the maintenance processes, you can disable the maintenance mode and get the normal view back.
You can turn off your maintenance mode by clicking on the Disable button instead of Enable Maintenance Mode option on your SeedProd dashboard.
So that’s it. Wasn’t that easy?
We hope this article was helpful to you! Looking for more useful plugins? Check out our list of the best WordPress plugins for any site.
The post How to Put Your WordPress Site into Maintenance Mode (The Easy Way) appeared first on SeedProd.