Do you want to edit your WordPress website’s footer area?
With a well-structured website footer, you can add helpful features like social media buttons and menu links to improve your user experience.
This article will show you how to edit the footer in WordPress using several easy methods.
What Is The Footer in WordPress?
The footer in WordPress is an area of your web design that shows at the bottom of every web page. You can typically see it after the content area.
This part of your website is usually so far down the page that many website owners overlook it. But there are many ways you can use your WordPress footer to make it more useful for your users, website SEO, and your business growth.
Why Should You Edit Your WordPress Footer?
When someone scrolls to the bottom of your WordPress site, it’s a sign that they need more information. It could be that they need your phone number or the link to your contact page. And if users can’t find that information quickly, they’re bound to be annoyed.
Your WordPress footer is the ideal place to answer your visitor’s needs and questions. For instance, you can use that area to include:
- Your company logo
- A brief about section linking to your about page
- Your contact details or contact page link
- Social media profile icons
- Website navigation menus
- Privacy and cookie policies
- Copyright text
- Your website sitemap
- Company disclaimers
Plus, typical WordPress templates come with the phrase “Powered By WordPress.” This can take away from your company’s branding and show unnecessary information to your customers.
By editing your footer in WordPress, you can remove or edit that phrase to better suit your business and users.
How to Edit The Footer in WordPress
Now that you know why your website’s footer is essential let’s look at how to edit the footer in WordPress.
1. Edit Your WordPress Footer Widgets
Many of the best WordPress themes nowadays have customizable widget areas in the WordPress footer. You can use these widget areas to add almost any type of content.
To add widgets to your WordPress footer, just navigate to Appearance » Widgets from your WordPress dashboard. Then drag any widget from the list on the left to your footer sidebars on the right.
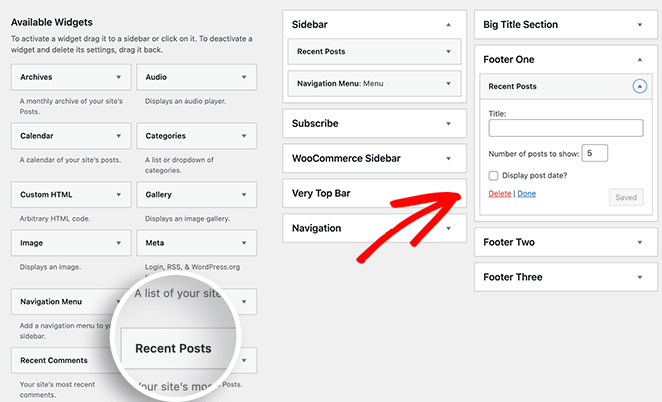
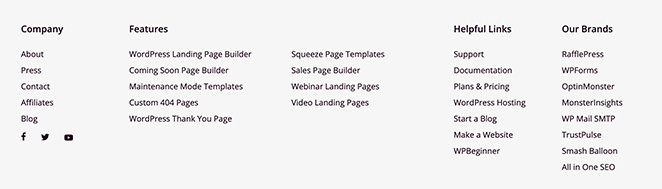
Many themes, like the one in the example above, have more than 1 footer area. Plus, each theme shows the footer differently.
That’s why it’s important to preview your website after making any changes to ensure your widget is where you want it.
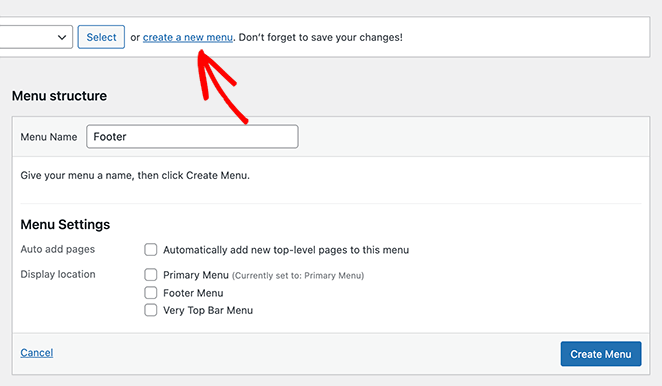
You can also use this method to add links to important pages in your WordPress footer. To do this, you first need to create a new menu in WordPress.
So navigate to Appearance » Menus from your WordPress dashboard and click the Create New Menu link.
Then enter a name for your menu and click the Create Menu button.
Now you can add links to your menu. Just select any posts, pages, or categories from the left panel to add them to your menu.
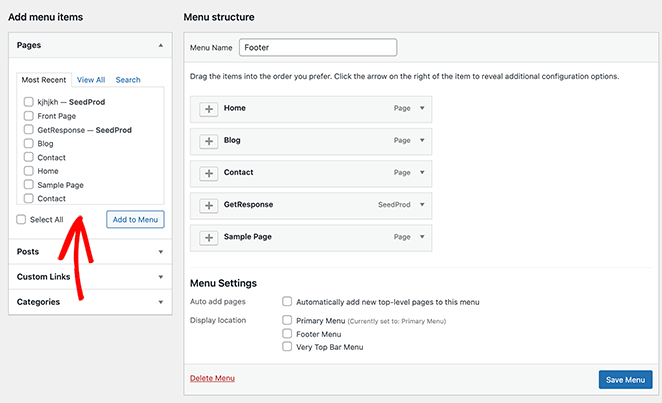
Then, go ahead and click the Save Menu button.
You’re now ready to add your new menu links to your WordPress footer area. Head back to your widgets page by navigating to Appearance » Widgets.
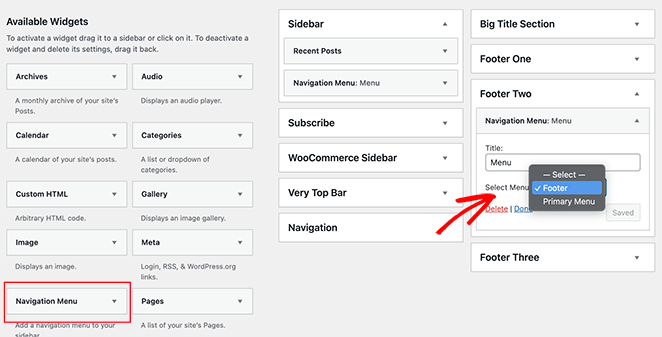
From there, drag the Navigation Menu widget into your footer area. And in the dropdown menu, choose the footer menu you just made and click Save.
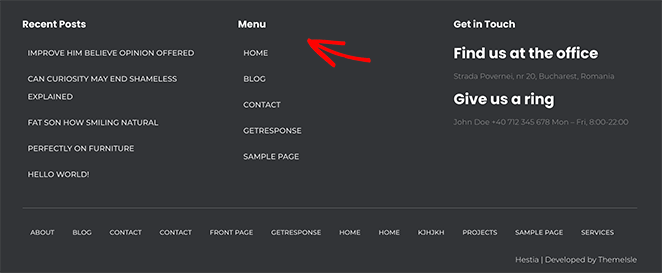
Now you can visit your website and see how your footer links look.
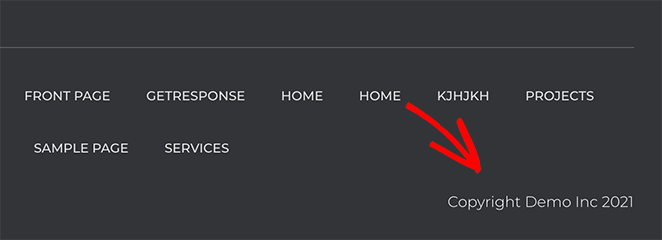
2. Remove the ‘Powered by WordPress’ Text from Your Footer
Often, when you first install WordPress, your site may show a ‘Powered by WordPress’ link in the footer at the bottom of each page. The problem is, this isn’t a footer widget, so it isn’t easy to figure out how to change it without help from WordPress experts.
Many WordPress themes alter this line of text to promote their theme like the one below.
They also often include the option to replace it with your own text in the WordPress theme customizer.
Just head to Appearance » Customize from your WordPress dashboard and scroll through the list until you find a heading called Footer.
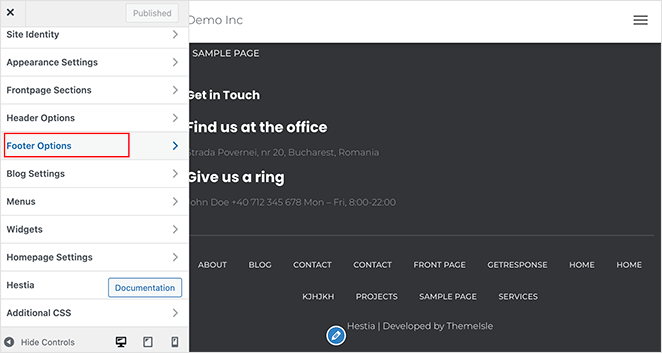
We’re using the Hestia WordPress theme for this example, and the footer section is called Footer Options. Clicking the heading gives you the option to change the content of the footer text to suit your website better.
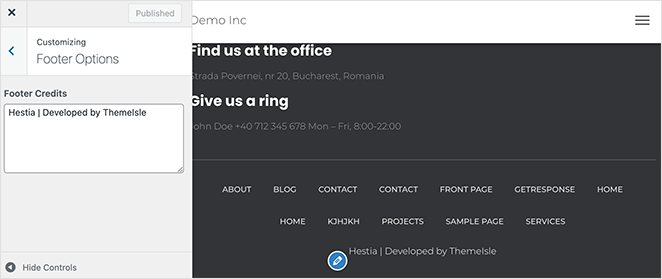
Once you’ve finished editing the content, click the Publish button at the top of the screen. You can then preview your website to see the changes.
For more help, check out this guide on removing the ‘Powered by WordPress’ footer link. It details how to edit the footer.php of your theme files manually.
3. Add Code to Your WordPress Footer with a Plugin
Sometimes you may need to edit your WordPress footer to add code snippets to your website. You can generally do this to connect an app or analytics program like Google Analytics.
For example, if you want to add a Pinterest button to your site, you’ll need to add Pinterest’s script to your WordPress footer.
The easiest way to add scripts to your WordPress footer is to install and activate the Insert Headers and Footers plugin. For help, follow this guide on how to install a WordPress plugin.
After activating the plugin, go to Settings » Insert Headers and Footers from your WordPress admin area. Then copy and paste your footer code into the ‘Scripts in Footer’ box.
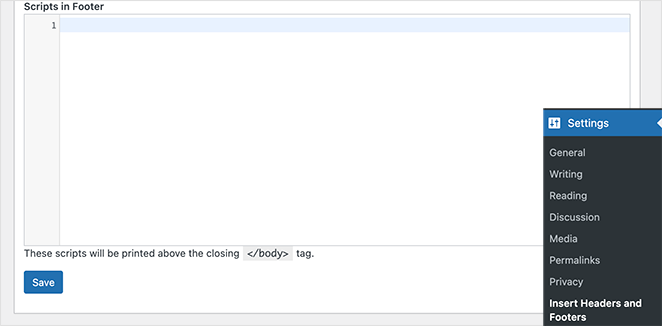
When you’re finished, click the Save button to store your settings. Your footer scripts should now be installed correctly in WordPress.
4. Edit the WordPress Footer with a Website Builder
The above methods for editing your WordPress website’s footer are excellent for making changes to your footer content. But what if you want to make your footer look completely different?
The best solution for redesigning your WordPress footer across your entire website is using a WordPress website builder plugin like Beaver Builder, Divi, or Elementor. They’re easy to use and don’t require any coding to make an excellent footer design.
Plus, they include features that allow you to add global headers and footers to your site visually. Let’s take a look at adding a global footer using the Divi Builder.

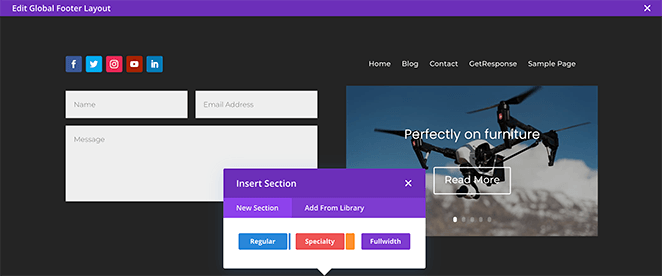
After installing and activating Divi, navigate to Divi » Theme Builder from your WordPress admin area. On this page, click the Add Global Footer option.
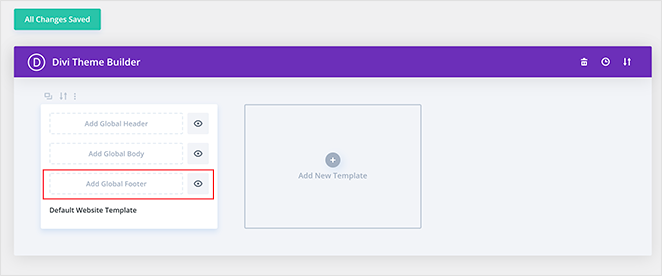
This shows the option to choose a premade layout from the theme library or build a layout from scratch. For this guide, we’ll click the Build Global Footer option to start from scratch.
From there, you can use Divi’s drag and drop builder to design your footer visually and see the changes in real-time.
For instance, in the example below, we’ve added a contact form, navigation menu, social media icons, and Divis’s Posts Slider widget. We also edited the footer background color and the total number of columns.
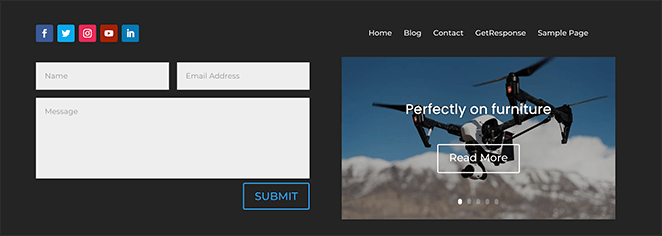
When you’re happy with your design, click the X icon in the top-right corner of your screen to exit the builder. Then, click Save Changes to store your new global footer.
Now when you view any page on your website, you’ll see your newly designed WordPress footer area.
So far, we’ve covered editing your WordPress footer using the theme customizer, adding code with a plugin, and using a website builder to change your global footer design. But what if you want to change the footer design for a single WordPress landing page?
We’ll cover that next.
5. Edit Your WordPress Landing Page Footers with SeedProd
Many website owners use landing pages to drive more leads and conversions for their business. Landing pages function differently from regular web pages in that they focus on a single goal rather than lots of different pieces of information all at once.
With this in mind, you may wish to edit your landing page footer, so all the information on your page adds up to your primary page goal. And one of the easiest ways to do that is with a landing page plugin like SeedProd.

SeedProd is the best drag-and-drop landing page builder for WordPress. Its user-friendly visual interface makes it easy for anyone to create high-converting landing pages without hiring a developer.
SeedProd comes with tons of responsive landing page templates you can customize in the visual editor. It also has several built-in page modes you can turn on and off with a single click, including:
You can customize your landing pages with any of SeedProd’s powerful page blocks. For instance, you can add an optin form to collect email addresses by dragging the block onto your page preview.

It also comes with various landing page sections, which makes it easy to add custom headers, calls-to-action, hero areas, FAQs, and footers.
This is the feature you’ll need to edit the footer in your WordPress landing page.
First, click here to get started with SeedProd and install and activate the plugin on your WordPress website. You can then follow this step-by-step guide to create a landing page in WordPress.
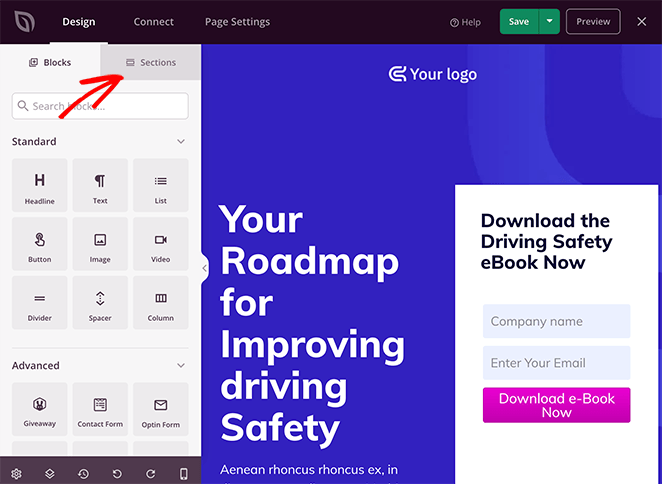
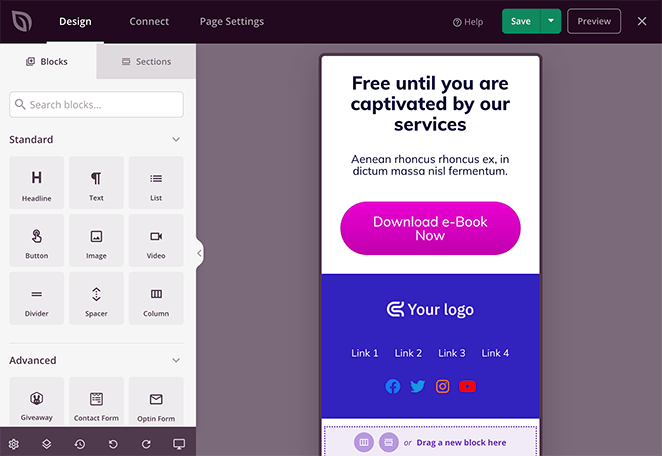
Once you’re inside SeedProd’s drag-and-drop page editor, click the Sections tab in the left-hand panel.
Now click the Footers heading to show SeedProd’s different footer layouts.

You can click the magnifying glass icon to preview the sections before adding them to your page.
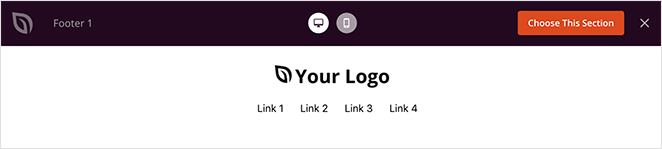
Then click the Choose This Section button to add it to your landing page design.
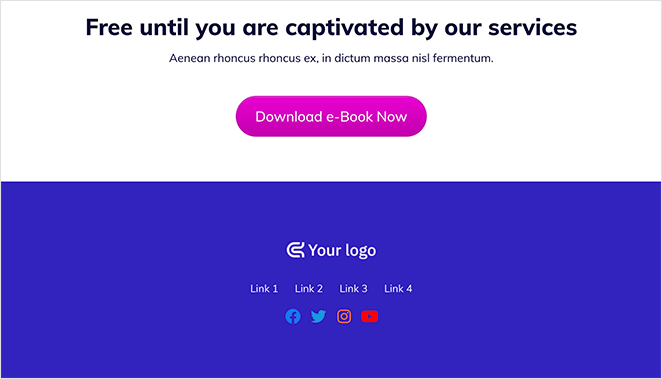
After adding the footer block section to your page, you can easily customize it in the visual editor. For instance, you change the section background color or add a background image.
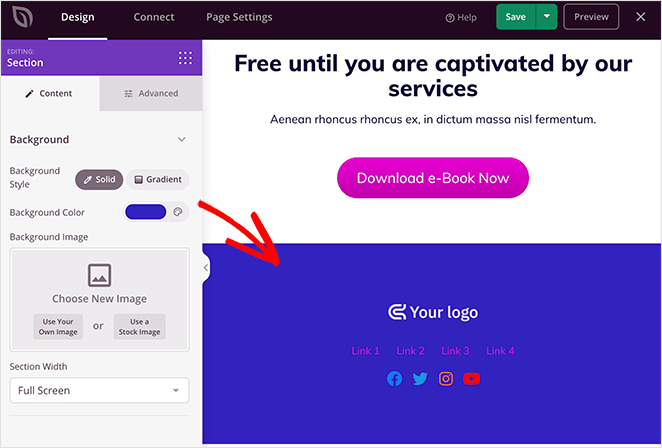
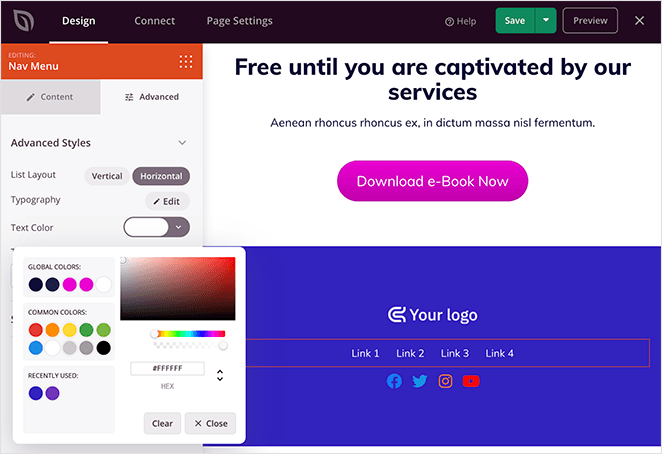
Or you can click the footer navigation elements to change the link colors or social media icons.
You can also check your footer to see how it looks on mobile screens like tablets and smartphones. To do that, click the mobile preview icon at the bottom of your screen.
This takes you to SeedProd’s mobile preview. If your landing page footer doesn’t look right, you can edit it right there in the mobile preview until it looks the way you want.
When you’re ready to make your changes live, click the down arrow next to the green Save button and click Publish. You can then click the See Live Page button to preview your new WordPress landing page footer.
And that’s it!
We hope this post has helped you learn how to edit the footer in WordPress. You might also like this round-up of the best WordPress plugins to grow your business.
And while you’re here, please follow us on Facebook and Twitter for more helpful tips and tutorials.
The post How to Edit The Footer in WordPress (5 Methods) appeared first on SeedProd.