Do you want to learn how to create a coming soon page in WordPress? Getting the word out about a new website is pretty hard. So letting visitors know one is coming soon can raise awareness and drive traffic to your site before it’s even launched!
But how do you build a page like this? In this article, we’ll share some easy steps for building a page to let visitors know your new site will be live soon.
Table of Contents
- Choose a coming soon page plugin
- Install and activate SeedProd
- Create a new WordPress coming soon page
- Add your page content
- Change your background photo
- Edit your page colors and fonts
- Connect your email marketing service
- Add a contact form
- Include social profile buttons
- Add a Countdown Timer
- Enhance your pre-launch page
- Activate your coming soon page
But first, let’s get to grips with what coming soon mode is.
What is a Coming Soon Page?
A coming soon page (also known as WordPress coming soon mode) is where you hide your website behind a single landing page so visitors can see only that page. This means they can’t access any other area of your site which might still be under construction.
Let’s face it, you don’t want potential customers seeing a half-finished website. So locking it behind a coming soon page keeps the messy stuff hidden away. That way you can control exactly what people see, and when they see it.
You can use the coming soon mode for a number of situations including:
- Giving your site a place where visitors can get information during its pre-launch phase.
- To grow your email list before launching your website with a signup form.
- Hiding a new design behind an under-construction page, while giving clients a password to access a live preview of what you’re working on.
Needless to say, there are tons of ways you make a launching soon page work for you and your business. But how do you create a coming soon page in WordPress?
Let’s find out.
Step 1: Choose a Coming Soon Page WordPress Plugin
First, you need to pick a WordPress plugin to build and activate the coming soon mode. For this tutorial, we’ll be using SeedProd the best coming soon and maintenance mode plugin for WordPress.
What is SeedProd?
SeedProd is a light-weight WordPress plugin that lets you create stunning coming soon pages, grow your email list, and limit access to your site while it’s under construction.
Alongside this, it’s packed with a range of options to promote your new site and integrate easily with third-party services.
Even better, SeedProd has both a free and paid version, which makes it accessible to a range of budgets.
The free version of SeedProd gives you access to:
- Basic design controls
- Mobile ready and responsive design
- Fullscreen backgrounds
- Webform integration from 3rd-party providers
- Visible to non logged in users
- Work on your site behind the scenes
- Compatibility with all WordPress themes
- Google Analytics support
- Both a coming soon and maintenance mode
- Search engine optimized markup
On the other hand, the pro version provides all the above as well as the following:
- Advanced design controls
- Access to over 500,000 free stock images
- 750+ Google Fonts and Typekit integration
- Slideshows and video backgrounds
- 50+ pre-made themes
- Custom social icons support
- Integration with major email marketing services like ActiveCampaign, Aweber, MailChimp, and more
- Fraud detection and Recaptcha support
And a whole lot more. For a full table comparing both versions scroll to the bottom of this SeedProd Comparison page.
Now you know what SeedProd is, it’s worth mentioning that for this tutorial we’ll be using the Pro Version of SeedProd. This is so you get a better overview of how each feature works.
Step 2: Install and Activate SeedProd
The next step in learning how to create a coming soon page in WordPress is to install and activate SeedProd on your website. So go ahead and log in to your SeedProd dashboard.
Then you’ll see a screen similar to the one below. From here, click the View License Key, Details, and Downloads link to go to your downloads page.
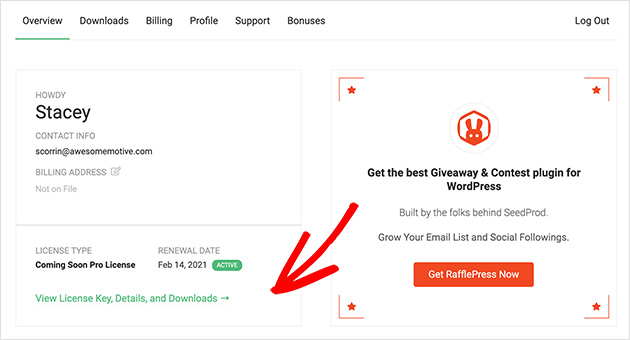
Then click the Download Coming Soon Pro button to launch the download of your plugin.

Next, you need to log in to your WordPress website dashboard and upload the SeedProd plugin. If you’re unfamiliar with how to do this, you can learn how to install and activate WordPress plugins here.
Then you can move on to the next step.
Step 3: Create a New WordPress Coming Soon Page
This step starts the process of adding a new coming soon page to your site. To do this head to Settings » Coming Soon Pro where you’ll see a screen like the one below.
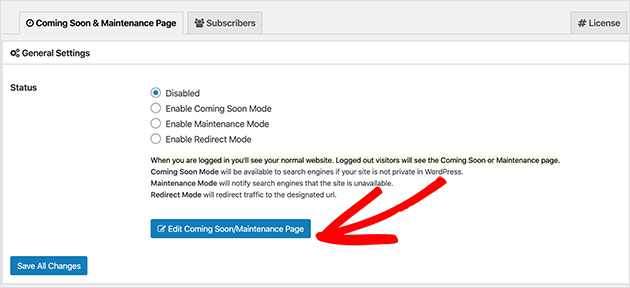
Now click the Edit Coming Soon/Maintenance Page button.
You’ll then be asked to choose a theme for your page.
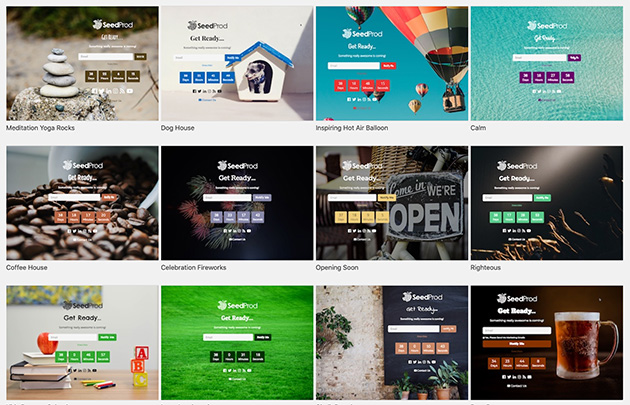
As we mentioned earlier, the pro version of SeedProd comes with over 50 professionally designed themes to make setting up your page easier.
So click any design that works for you, or choose the blank template to start from scratch. Then you’ll automatically head to the SeedProd page editor to customize your design.
Step 4: Add Your Page Content
The SeedProd page editor lets you easily add, remove, and customize the different elements of your pre-launch page.
Down the left-hand side, you’ll see a list of all available options while on the right-hand side is a live preview of your page.
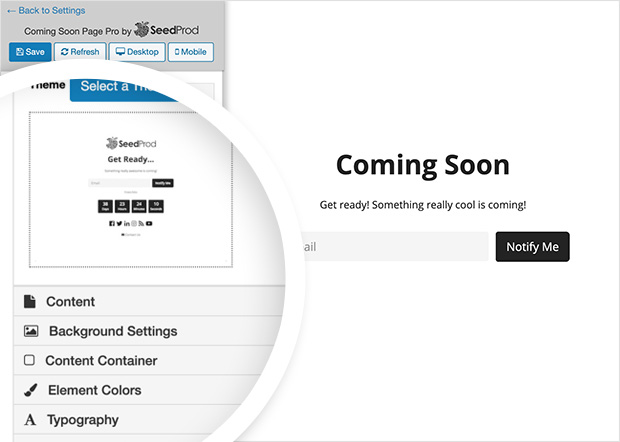
First of all, you’ll want to change the page content.
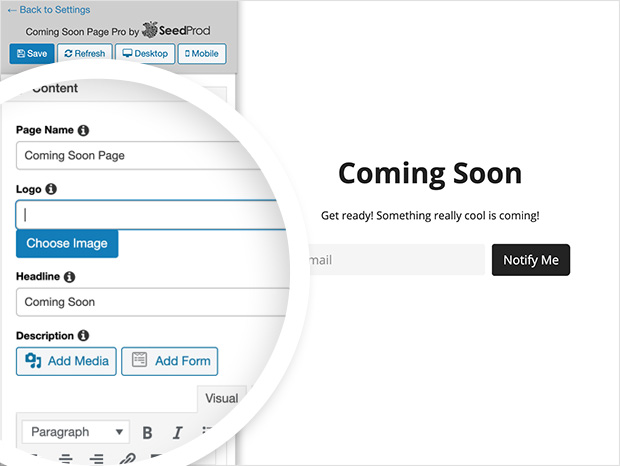
To do this, click the Content tab which reveals the following options:
- Page Name – Enter a name visible only to you to help you distinguish it.
- Logo – Upload your own logo image.
- Headline – Pick a snappy headline for your page.
- Description – Tell visitors what the page is about. You can also add WordPress shortcodes and video embeds in this area to vary your content. Do this by enabling 3rd party plugins in the Advanced tab.
You can also rearrange the different content types in this section by dragging and dropping them up and down the list.
Step 5: Change Your Background Photo
Next up is customizing the background of your landing page. So click the Background Settings tab to expand the options.
Here you can change the background color, upload a new background image, or choose from a range of free stock photos for the background.
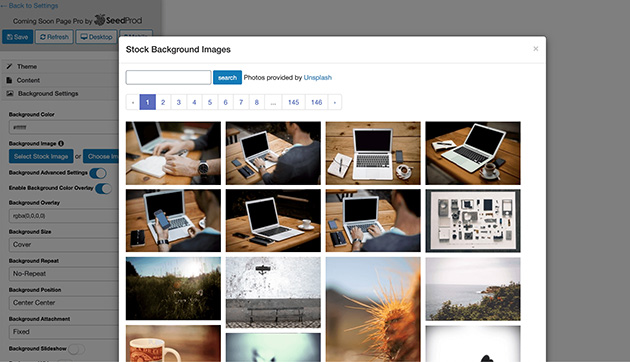
And if you click the Background Advanced Settings toggle you an configure the following features:
- Background Overlay – Set an overlay color for the background to increase readability.
- Background Size – Choose from Cover, Auto, and Contain.
- Background Repeat – Repeat the background image.
- Background Attachment – Set the attachment to Fixed or Scroll.
It’s also possible to add your background as a slideshow or video. All you have to do is toggle either option in the settings.
For the slideshow, you can choose images from your WordPress Media Library, as well as setting the slide speed, and randomizing slides.
On the other hand, to add a video background, paste in the video URL and choose if you want to play video audio and set the video on a loop.
Step 6: Edit Your Page Colors and Fonts
Customizing the fonts, elements, and colors in SeedProd is pretty simple too. Click the Element Colors tab to change the colors for your buttons, countdown timer, and progress bar.
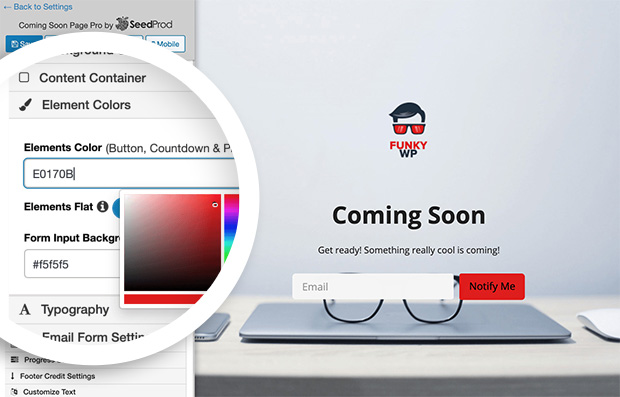
Alongside this, you select either a flat button design or a more rounded gradient design, as well as changing the color for form input backgrounds.
Under the Typography tab, you can choose from hundreds of Google fonts for your coming soon page. And the color picker lets you select custom colors for paragraph and headline text.
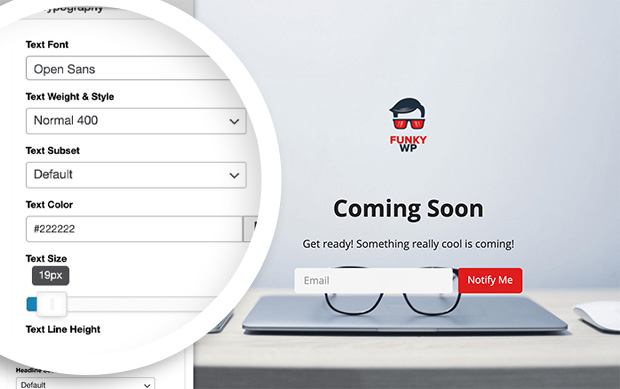
For even more font options, enter your Typekit ID into the field provided and you can load additional fonts from there.
Step 7: Connect Your Email Marketing Service
All successful coming soon pages need some way for visitors to learn when your site launches. Connecting your email marketing service and letting visitors enter their email address for notifications is an effective way to achieve this.
To add a signup form in SeedProd, click the Email Form Settings tab and toggle on Enable Form.
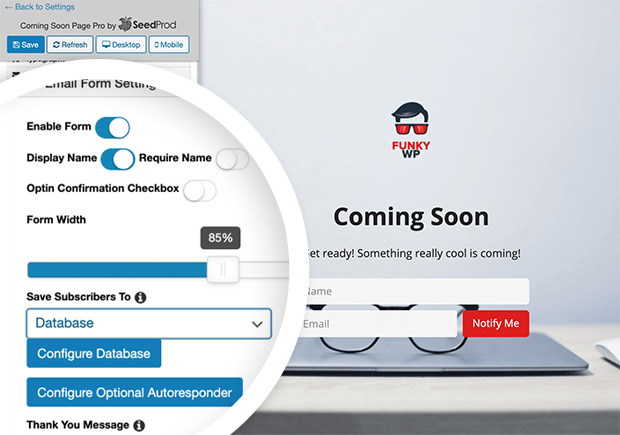
From here you can also choose which form fields to display and control the form width.
Then it’s time to connect your email service. Under the Save Subscribers To heading, choose your preferred service from the drop-down list and click the Configure [Service] button.
You’ll then head to a different page where you can enter your email marketing service API keys, and select the list you’d like to save new contacts to.
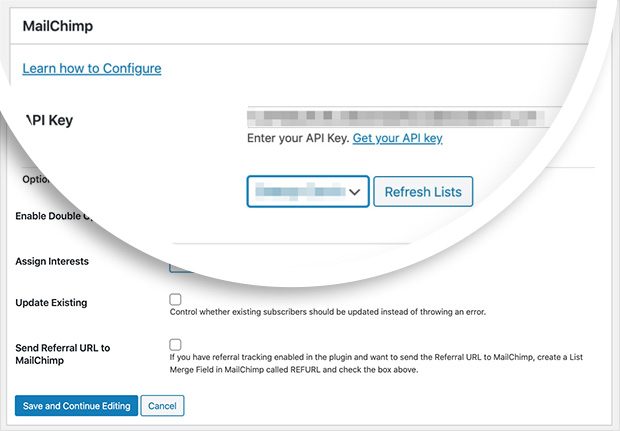
When that’s set up, click the Save and Continue Editing button to return to the editor.
Step 8: Add a Contact Form
Another way to help site visitors get in touch from your coming soon landing page is to include add a contact form to WordPress.
Because SeedProd integrates with 3rd-party form builders, you can easily connect forms made with WPForms for example, to your coming soon page.
To do this click the Contact Form Settings heading and toggle Enable Contact Form.
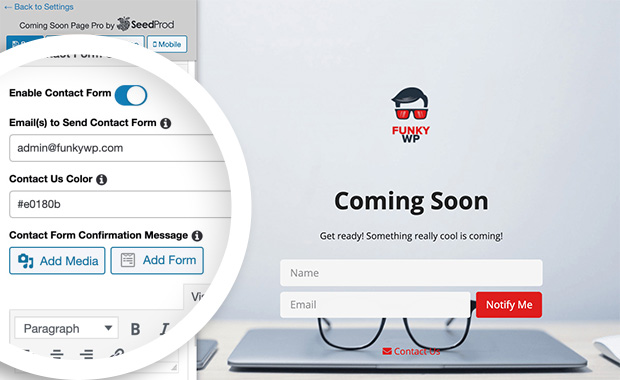
Then you can configure the following settings:
- Email(s) – The email address you’d like to send form submissions to.
- Contact Us Color – The color of the contact us icon and text.
- Form Confirmation Message – Here you can insert a thank you message.
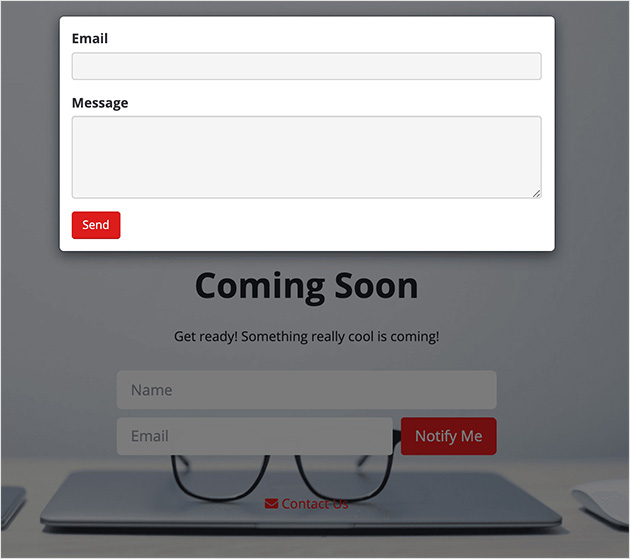
To add a form from a 3rd party, click the Add Form button. Then choose your form from the drop-down list, select which fields to include, and click Insert Form.

The Contact Us button will now display on your page preview. And when you click it, a popup contact form appears for visitors to fill in.
Step 9: Include Social Profile Buttons
To help even more people stay in touch with your site development, it’s worth including social profile buttons on your page. Whenever a visitor clicks one of these, they’re taken to the relevant social platform where they can see your updates.
Adding your social profiles is as simple as clicking the Social Profiles heading and toggling it to enabled.
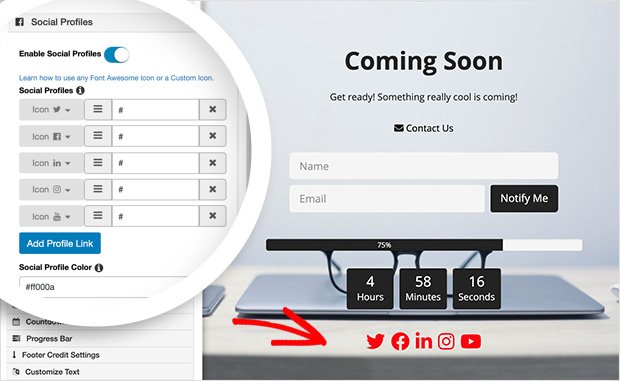
Then you can select icons to represent each social media network and paste your profile link.
Changing the icon color is pretty easy too. Just paste the hex value of your custom color or choose one from the color picker. You can even change the icon size by choosing a value from the dropdown list too.
Step 10: Add a Countdown Timer
If you’d like to add a sense of urgency to your coming soon pages, navigate to the Countdown heading and click Enable Countdown.
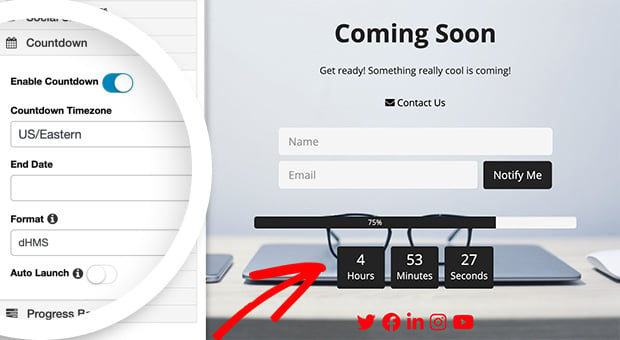
Not only does this setting encourage people to learn more about your site before it launches. But it also gives people a time-frame for when they can expect your site to be accessible.
In this option, you can set your timezone, the timer end date, and even launch your site automatically when the timer ends.
Step 11: Enhance Your Pre Launch Page
So far we’ve covered the essential features most users will use when building their launch pages. But we understand that many businesses need to enhance their pages further.
With this in mind, here’s a brief run-down of what else you can enhance your SeedProd coming soon page with.
Social Share Buttons
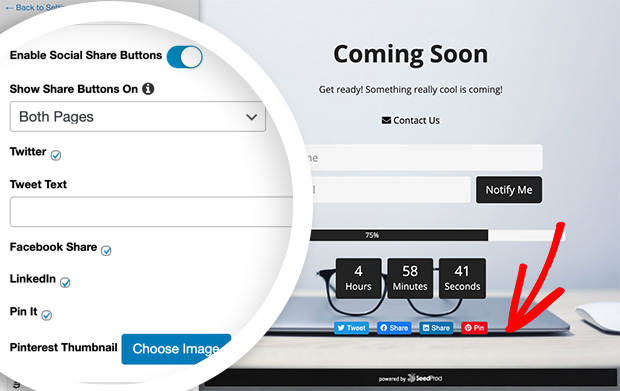
Under the Social Share Buttons heading, you can add sharing options for:
And choose to display them on either the thank you page, front page, or both.
Progress Bar
The Progress Bar feature displays a simple progress bar showing how close your site is to launch.

You can set a start and end date, or set a manual percentage to override it.
Footer Credit Settings
Footer Credits are helpful for sites that need to include a disclaimer or disclosure on all of their webpages.

Enabling this setting, lets you include an image, text or affiliate link, as well as controlling the position of the credit.
Advanced Scripts
Under this setting is where you can enable 3rd-party plugins, Recaptcha, RetinaJS, and more.
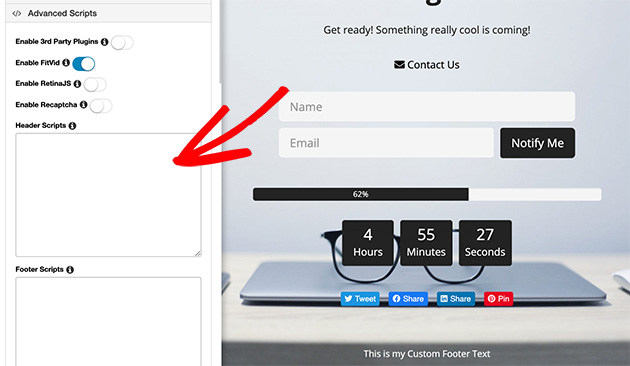
And it’s also where header and footer code snippets for Google Analytics etc.
When you’ve configured all your settings in the SeedProd page editor, click the Save button.
But how do you activate a coming soon page in WordPress? Read on to find out.
Step 12: Activate Your Coming Soon Page in WordPress
When you’ve saved your changes click the Back to Settings link in the top-left side of your screen. This takes you back to the SeedProd settings page where you can activate your page.

To activate your coming soon page in WordPress, click Enable Coming Soon Mode. Then click the Save All Changes button.
Now coming soon mode is enabled across your whole website. So visitors will see the page you just create.

And that’s it!
Congratulations! You’ve just learned how to create a coming soon page in WordPress. Pretty simple right?
Now all you need to do is get busy designing your site. But if you want to learn how to market your website before launch, check out this detailed guide for tips.
And while you’re here, why not give us a like on Facebook and follow us on Twitter to keep up with our latest WordPress guides.
The post How to Create a Coming Soon Page in WordPress (the Easy Way) appeared first on SeedProd.