Want to set up a professional email address for your business for free?
Your email address is one of the most powerful elements of your business. It has much more potential than being just a medium of communication.
Apart from letting you keep in touch with your clients it also helps you –
- build relationships with your clients and potential customers
- notify your customers about updates
- send promotional content to potential customers
- raise brand awareness
and do much more.
So it’s important to ensure that your clients read your emails and don’t just randomly mark them as spam.
Why Need a Professional Business Email Address
A professional email (like yourname@example.com) can be a great way to make that happen.
With a professional email address, your communication with your client not only looks authentic and professional, but it also reduces the risk of your emails being marked as spam.
In today’s article, we’ll tell you how to come up with a professional business email address for free without wasting a lot of time.
What Do You Need to Create a Professional Email Address?
Before you can create a business email address, you’ll need a domain (such as www.example.com) and web hosting. If you already have a business website, you may be able to set up an email address with your current web hosting company.
However, many web hosting companies charge extra for professional business emails. These extra costs can add up quickly!
That’s why we recommend going with Bluehost. They include a free domain name and free professional email address with their hosting, which can save you a ton of money.
Ready to set up your business email address? Let’s get started.
Step 1: Set Up Your Business Domain Name
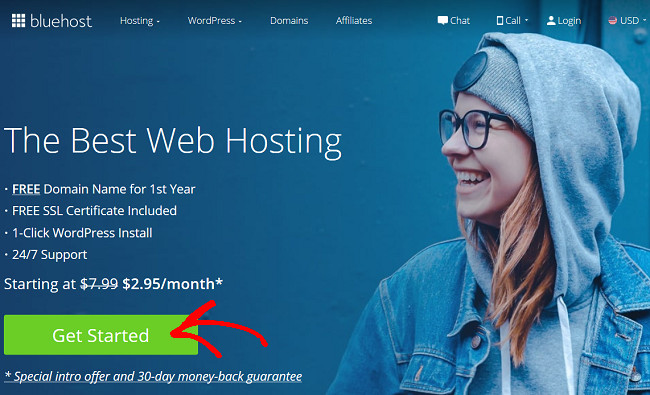
The first thing you need to do is to go to the Bluehost website and click on the Get Started button.
You’ll now be redirected to another window where you’ll get to choose a hosting plan.
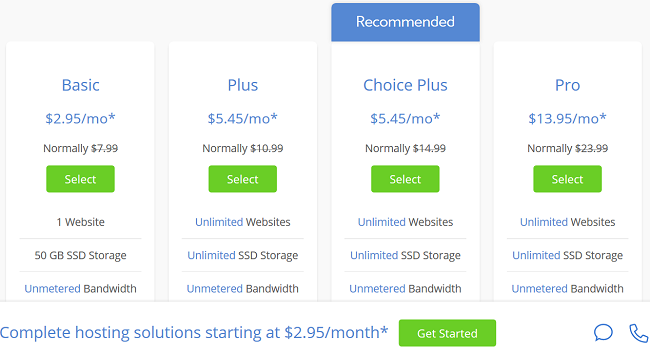
The basic plan lets you create 1 domain name and 5 email accounts for free. On the other hand, you can create unlimited number of business emails if you opt for the other plans.
So check out all the plans properly and select the one that best meets your requirements. Once done click on the Select button under your preferred plan. This will take you to the next page where you can set up your domain.
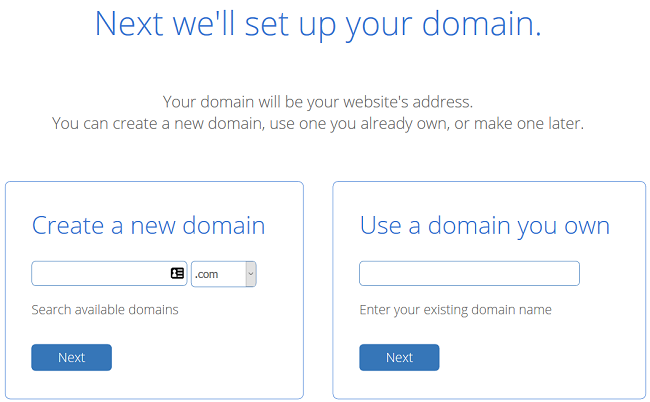
Here you’ll have two options. You can either create a new domain name or use your own if you already have one.
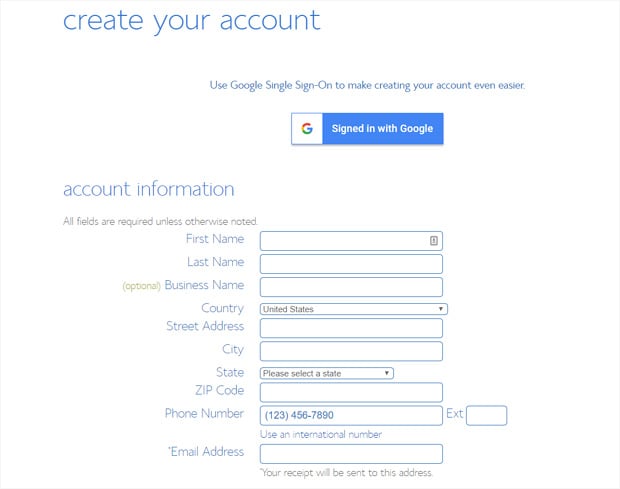
Once you enter your domain, Bluehost will check and confirm if your domain is available. If it’s available, you can proceed and make your payment. But before that you need to add in your account information.
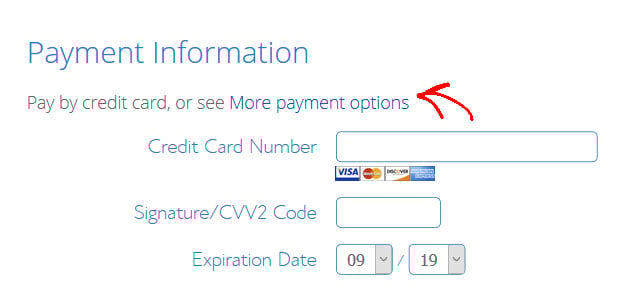
Under the payment option, it generally displays the option to pay via your credit or debit card.
If you want to make your payment via PayPal click on the More Payment options link. Complete your payment by clicking on the checkbox to accept the terms and conditions followed by the Submit button.
Once your payment is made, Bluehost will send you the hosting login details along with your cPanel login credentials.
Step 2: Create Your Professional Business Email Address
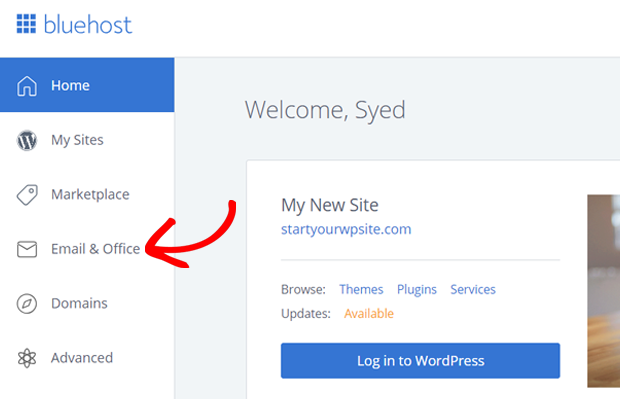
Now that your domain name is registered, its time to create your professional email address. For that, login to your Bluehost account with the credentials that you just received in your inbox.
Now click on the Email & Office option on the left side of your screen.
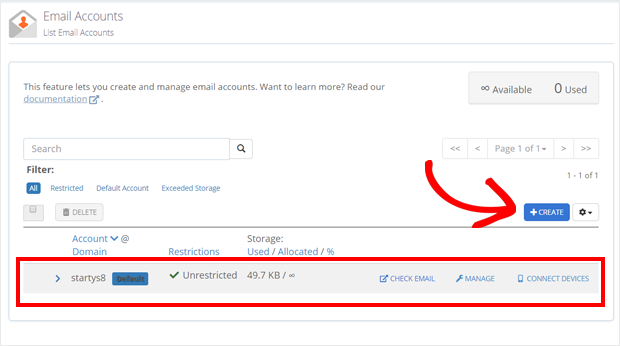
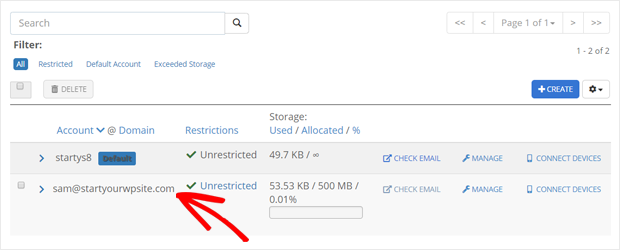
This will take you to the email account page where you can create and manage all your business email addresses. Here you’ll have an email address created for you by default.
To create a new one, just click on the Create button.
You can then start entering your username and password to create your business email address.
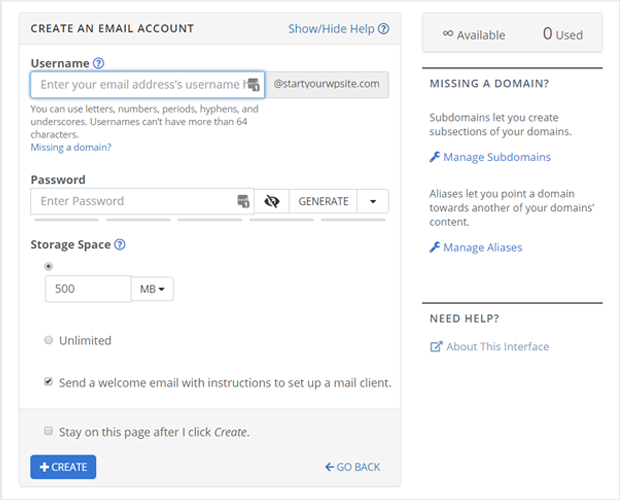
You can also select your storage space here. Once all the information is added, click on the Create button to complete the process.
And that’s it. Your account has been successfully created. You’ll now see it appear on the Email Accounts page.
Depending on your hosting plan you can create more email addresses for your employees by using the same process. If you have opted for the basic plan you can create upto 5 email addresses and for the plus and the choice plus plans you can create an unlimited number of emails.
Step 3: Access Your Email Account
Your email address is now ready to be used.
But first you have to connect your email address to a webmail application or a desktop mail client.
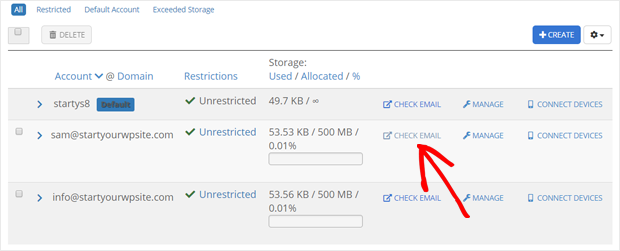
For that, you need to start by logging in to your Bluehost dashboard just like you did in the previous step. Now click on Email & Office » Manage.
You’ll now see the email address that was just created. Now click on the Check Email link just next to your email address.
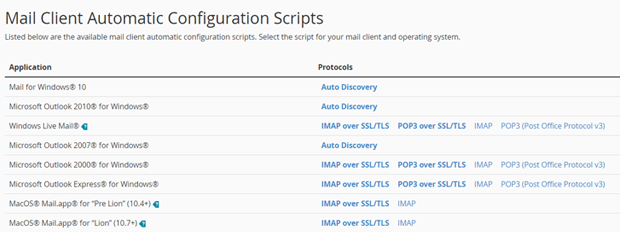
This will take you to a new window where you can see the default webmail application options. You can choose one form the given options.

Let’s select horde for now. You don’t need to make any other changes here. You email account interface will now look something like this –

These webmail applications generally needs no separate setup. But the only problem with them is that, you’ll have to login to your Bluehost account every time you want to access it.
This might make you want to discontinue using it in the long run. But don’t worry. You can use a desktop email application as an alternative. By doing that you can access your email account directly without having to log in to your Bluehost account.
Besides, you don’t have to do anything extra. Bluehost will auto-detect your application and offer you the necessary settings. You’ll find these options right below your webmail applications.
If you want to use Mail for Windows 10 for example, you’ll first have to set up a new email account in Windows 10 using the email address that you just created. After that, you can start using your account normally like any other email account without logging in to your Bluehost account.
If you use Gmail, you can also set up email forwarding to your Gmail account so that you can manage your personal and professional emails in the same place.
Step 4: Manage Your Business Email Addresses
With Bluehost, it’s easy to manage your business email addresses. You can do that by clicking on Email & Office » Manage link in your Bluehost account. This will open up the following window on your screen. Click on the Manage link as shown in the screenshot.

This will display all the options that you can use to manage your business email account. For example, you can use it to manage email filters, send automated responses, change your password, and update your account.
You can also free up your email storage and allocate storage space to your email account under this option.
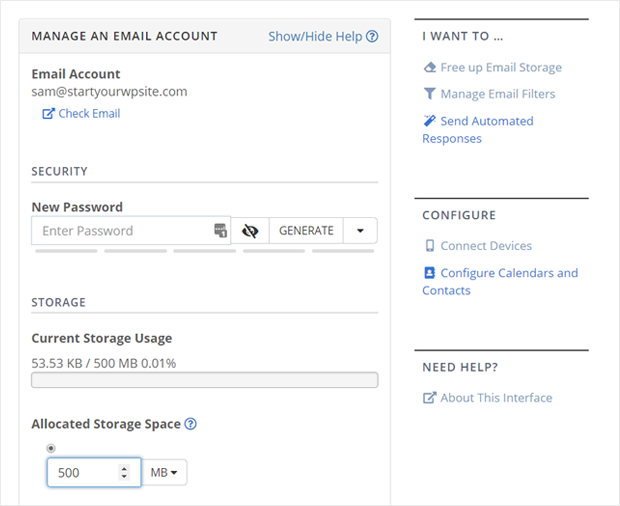
If you want to delete the email account, you’ll find the delete option at the bottom of this page.
So that’s it! Your free professional business email address is now all set to send messages to your clients. If you want more advanced features, you can use G Suite – the premium email services of Google.
The pricing plans for G Suite starts from $2.92 per user per month. You can start with its 14-day free trial before you opt for the premium plan. If you’re satisfied with its features, you can upgrade your plan at any time.
We hope this article was helpful to you. Since you’re setting up an email account for your business, you might also want to know how to get started with email marketing.
If you liked reading this article, do follow us on Facebook and Twitter for more of such posts.
The post How to Set Up a Professional Business Email Address for Free appeared first on SeedProd.